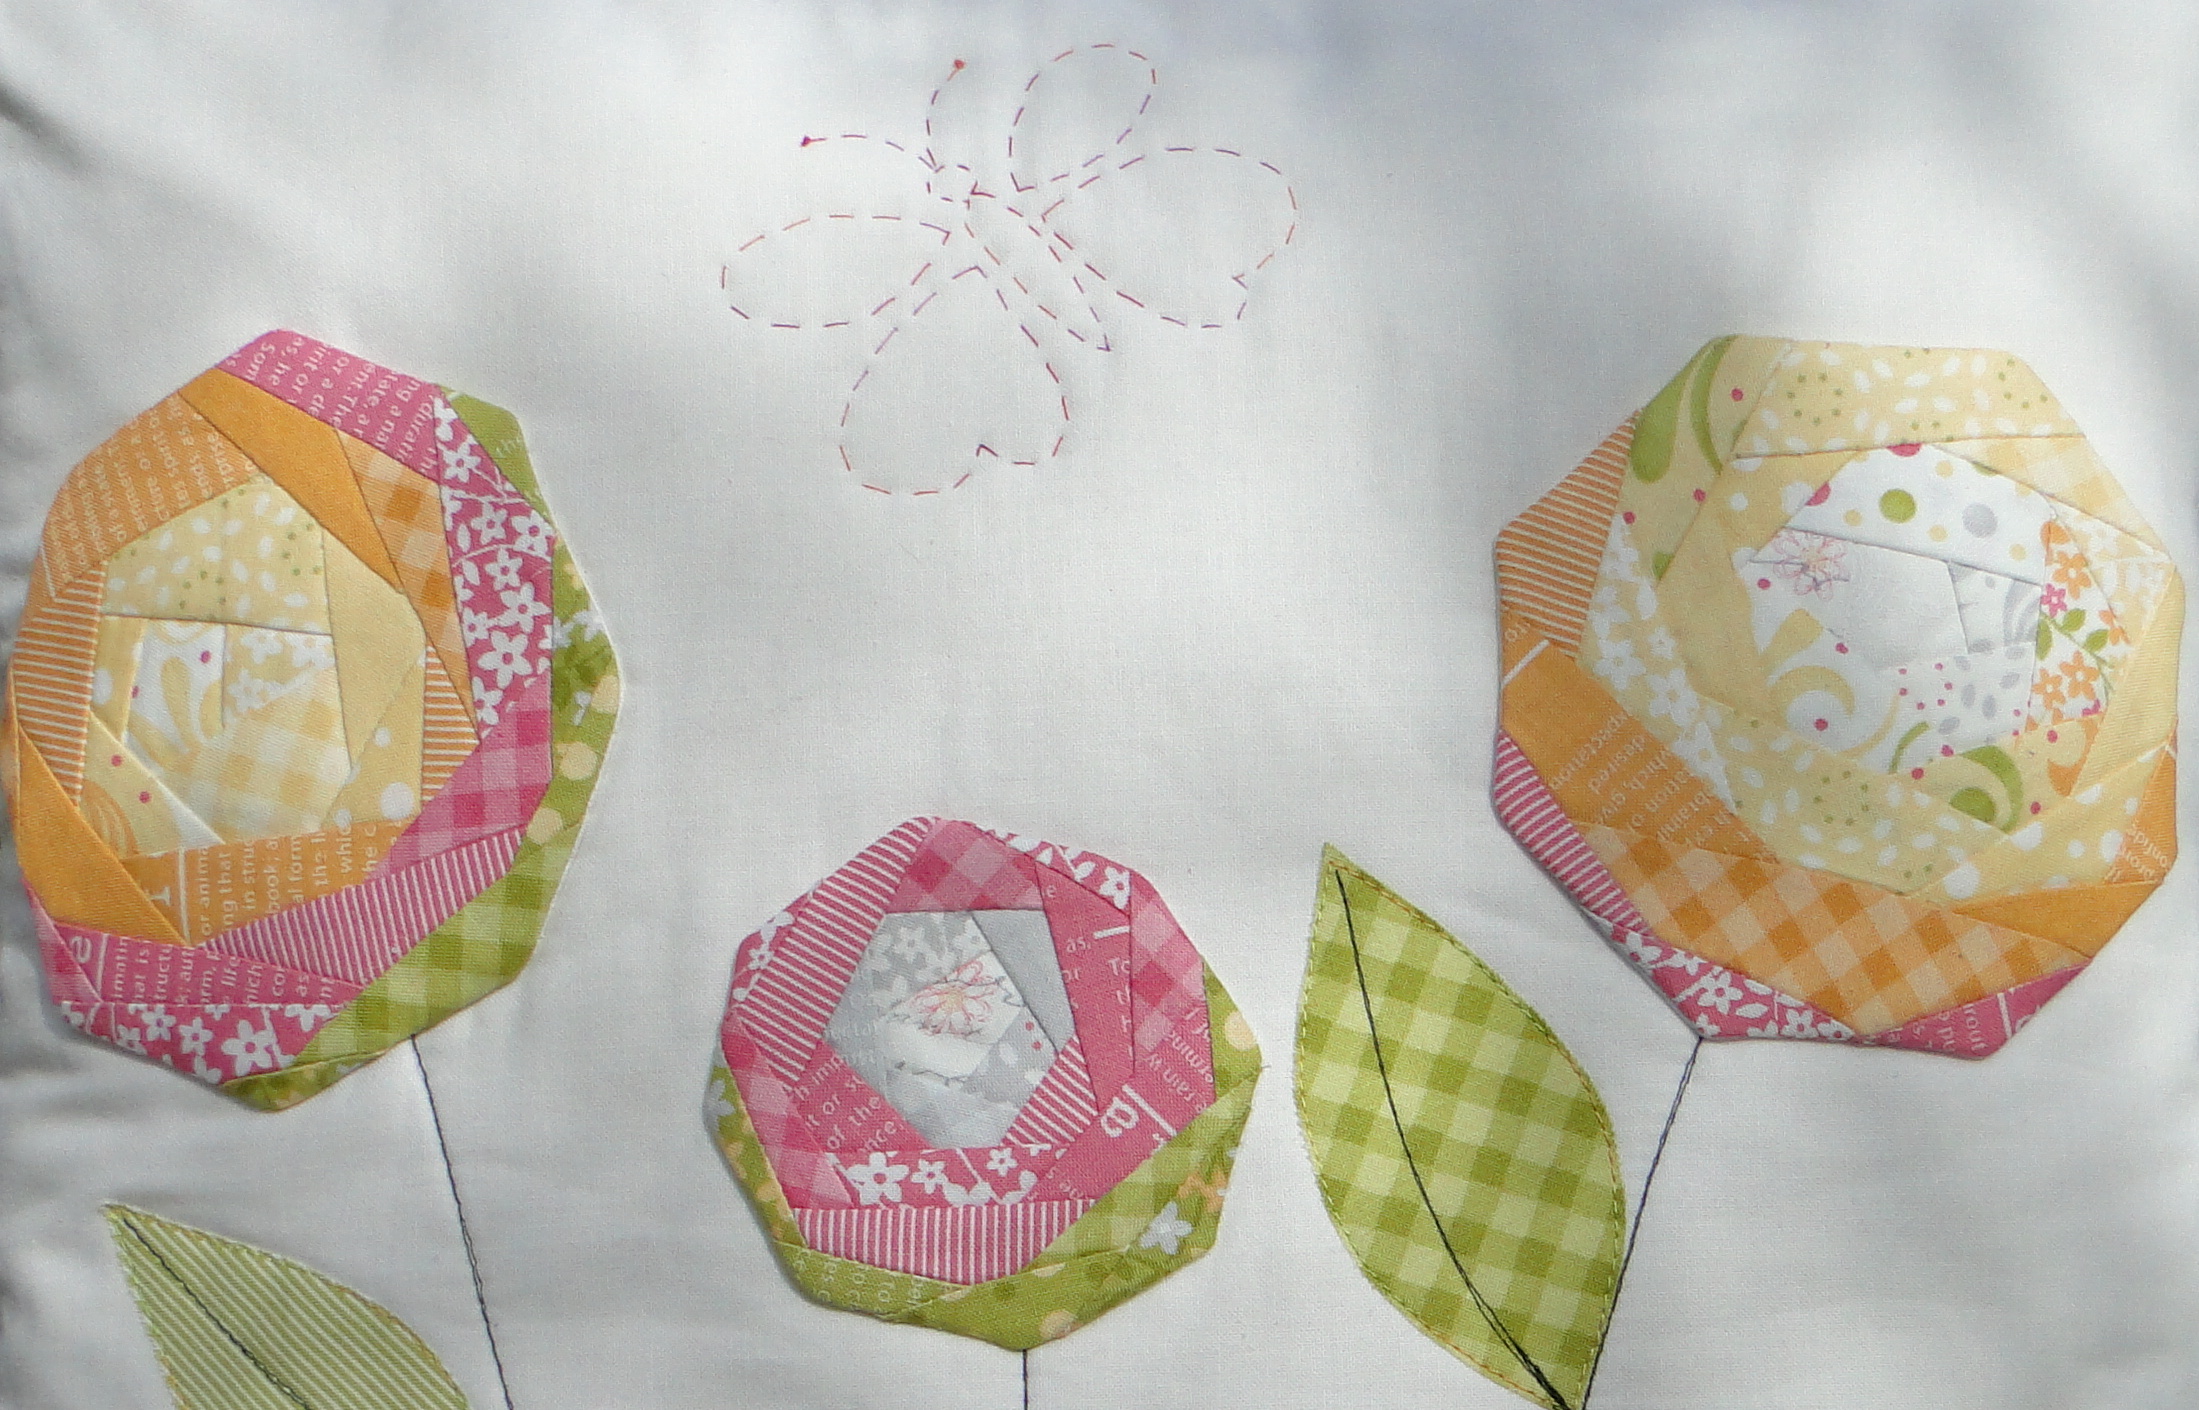
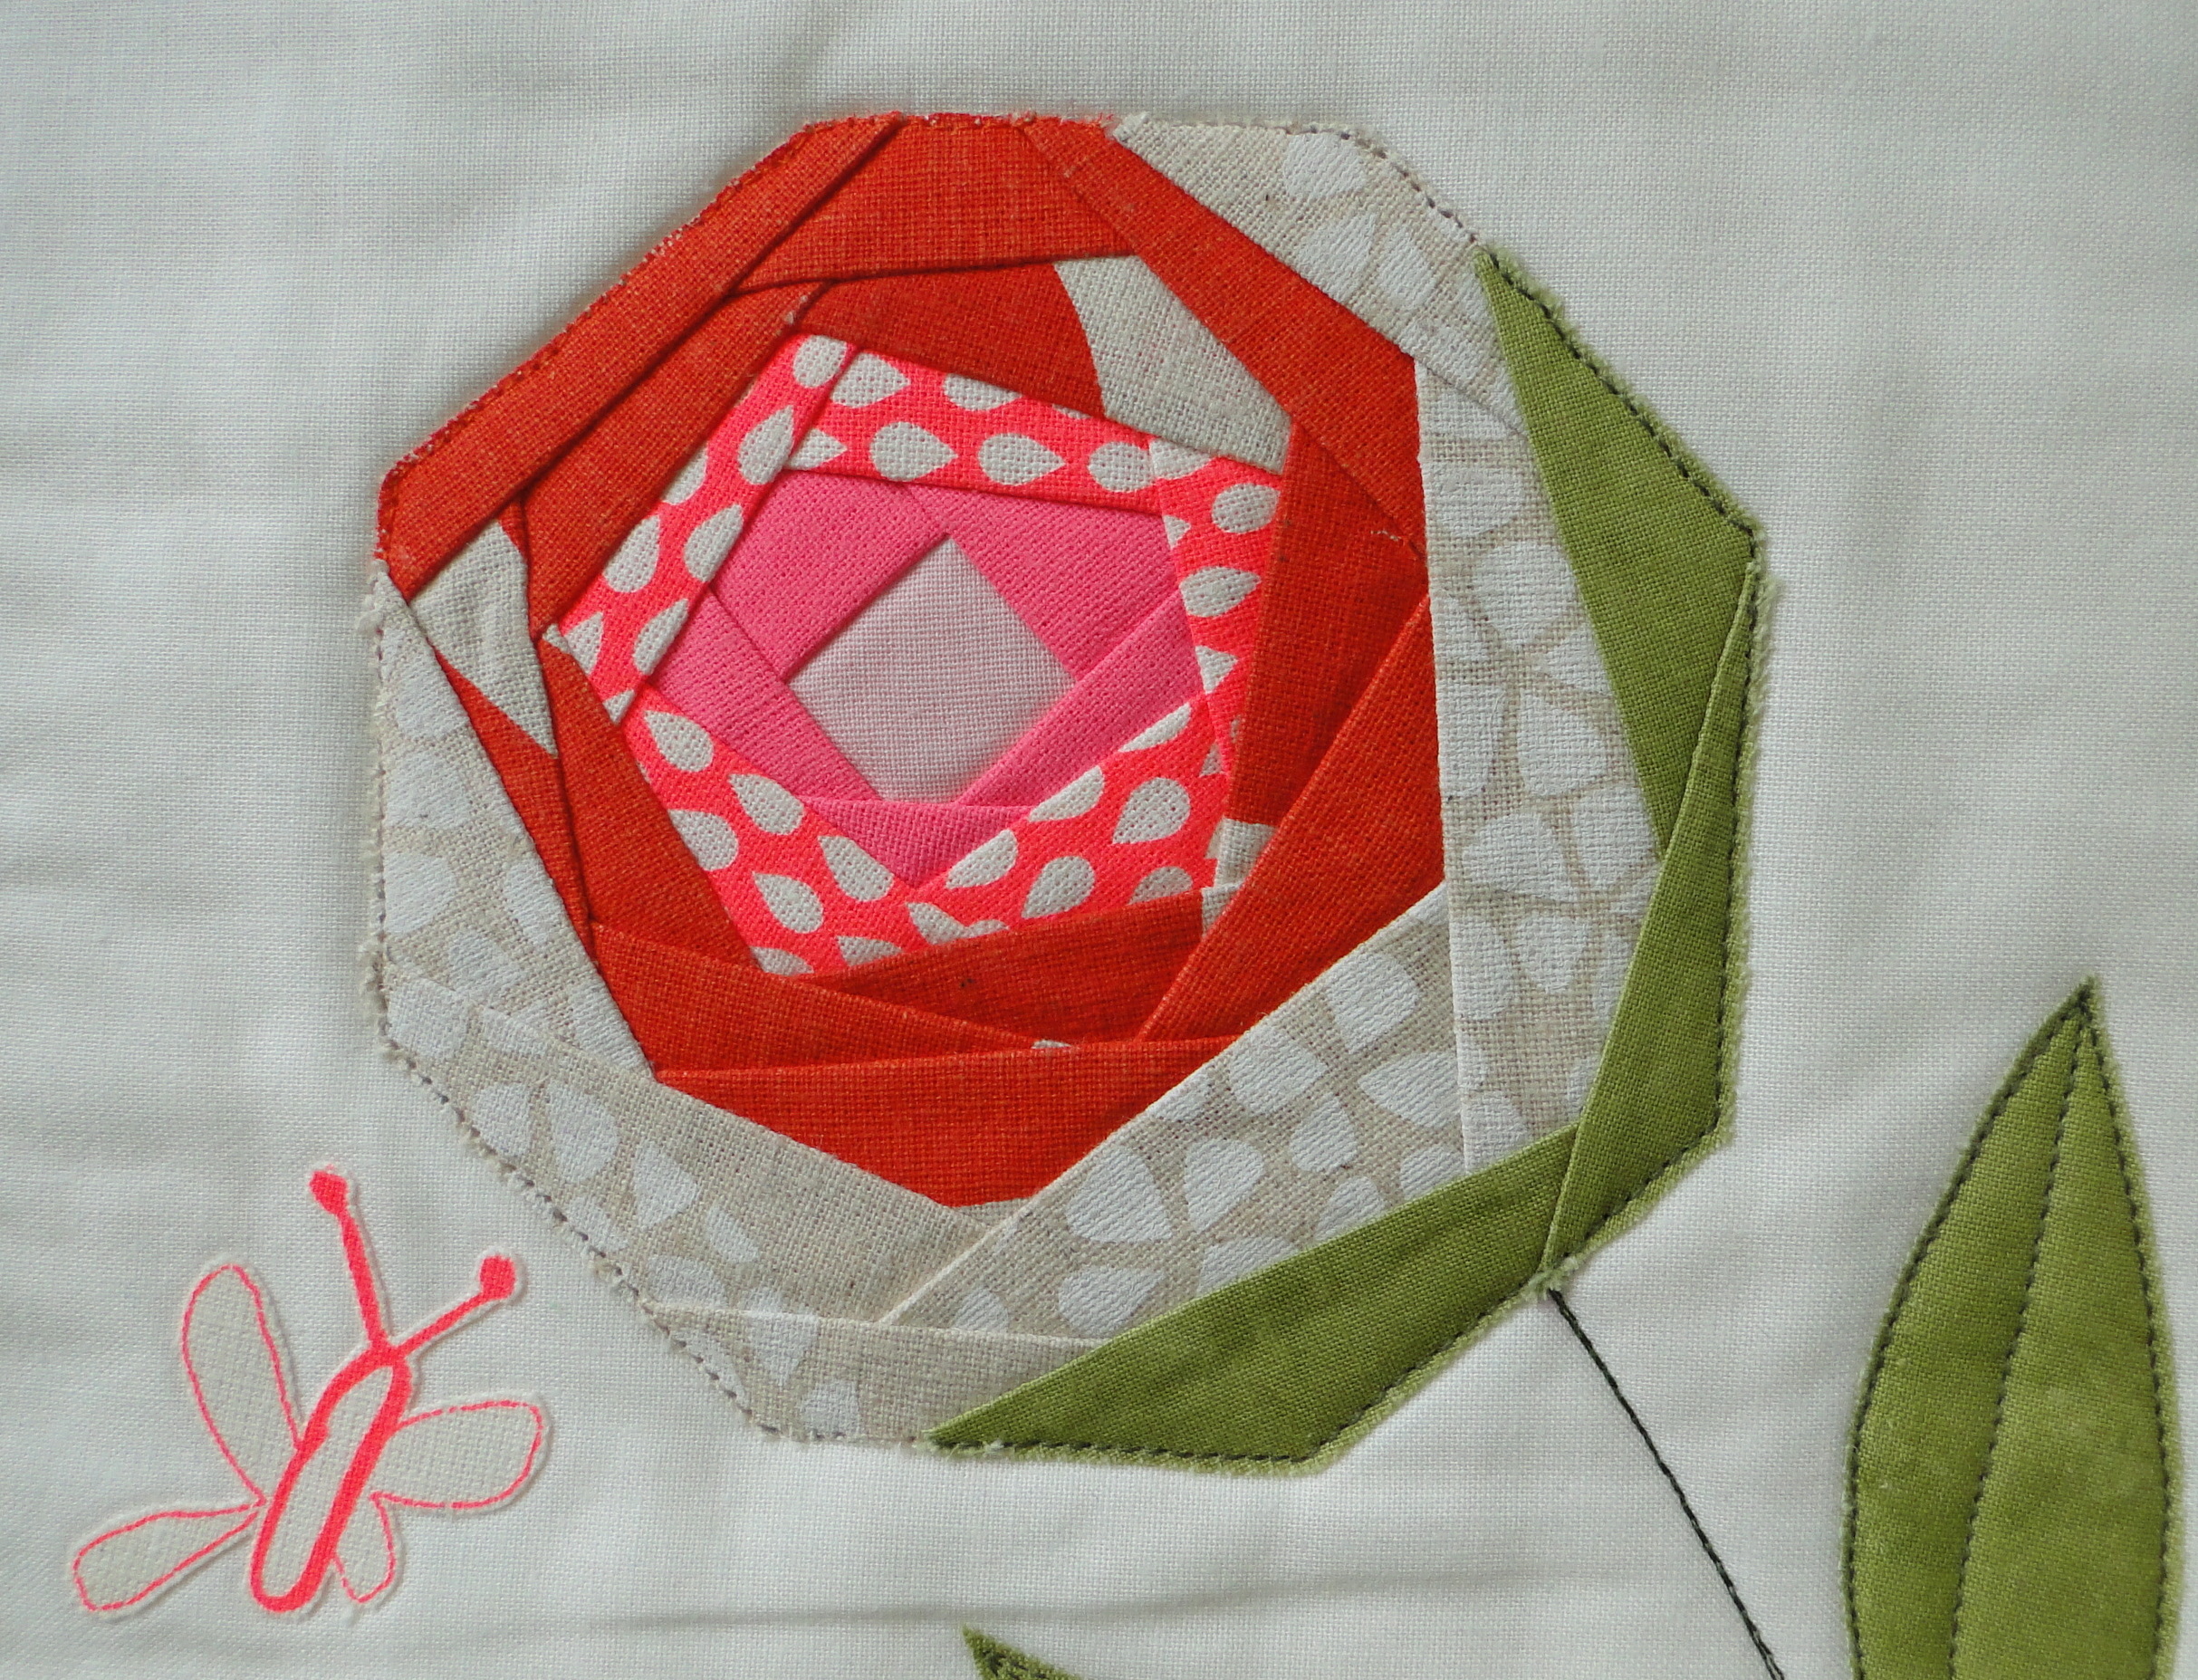
I’ve been asked a few times how I made the flowers on my Shelburne Falls cushion and my Mother’s Day / Easter cushion. So here to answer all of those questions is a tutorial on how I made them.
Before I start I have an apology to make. My photos aren’t the best. I do most of my sewing at night, when my two little boys are safely tucked up in bed. Needless to say night time sewing is not the best for photography. I should also point out that this is my very first tutorial so forgive me if it is over wordy, not clear on some points etc. I’ll happily answer any questions there may be.
To start with a list of materials: you will need a small piece of plain cotton for the base and a selection of rectangular scraps for the flower. You can use any colours you like. Personally I like to use a gradation of colours working from the centre outward. Scraps should be no more than 1″ wide and at you should not need any longer than 3″. Depending on how you wish to finish the flower you will need either fusible web or some lightweight muslin/cotton (more about that in a minute). Finally you will need an octagonal template to cut out your flower. I drew mine 4.5″ wide for my larger flower and 3.25″ wide for the smaller one.
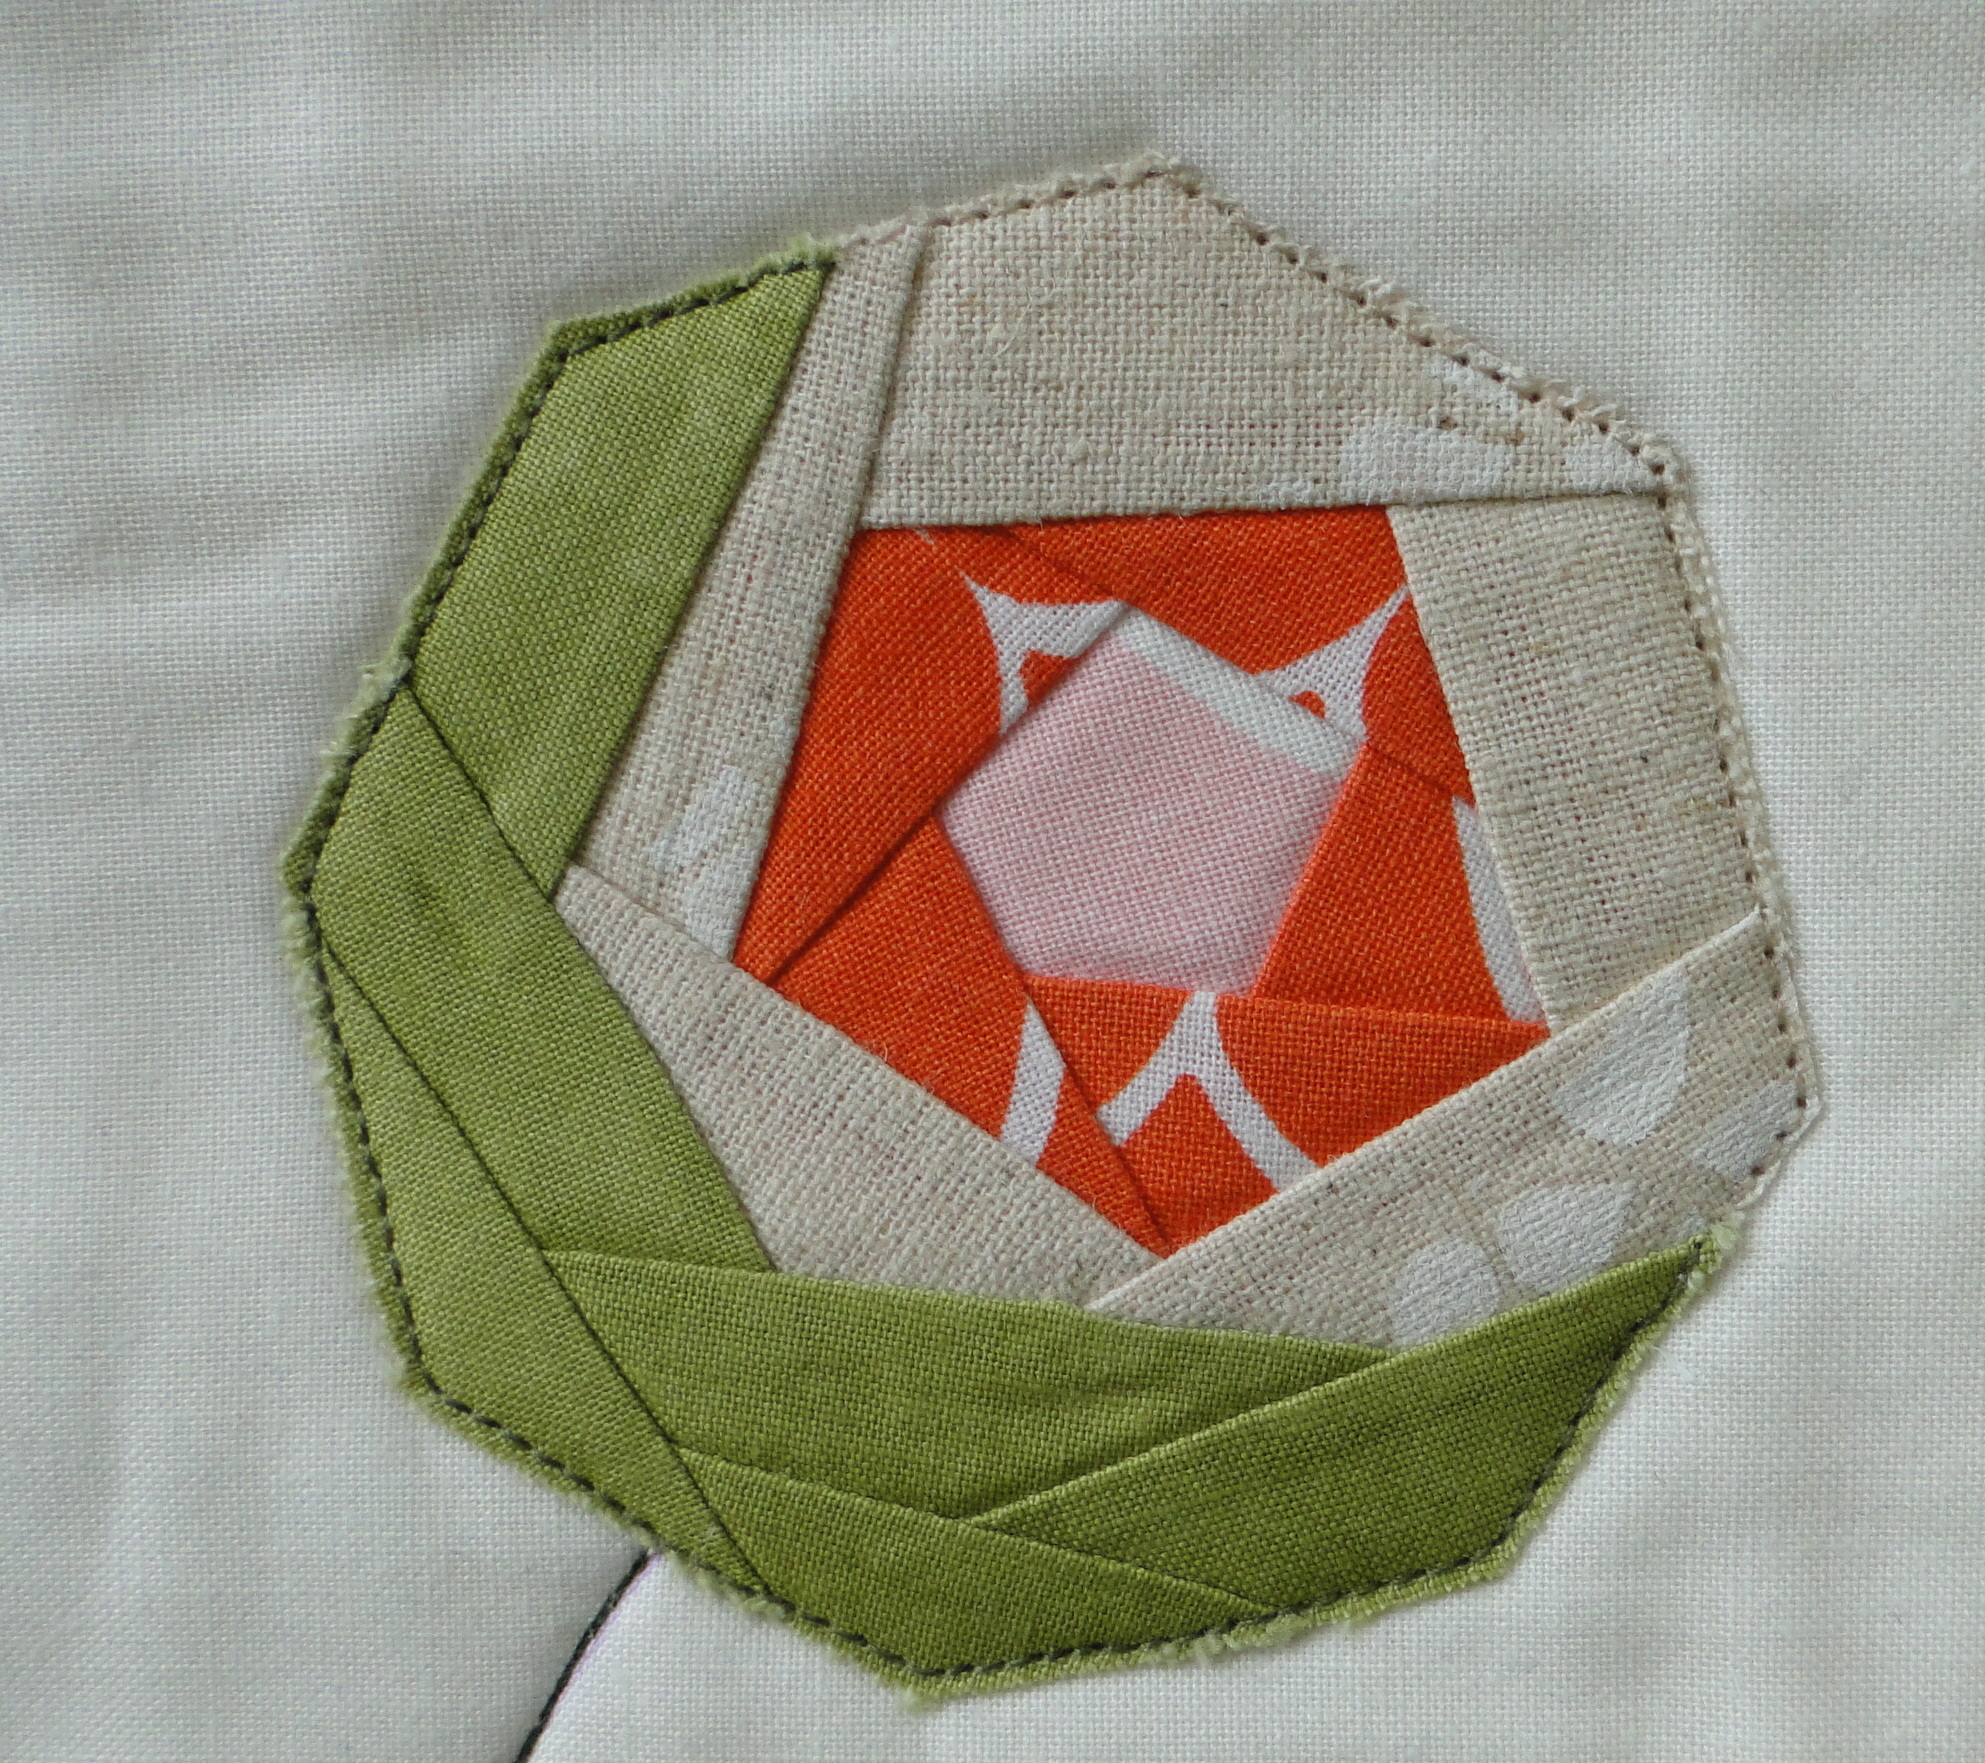
I should also give a little information on finishing the flowers before I start. My early versions were sewn as per this tutorial, although when cutting out my octagonal base fabric I added 0.25 inches to all seams to allow for finishing. Once the flower was completed I then stitched a layer of thin backing cotton to the right side of the flower allowing a quarter inch seam all around. After trimming my seams and clipping the corners I made a slit in the backing cotton and turned the flower inside out. This finished the edges of the flowers neatly but the resulting flowers were relatively bulky. This worked well on my cushions but I also wanted a less bulky version for a quilt I am planning and I then came up with the method I will describe here.

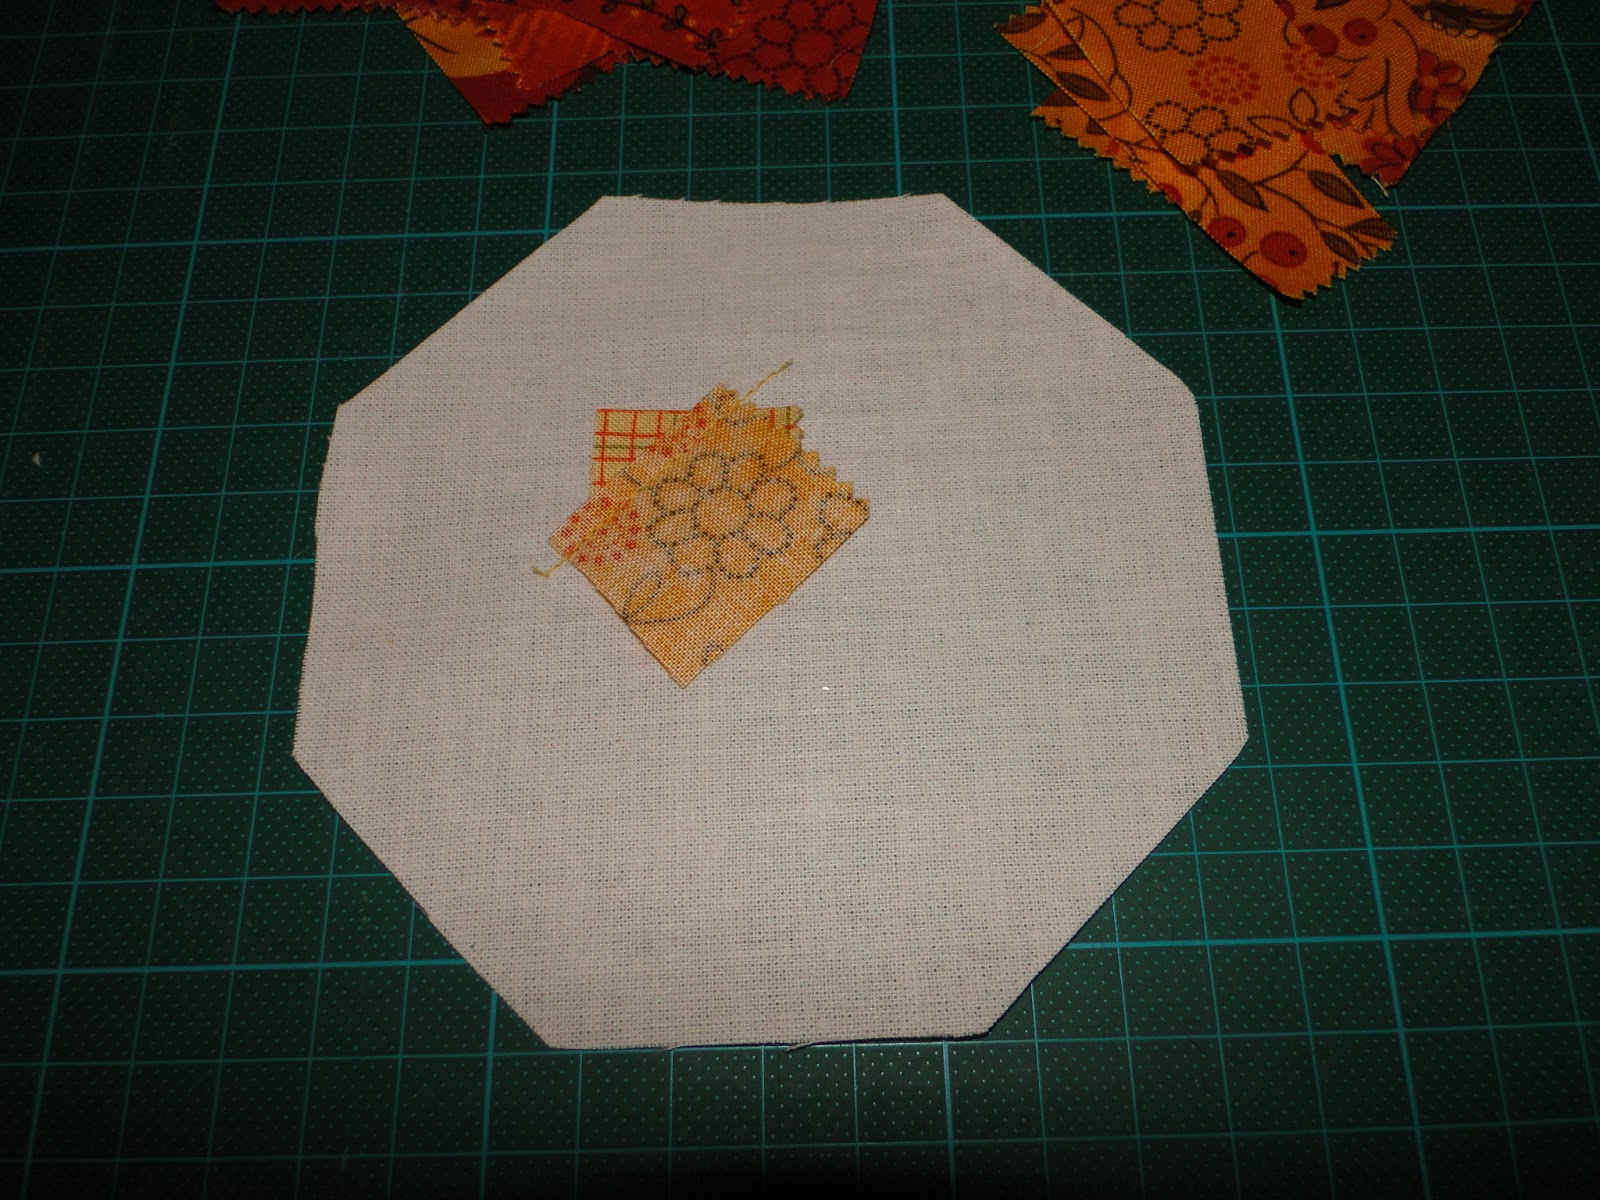
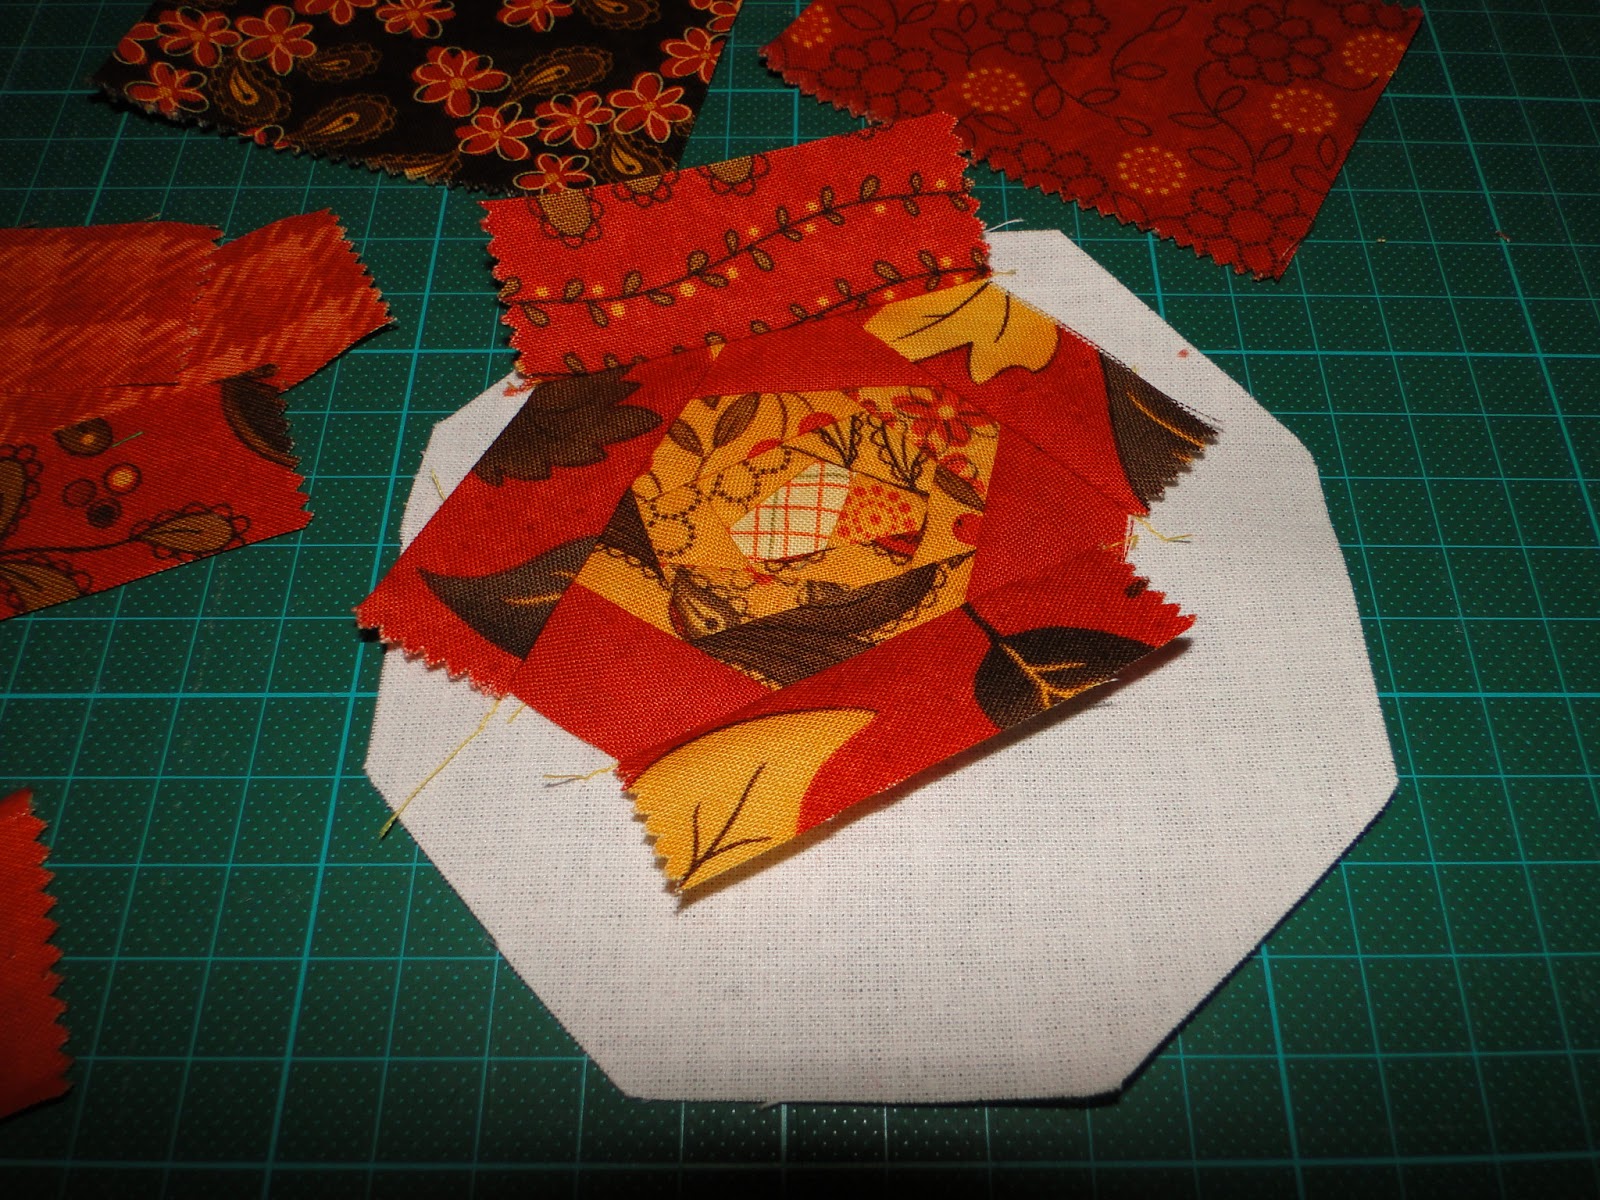
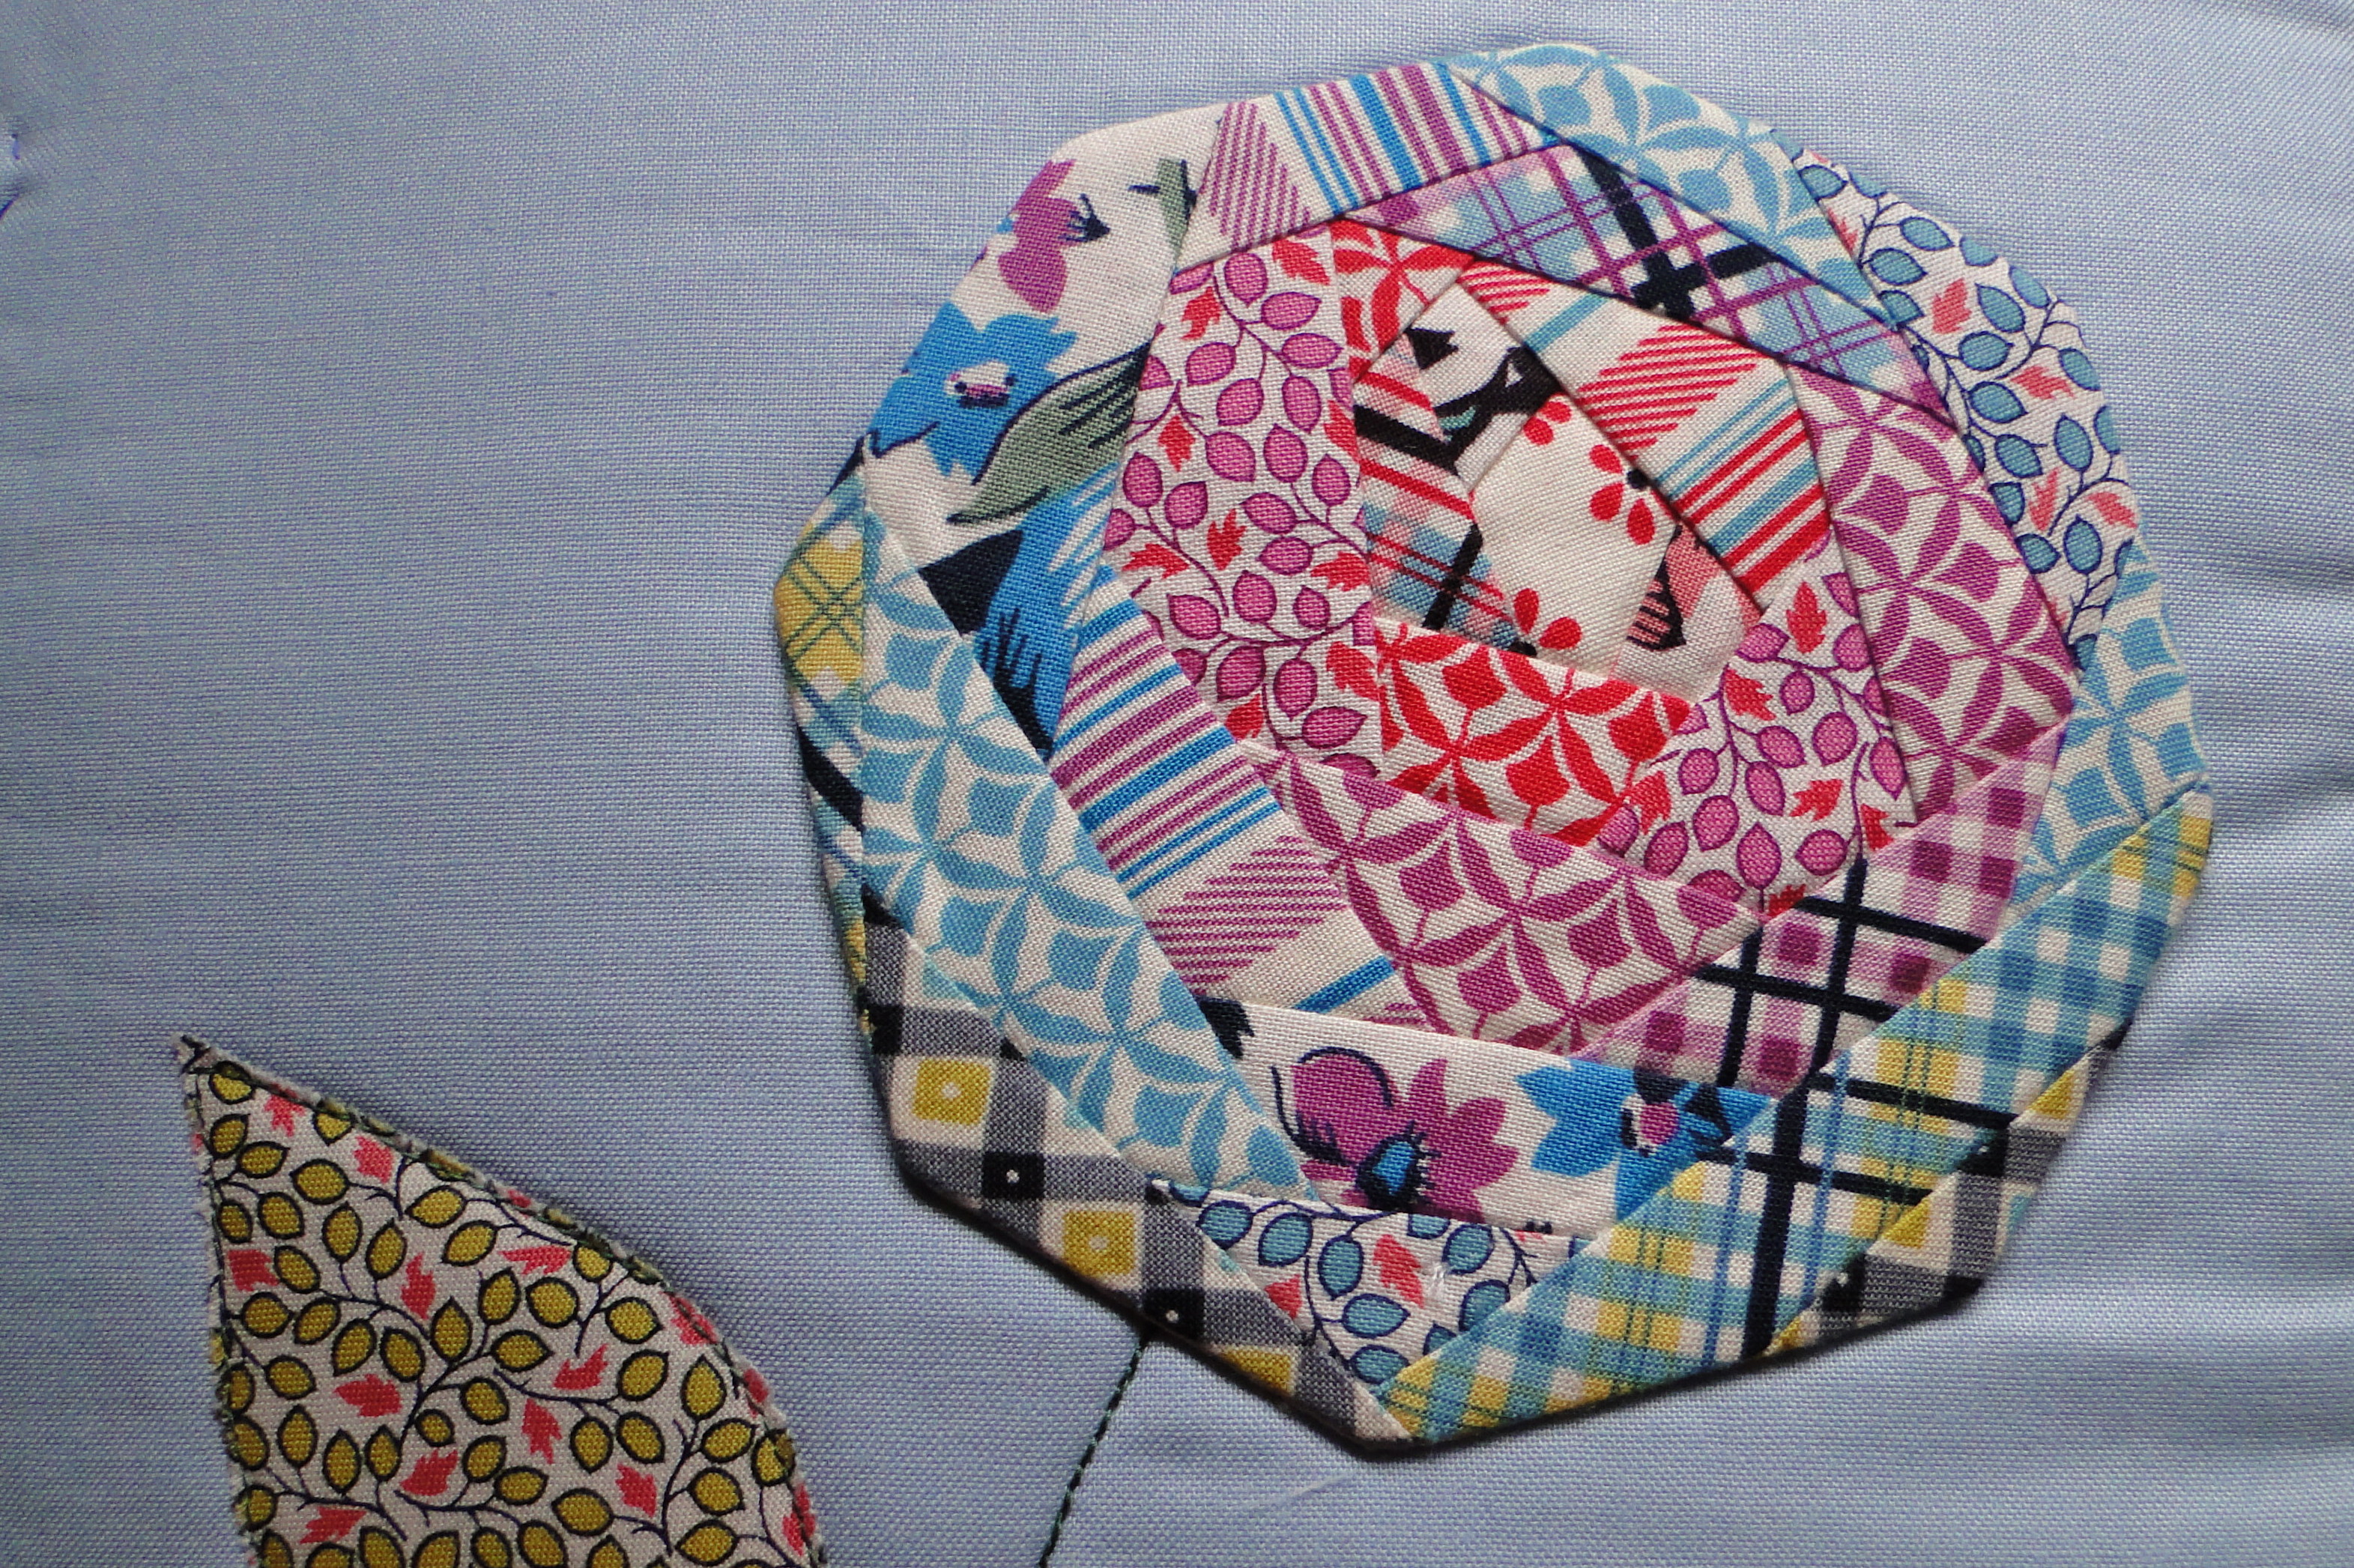
The first step is to cut out your base fabric. For this version I applied a layer of fusible web to the cotton before cutting out my octagon. I then cut out my octagon to the size I had planned for my finished flower. I removed the backing paper from the fusbile web side and then proceeded to place my central flower piece on the background right side up. I like to place it off centre as I find this gives me a lovely result in the finished flower. For reference my centre piece was approximately 1″ x 1.25″.

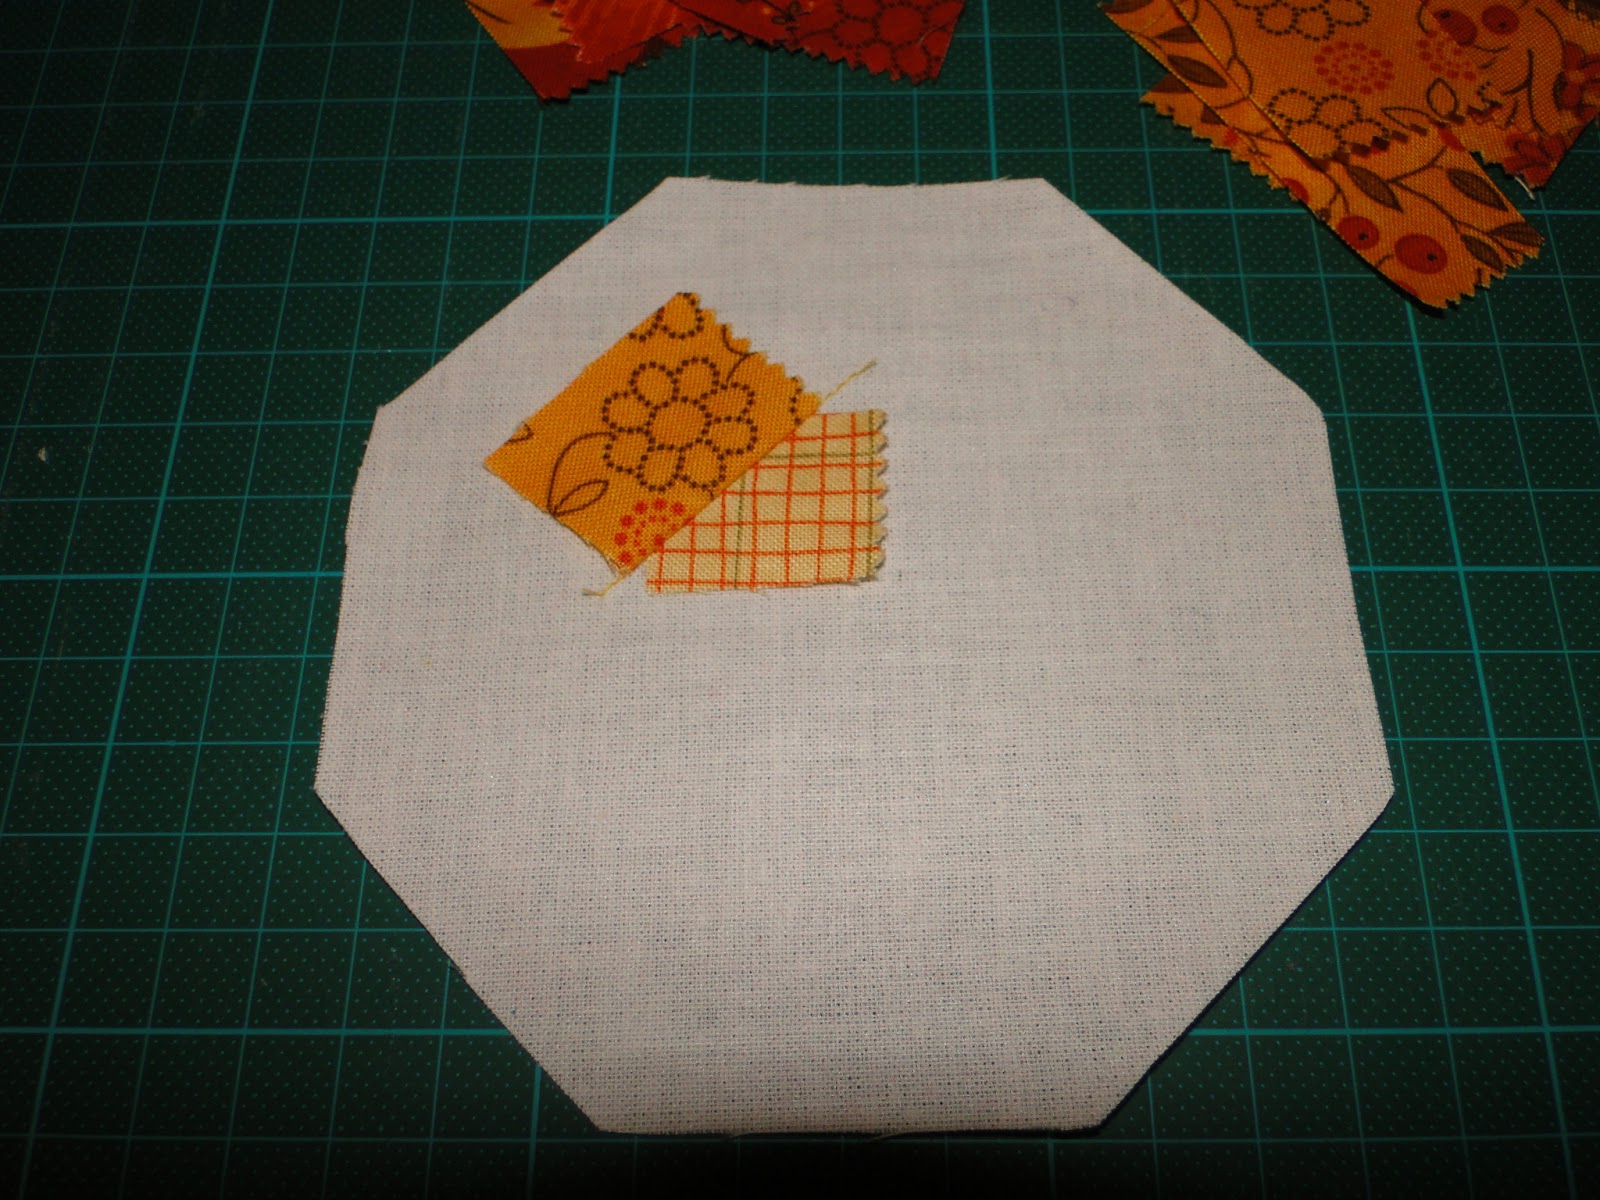
Your next piece will be place right side down on top of the centre piece at a slight angle. Stitch this second piece in place allowing approximately an eighth of an inch seam, then finger press away from the central piece. DO NOT iron it. If you do you will stick it in place with the fusible wed. You do not want to do this yet so please finger press only throughout. I should also add that I start and finish my stitch several stitches either side of my fabric piece, and I don’t use any locking stitches unitl I get ot he pieces at the edge of the flower. Most piece will be well enouvh anchored by the overlapping pieces not to need the extra locking stitches, and this way it’s also much easier to unpick and reposition a piece if you find it’s placement is wrong.
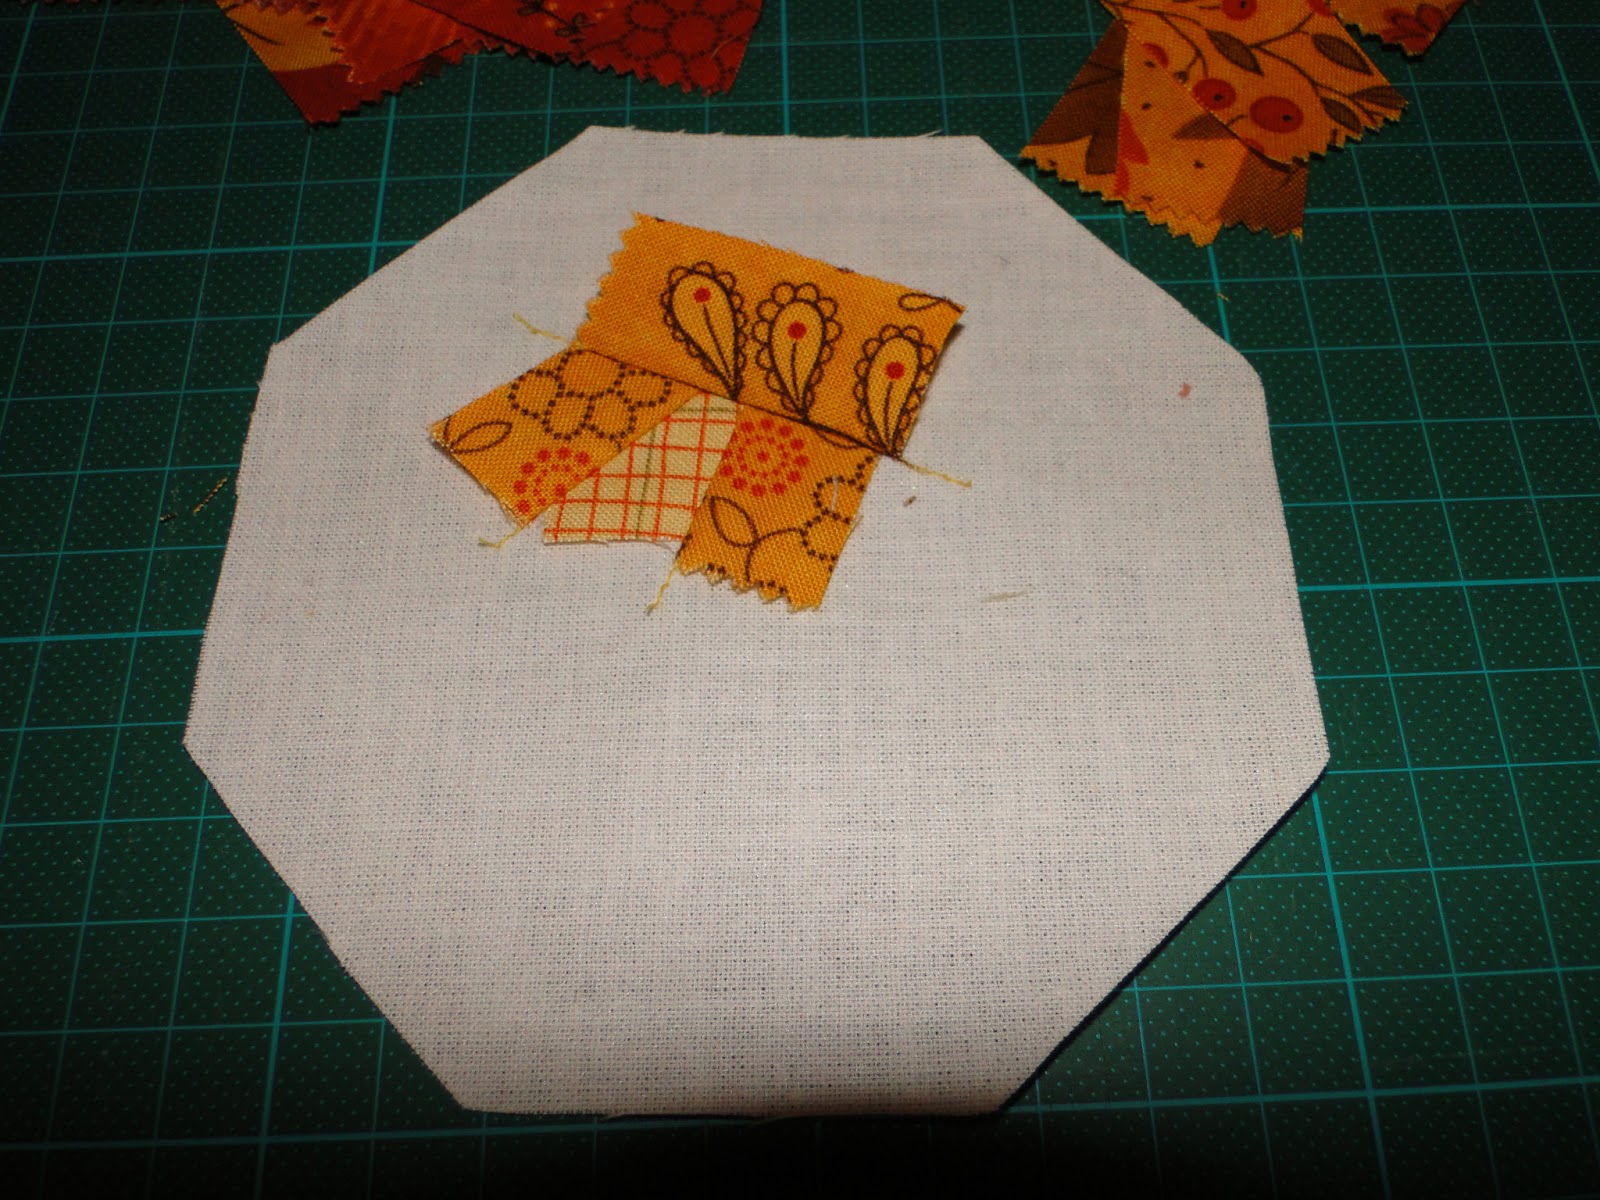
Add a third piece roughly opposite the second piece, again at an angle, stitch in place and FINGER PRESS away from the centre.

The next piece added will cover both the centre piece and the ends of the two pieces already added.
The following pieces should cover other end of the centre. The idea is to create a rough pentagon or even a hexagon around the first piece.

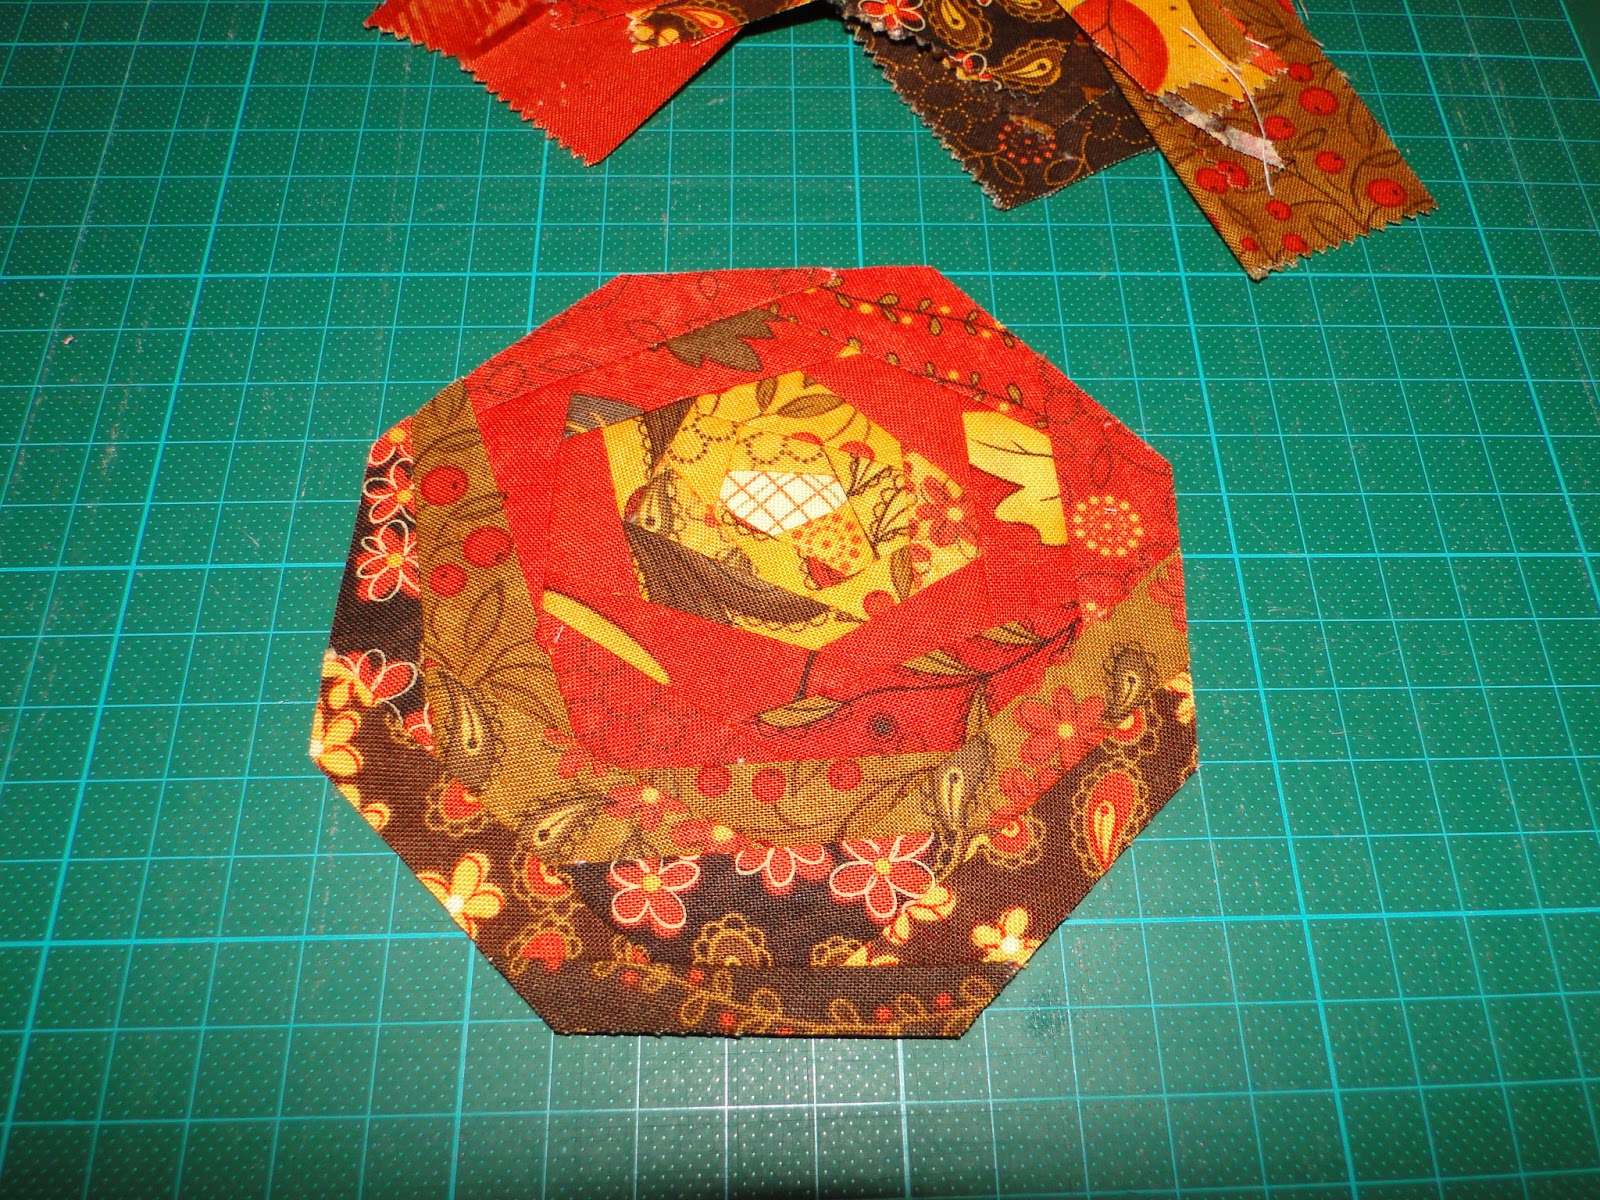
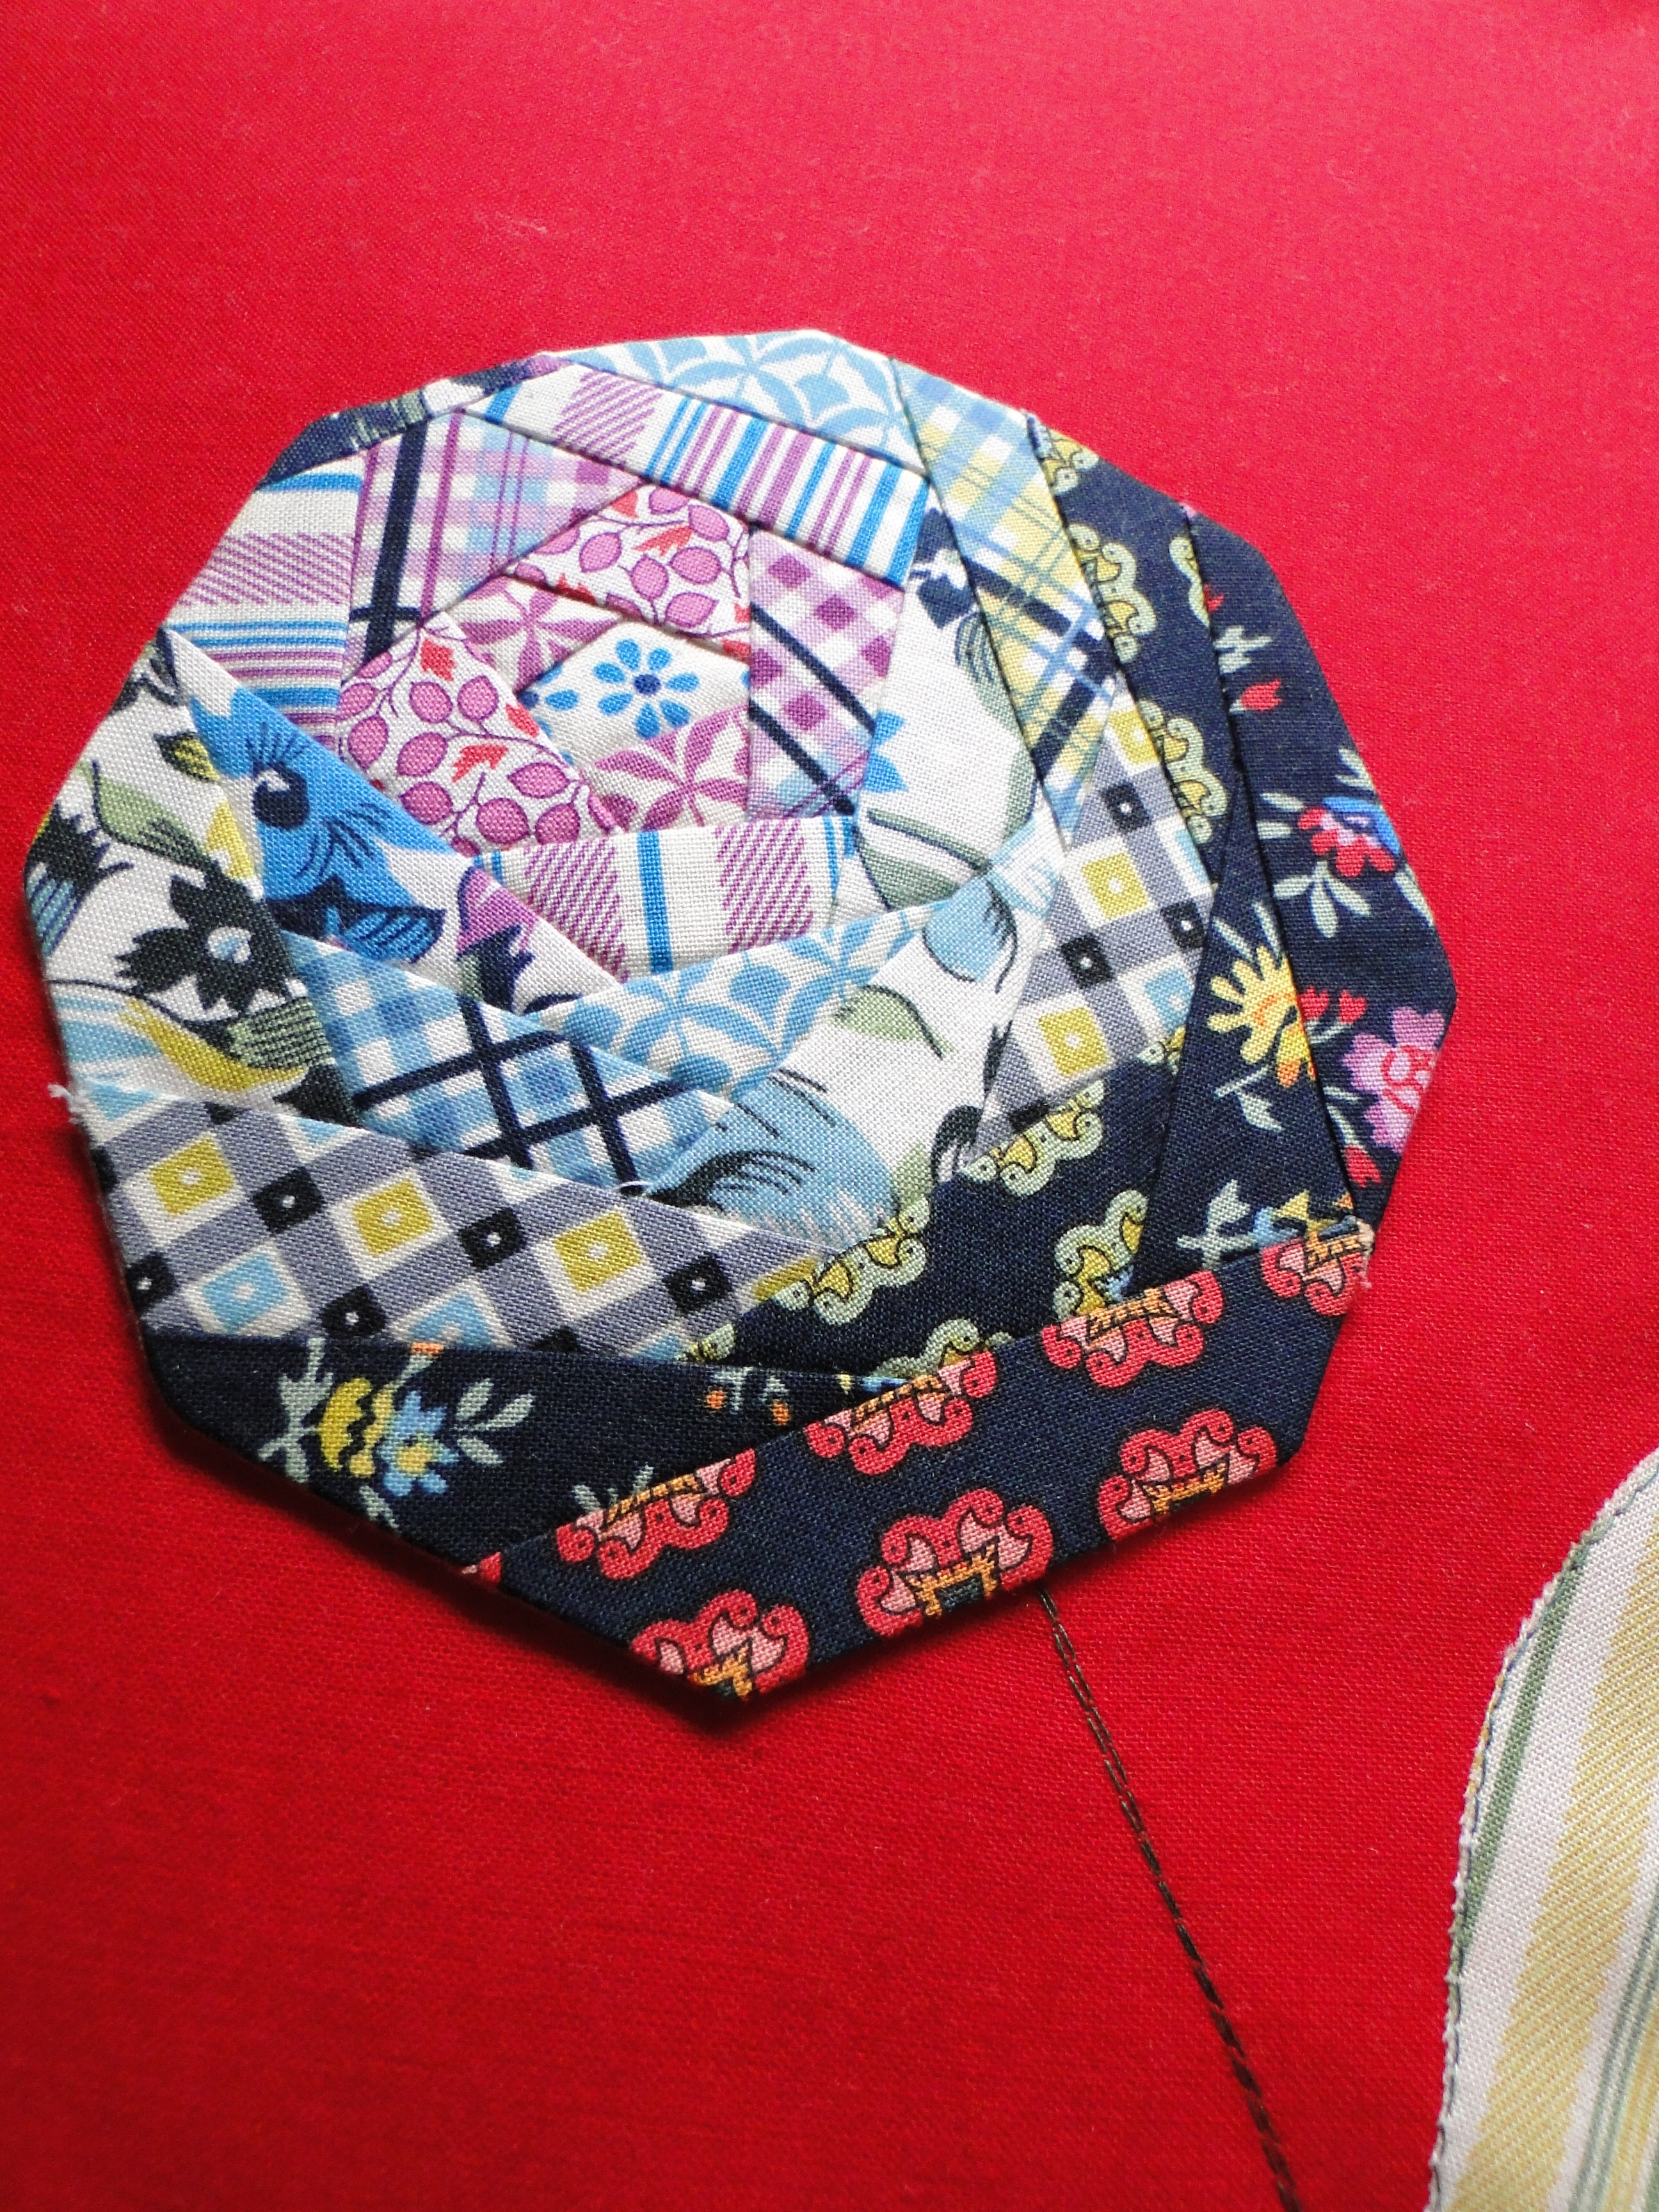
Once you complete the first “circle” of pieces around the centre you begin with the next “round”. At this stage you should aim to always try to cover at least two end pieces with each new piece added. You will find that as you go you may almost completely cover pieces previously added. This is fine.
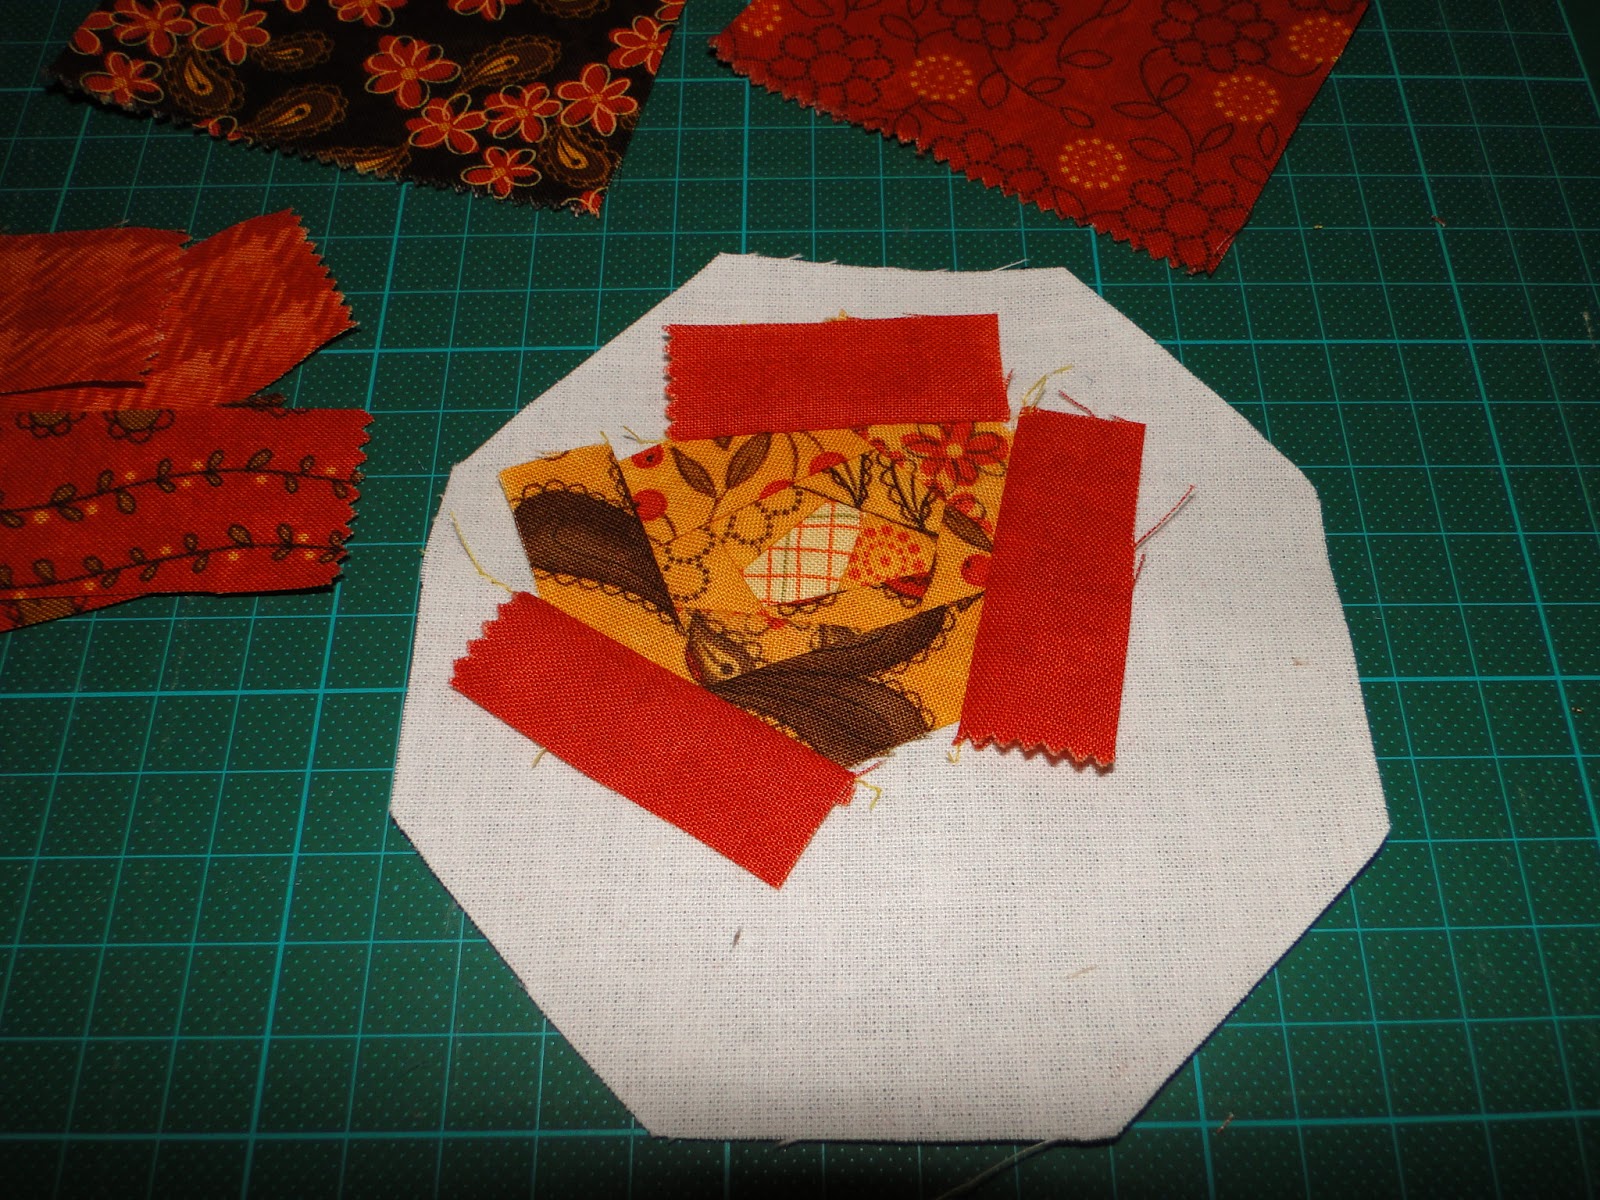
Soon you will find that you are reaching at least one edge of your octagon.
At this stage finger press each piece in place, then fold it back and trim all of the underlying material to expose as much of the base at possible. This is done no matter which type of finish you are working with. If adding a backing it reduces the bulk in the edge seams, if working with the fusible web it allows it to fuse directly with the edge pieces of the finished flower.
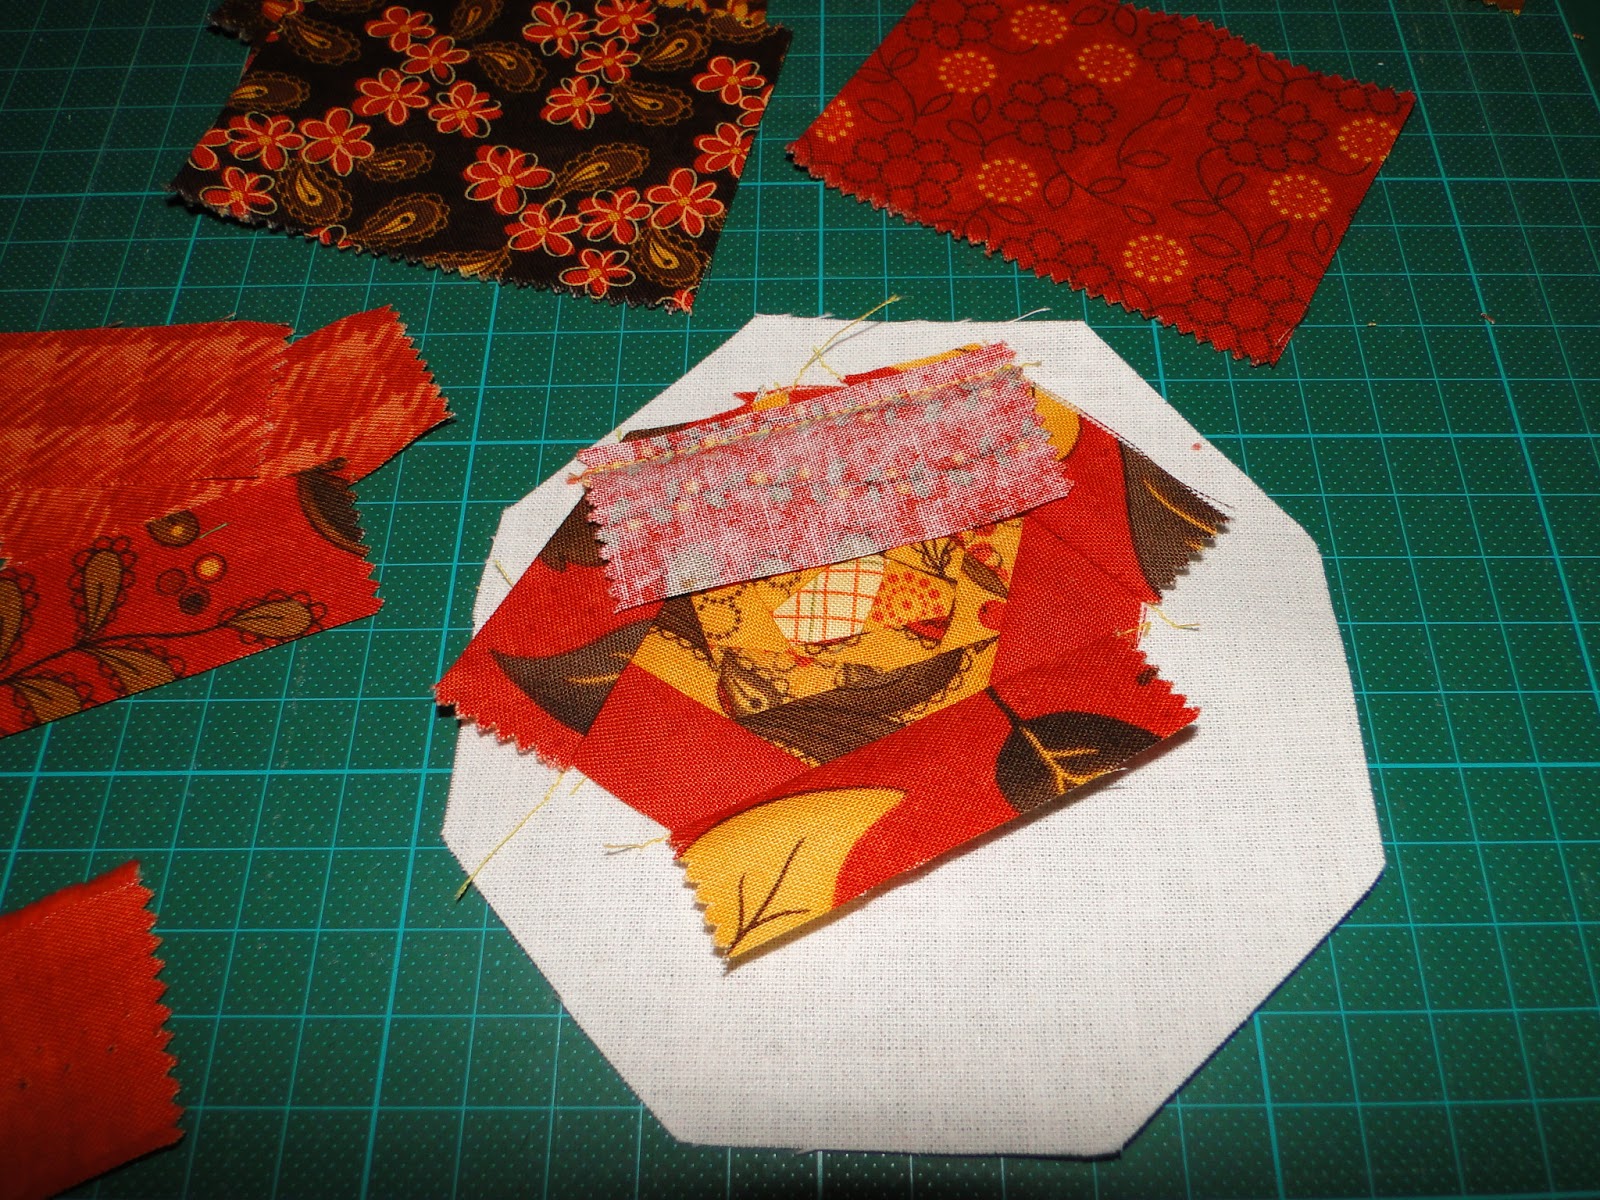
Then fold the piece back in place and roughly trim to follow the shape of the hexagon.
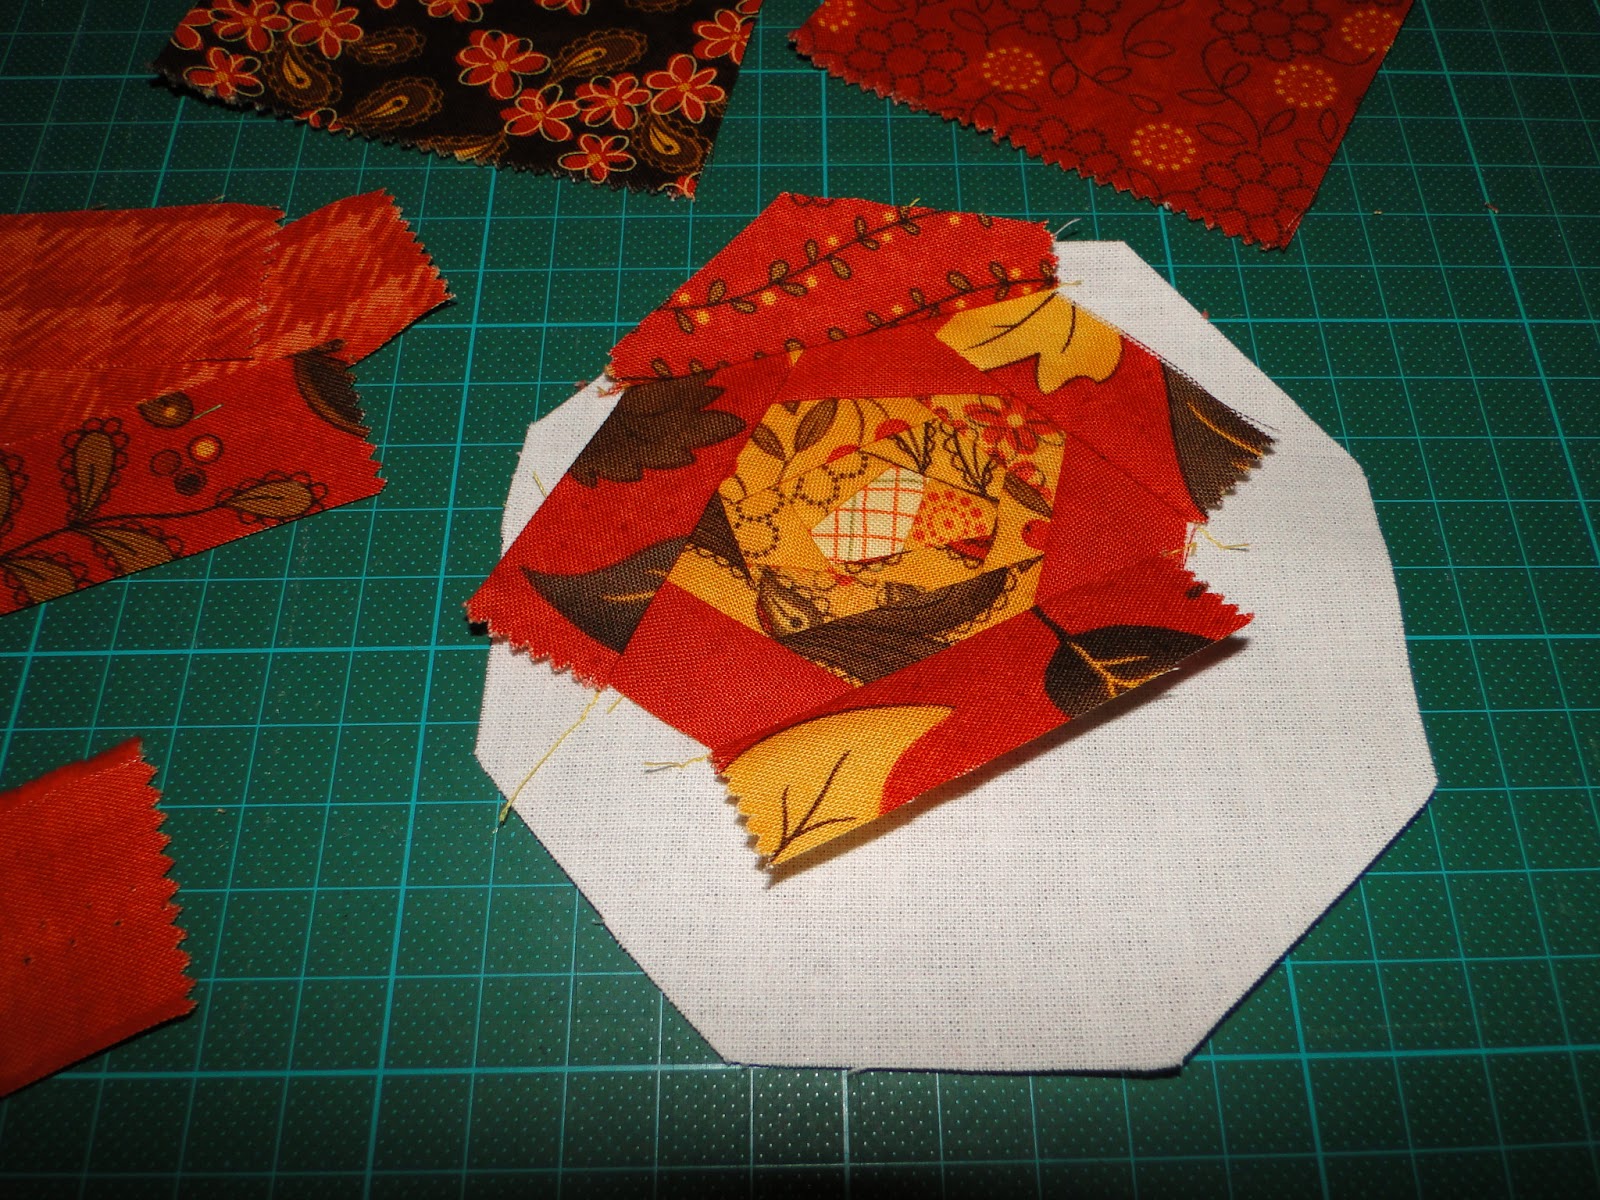
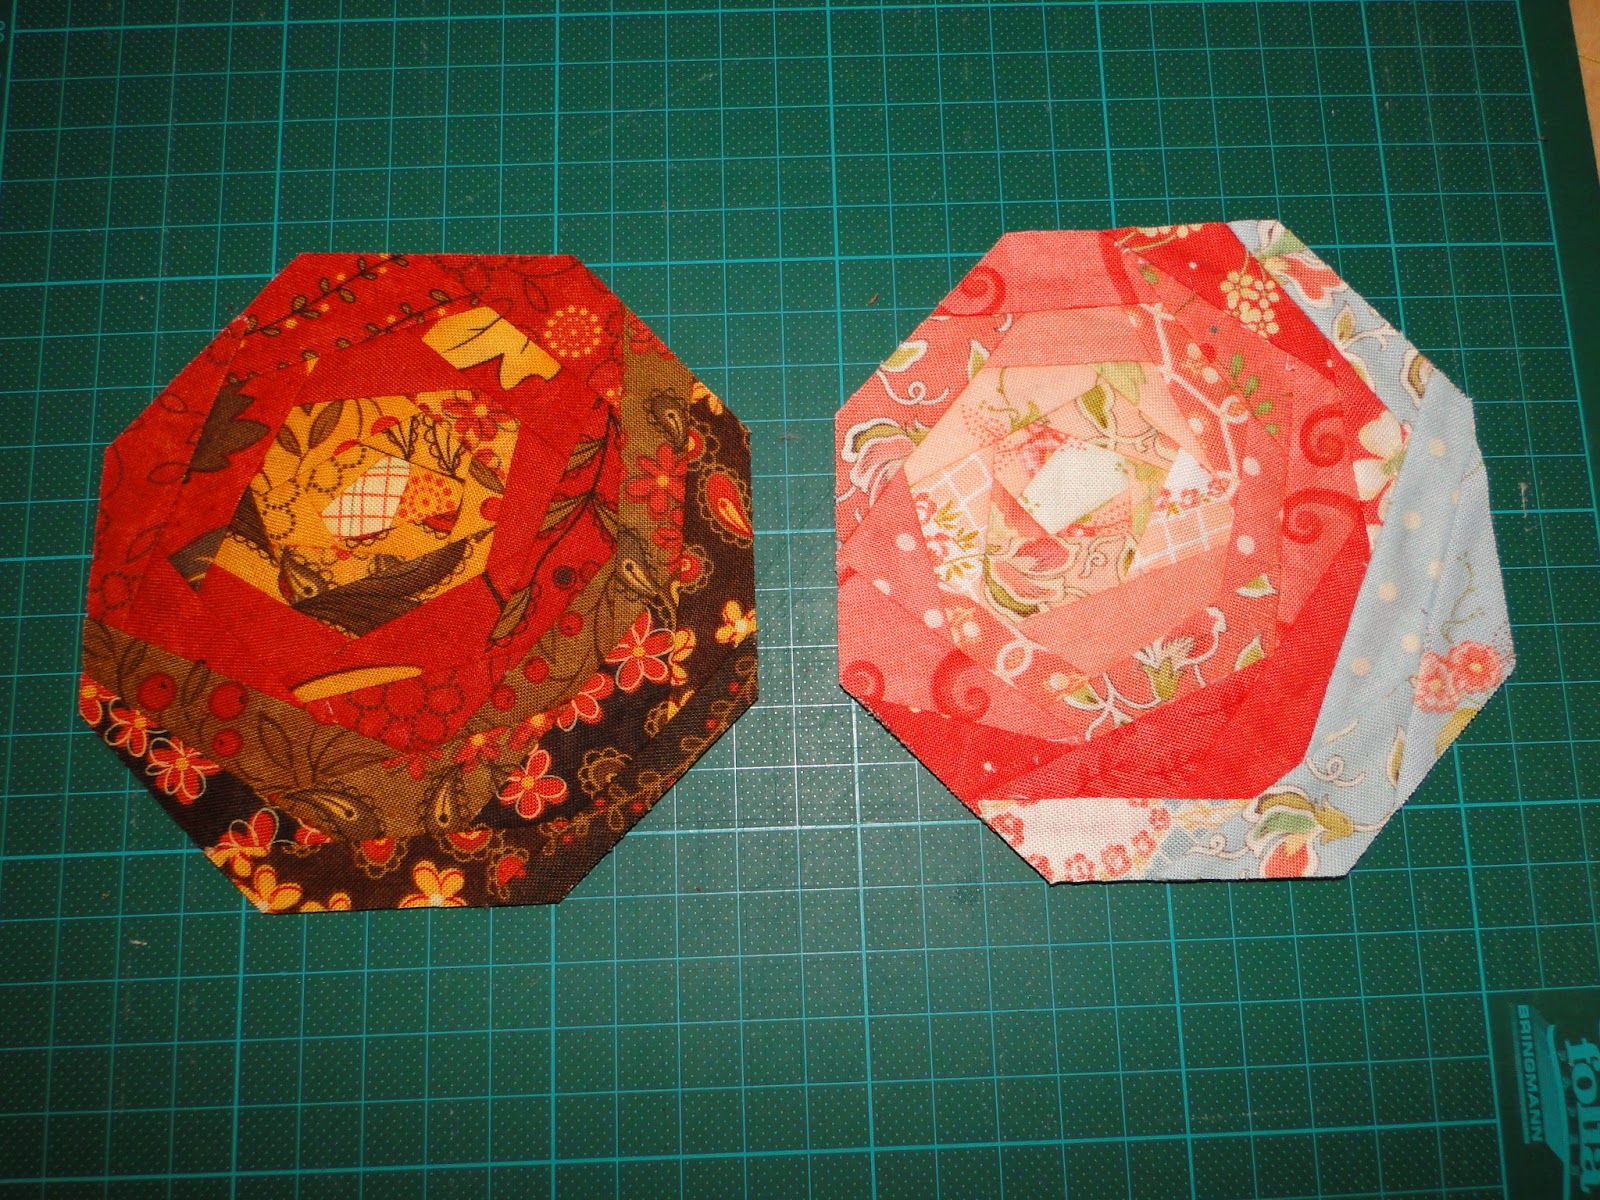
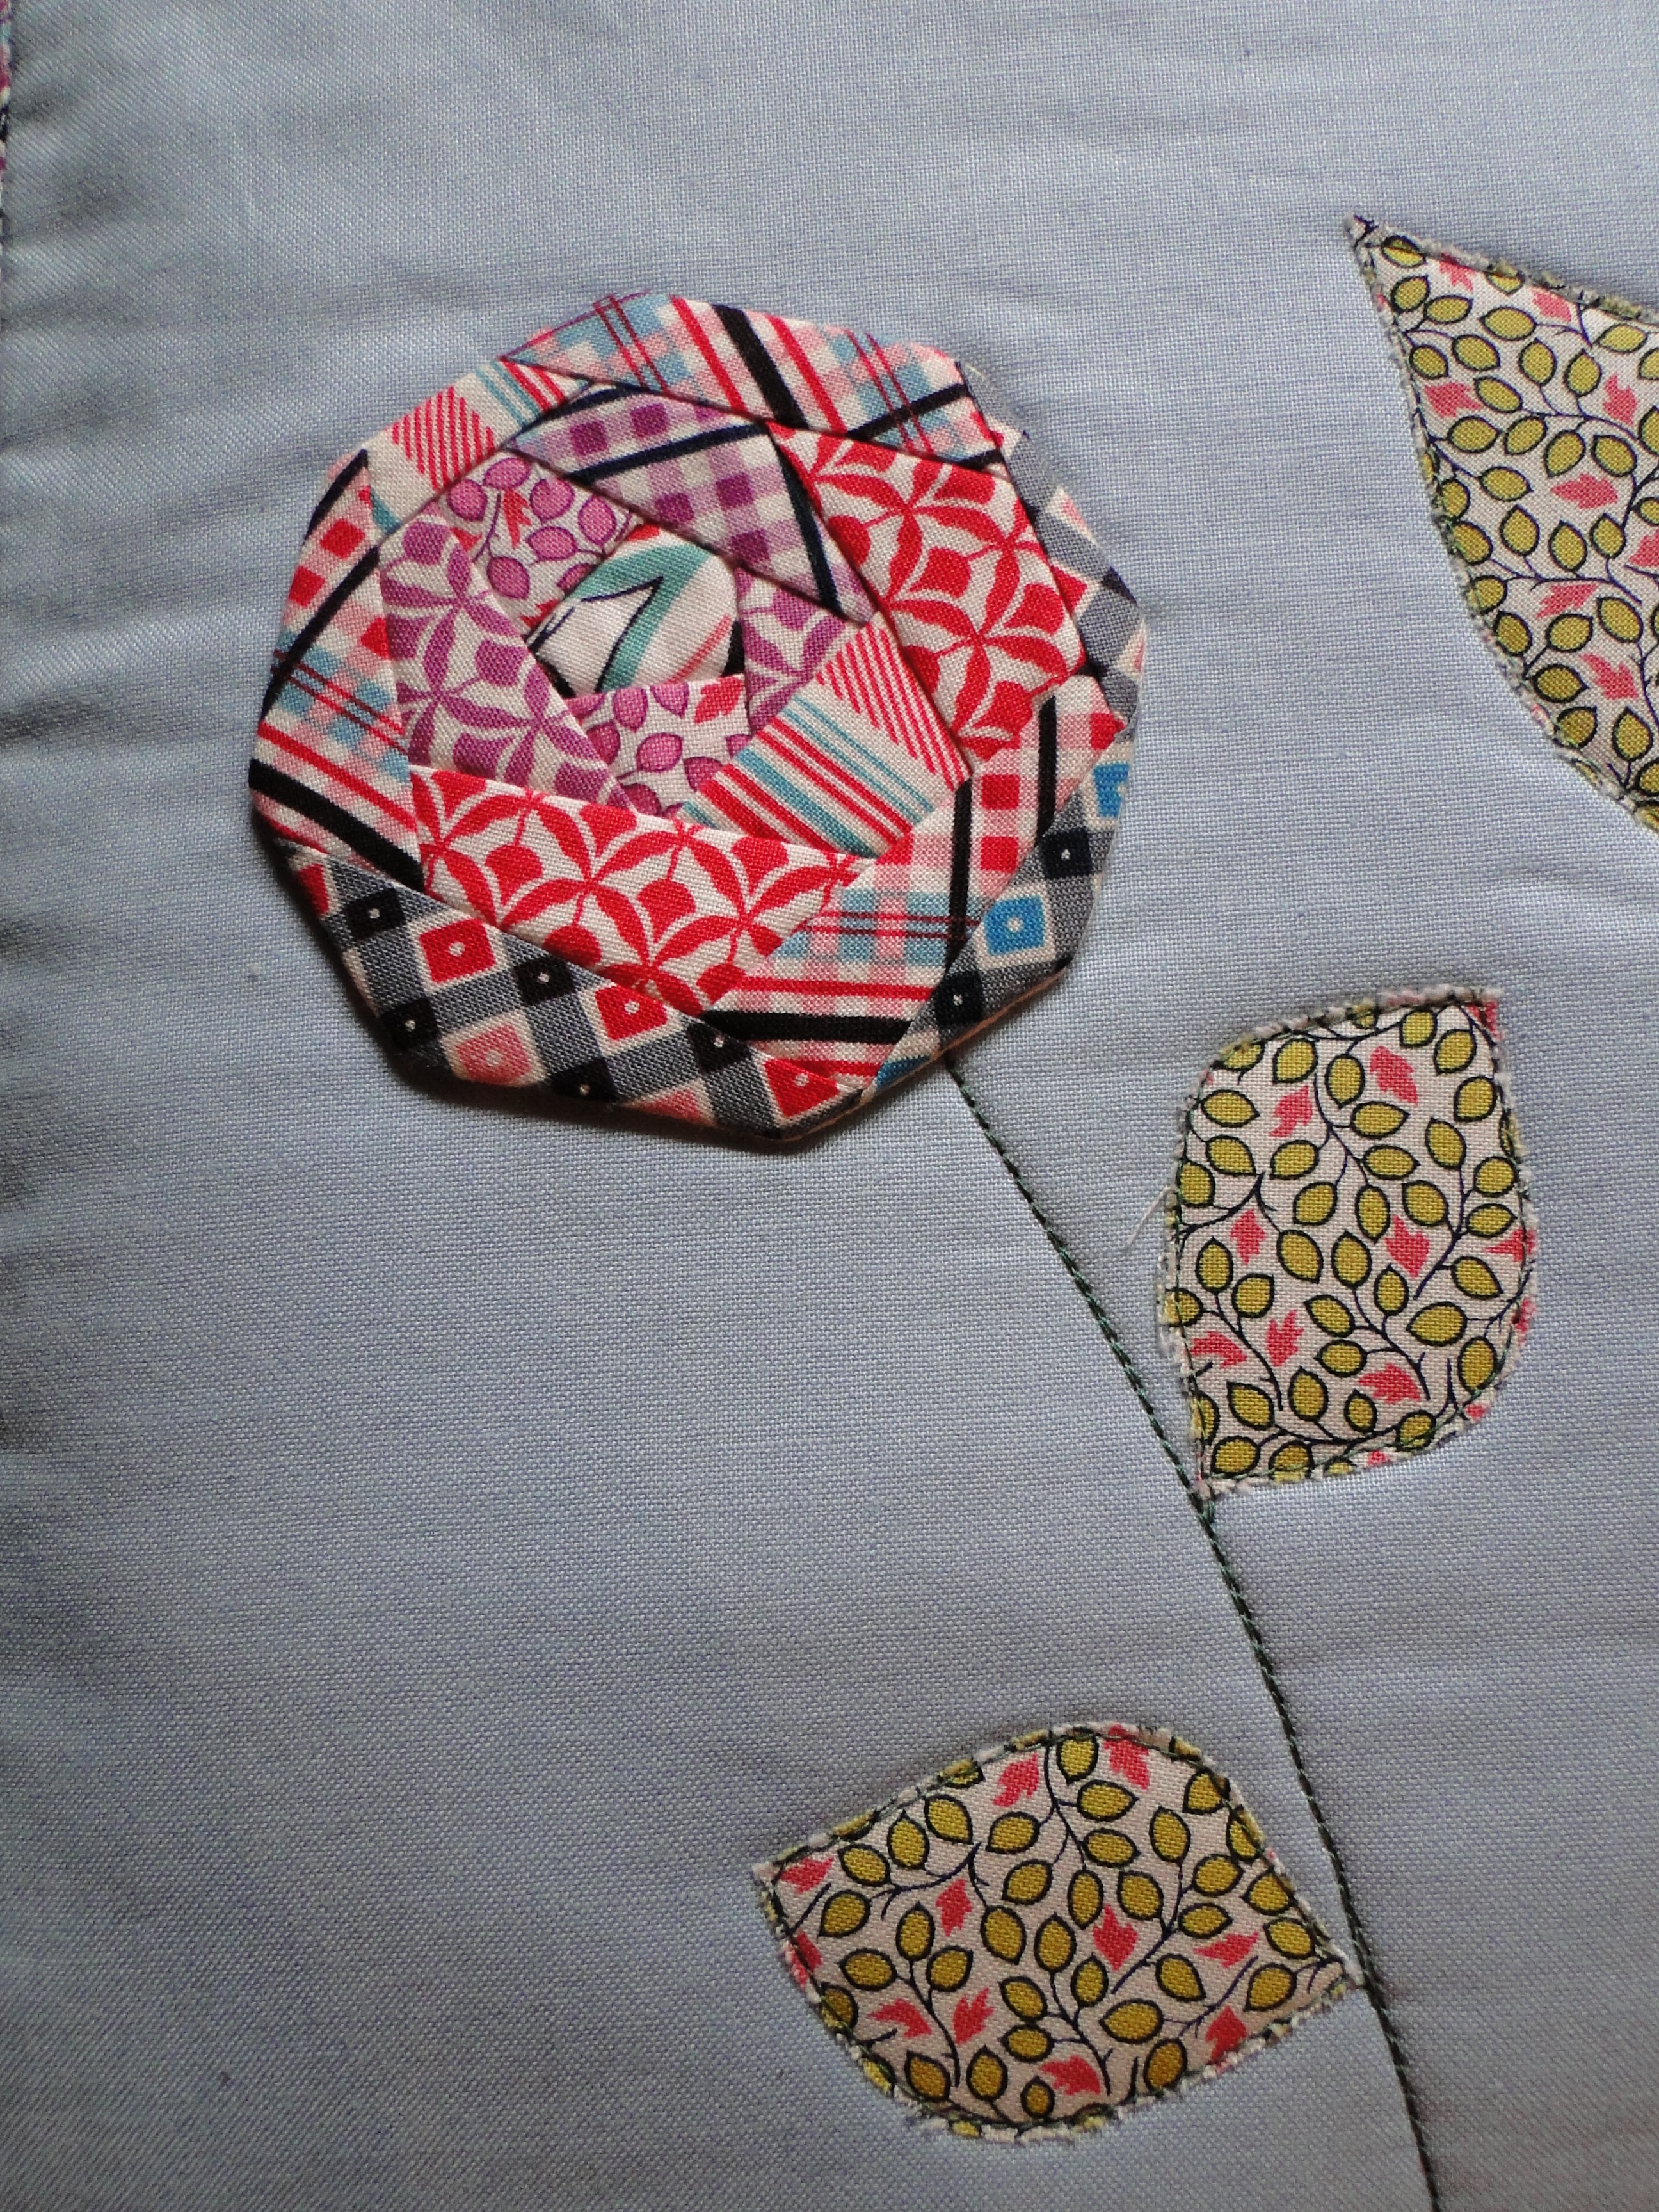
Continue adding pieces till you have covered all of the base. Now you can iron away. This should fuse all of the edges neatly if you are using fusible web.
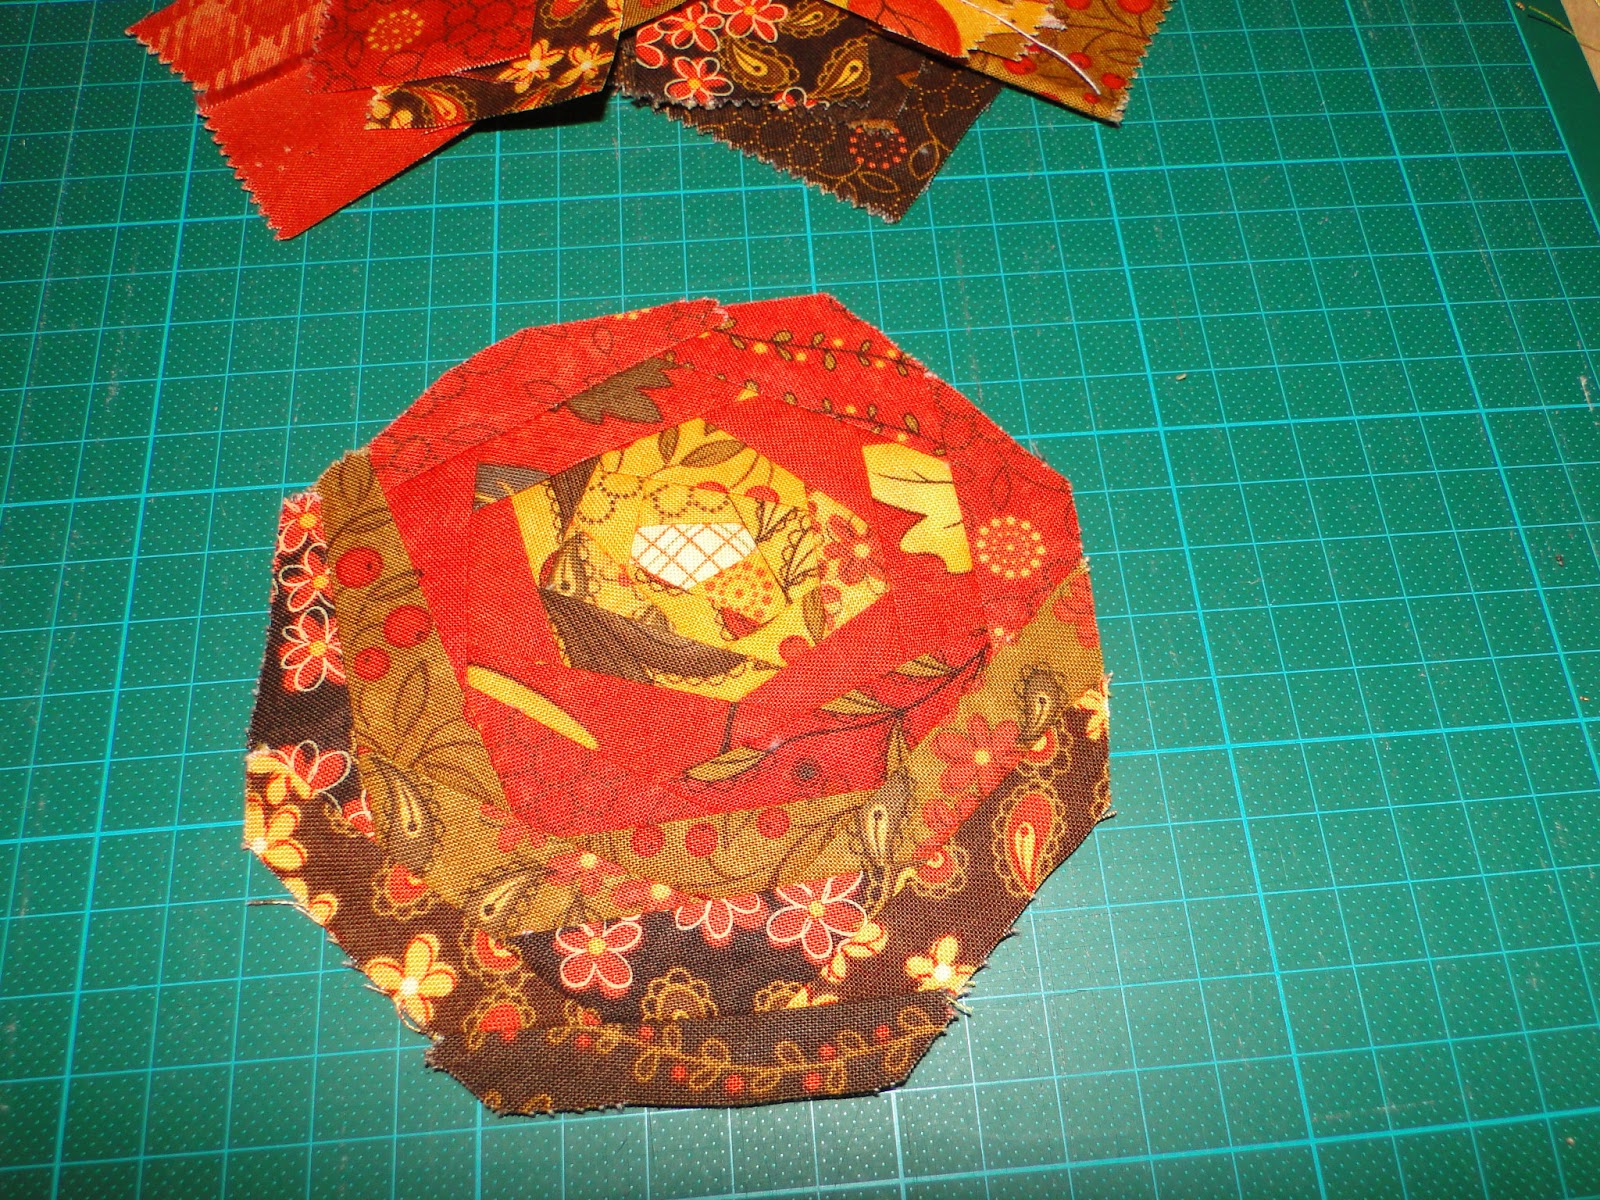
The final step for this version is to trim the flower neatly to shape using a ruler and rotary cutter. Turn the flower upside down to do this so you can use the base material as your guide. If you are backing your flower you can then proceed on to do that.
To use either version of the flower I attach a new layer of fusible web to the back and then iron in place. The backed flowers I then anchor in place with a ladder stitch. The flatter unbacked flowers lend themselves to all manner of decorative appliqué stitching.
Needless to say the variations in colour and design of these flowers are endless. I do hope you enjoy making and using these flowers as much as I do.

Thanks for a great tutorial. I wonder what if you pieced the strips onto a base of phone book paper cut to shape, then put the base fabric around and turned it (after removing the paper). That might eliminate some bulk and create a finished edge. Will have to try this.
I don’t see any reason why it would not work. To date I haven’t minded the extra bulk of the backing material as it gives the flowers and almost 3D effect when stitched in place. I can imagine that I will use them in projects in the future where I would like less bulk and I will defintiely try out the paper method then.
This is an awesome tutorial, I can’t wait to try it out.
Fabulous tutorial. Thank you
Great tutorial. I can’t wait to try this.
Really inspirational to me…I am starting to think about quilting and love the creativity this allows. Thank you for this tutorial.