Hello, and welcome to the very first Ho, Ho, Ho and On We Sew Link Party. If you missed the introduction to this Link Party or are not sure what it is all about then have a quick read of this post which should tell you all you need to know about it and when you are done there don’t forget to pop over to Celtic Thistle Stitches to see the project that Fiona has to share this month.
 To kick start this year of getting organised I would like to share with you all the tutorial for my fabric tree decorations.
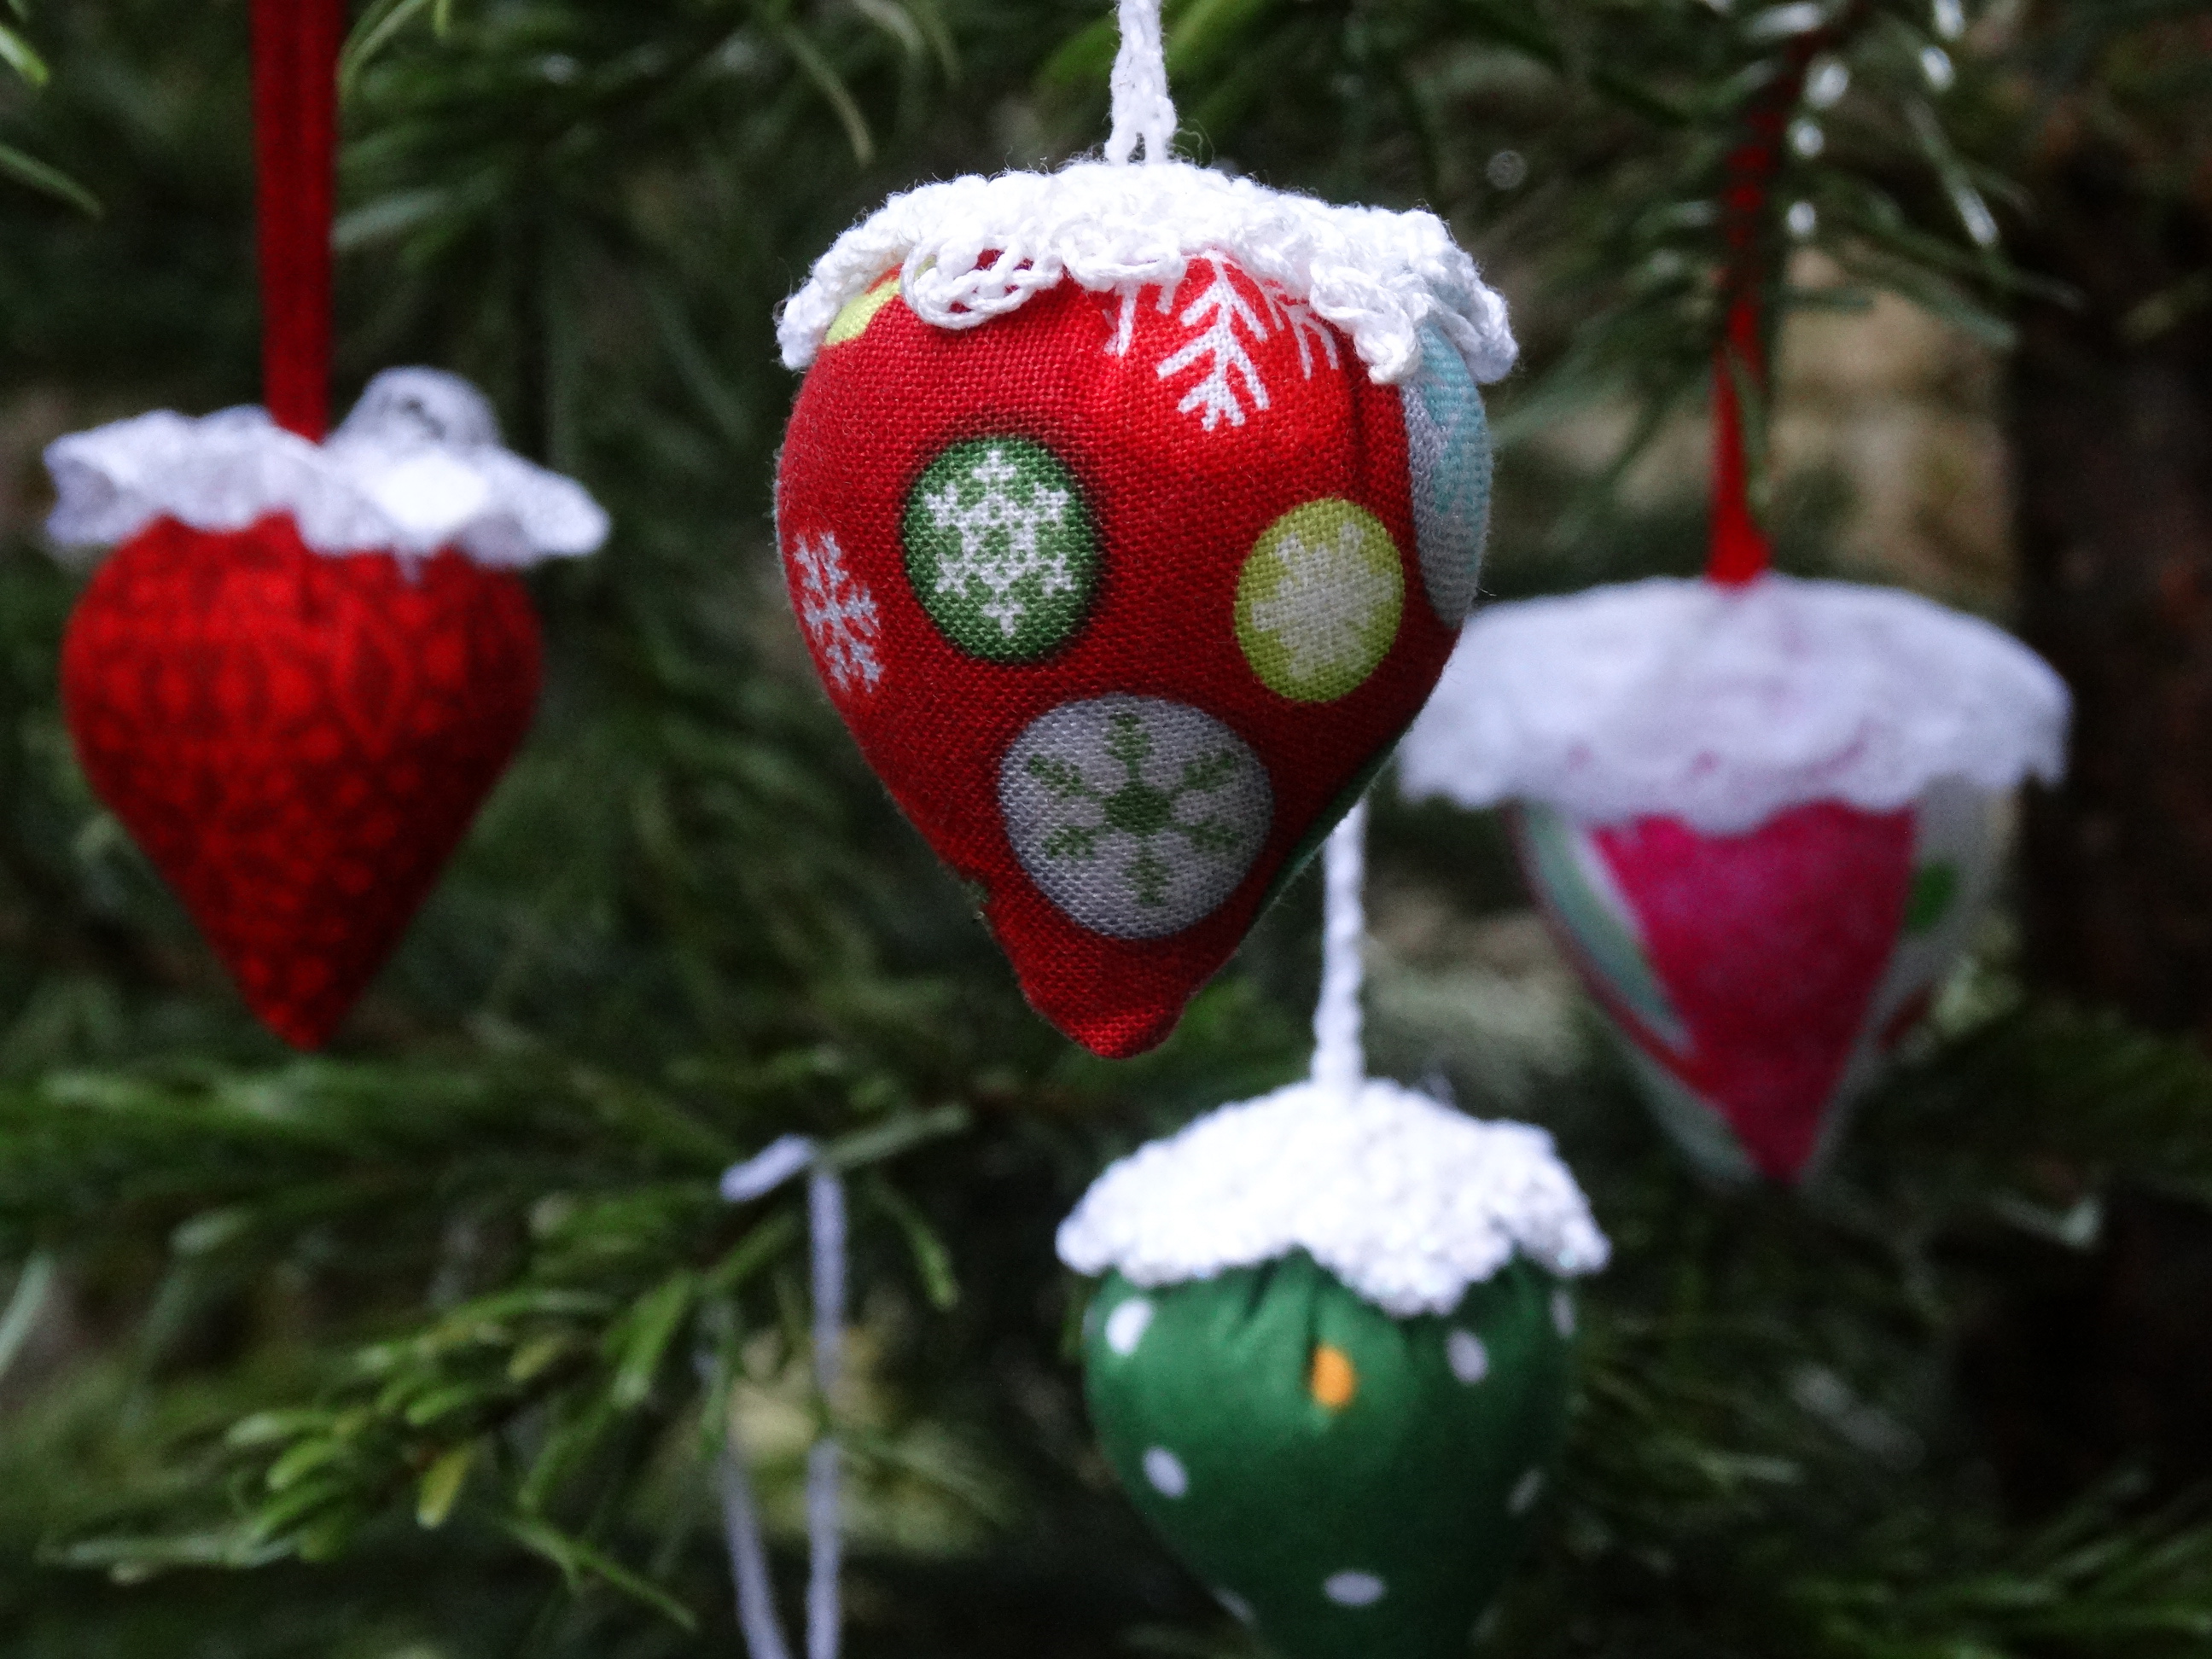 If you have ever made a strawberry pincushion then you will know exactly where I got the inspiration for these beauties from, if you haven’t then let me assure you that these decorations are very easy to make up and even if you don’t want to make some tree decorations you can always try your hand at some pincushions.
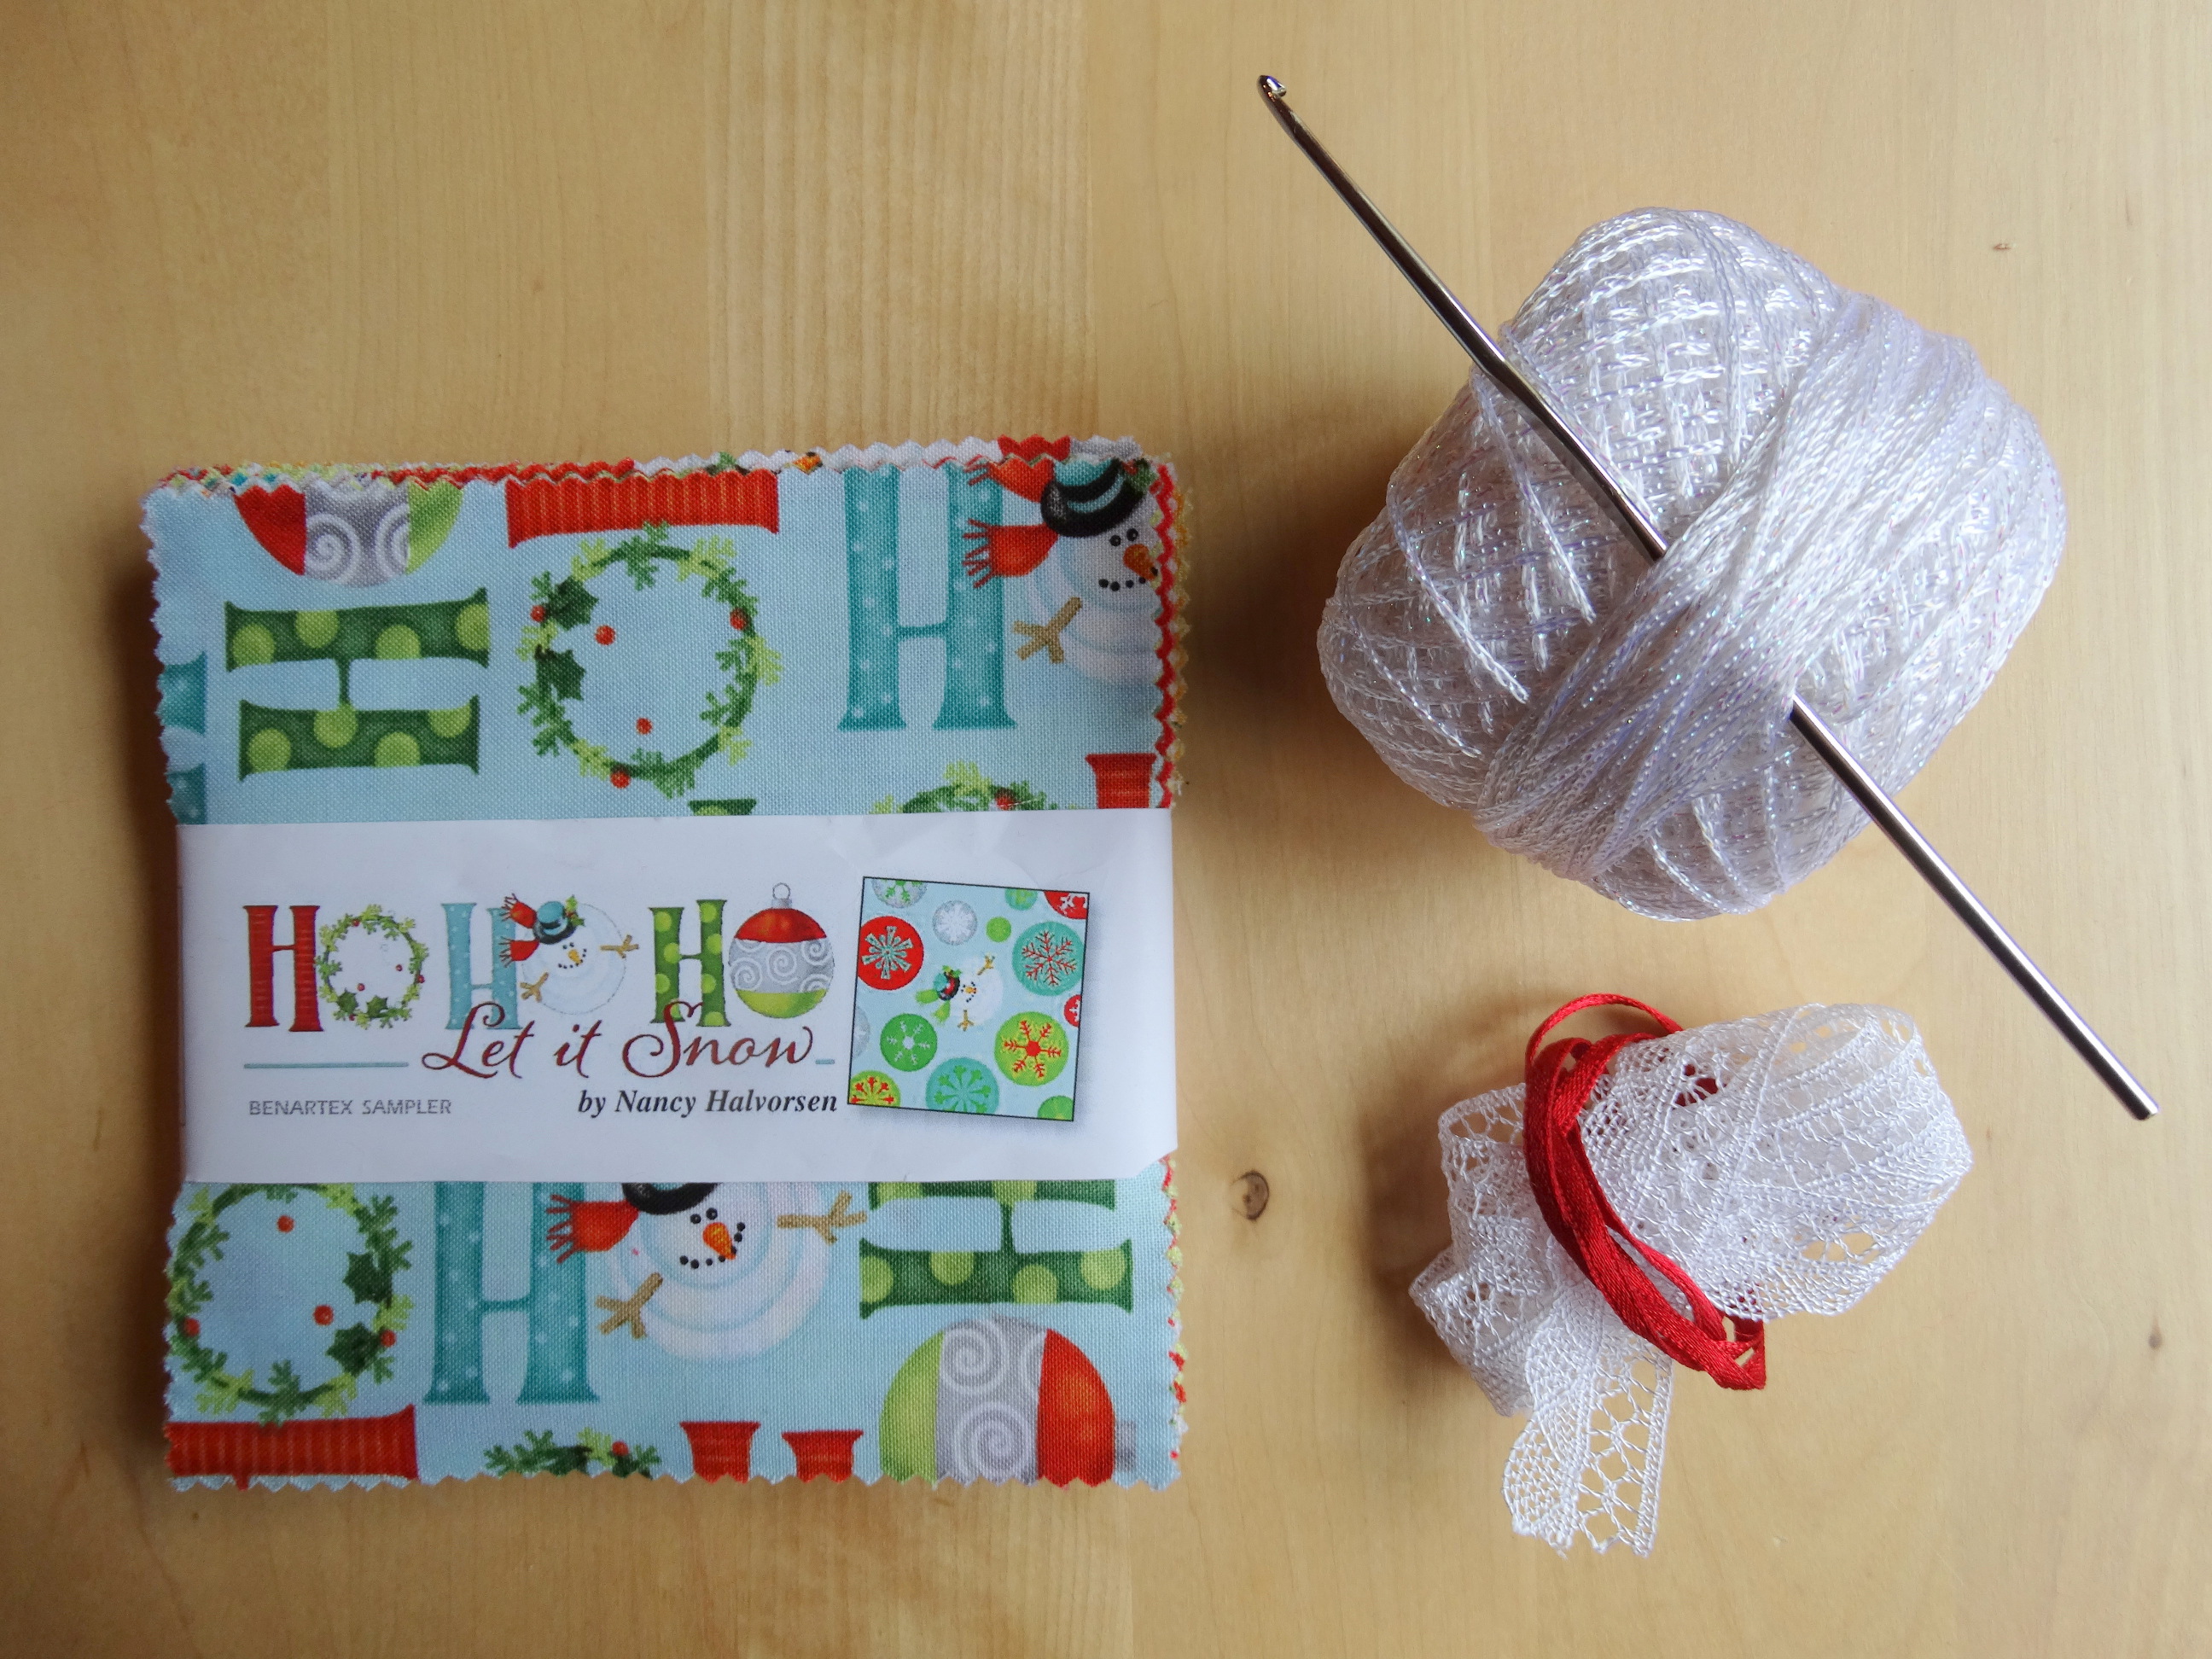
First you will need to gather your materials. These decorations do not use much material so are ideal for using up scraps, charm squares and left over jelly roll strips. In addition to fabric you will need
- scissors
- needle and thread
- crochet cotton size 10
- 0.75mm crochet hook
- stuffing
- optional embellishments (ribbon, lace, beads, etc.)
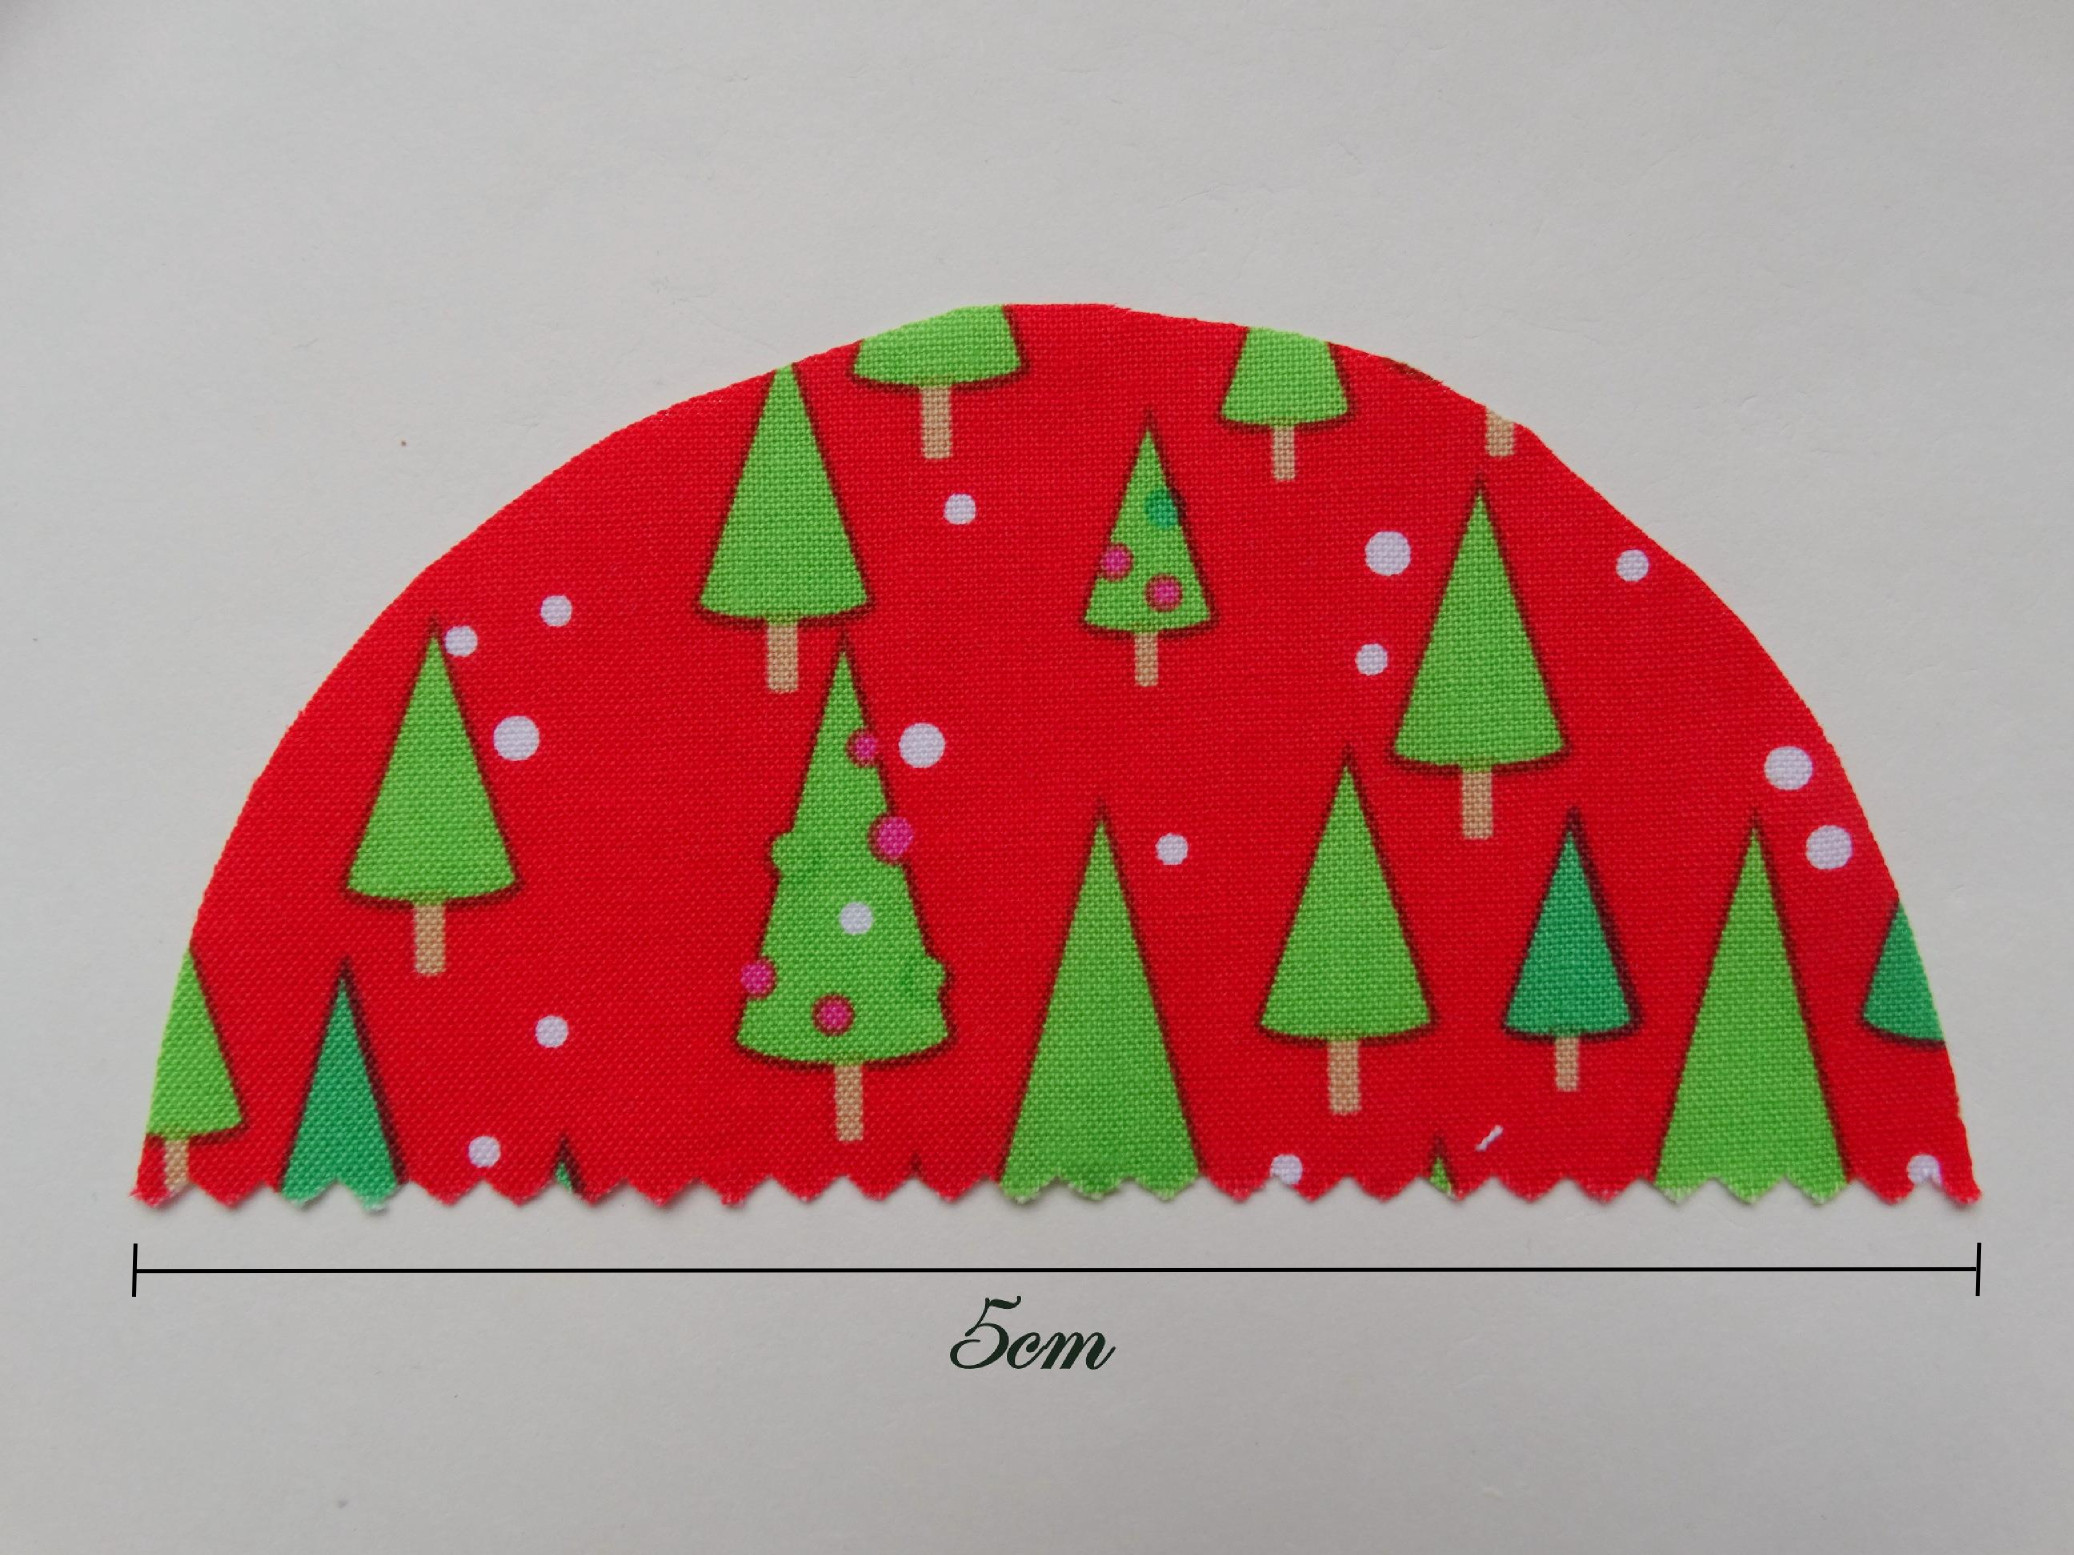
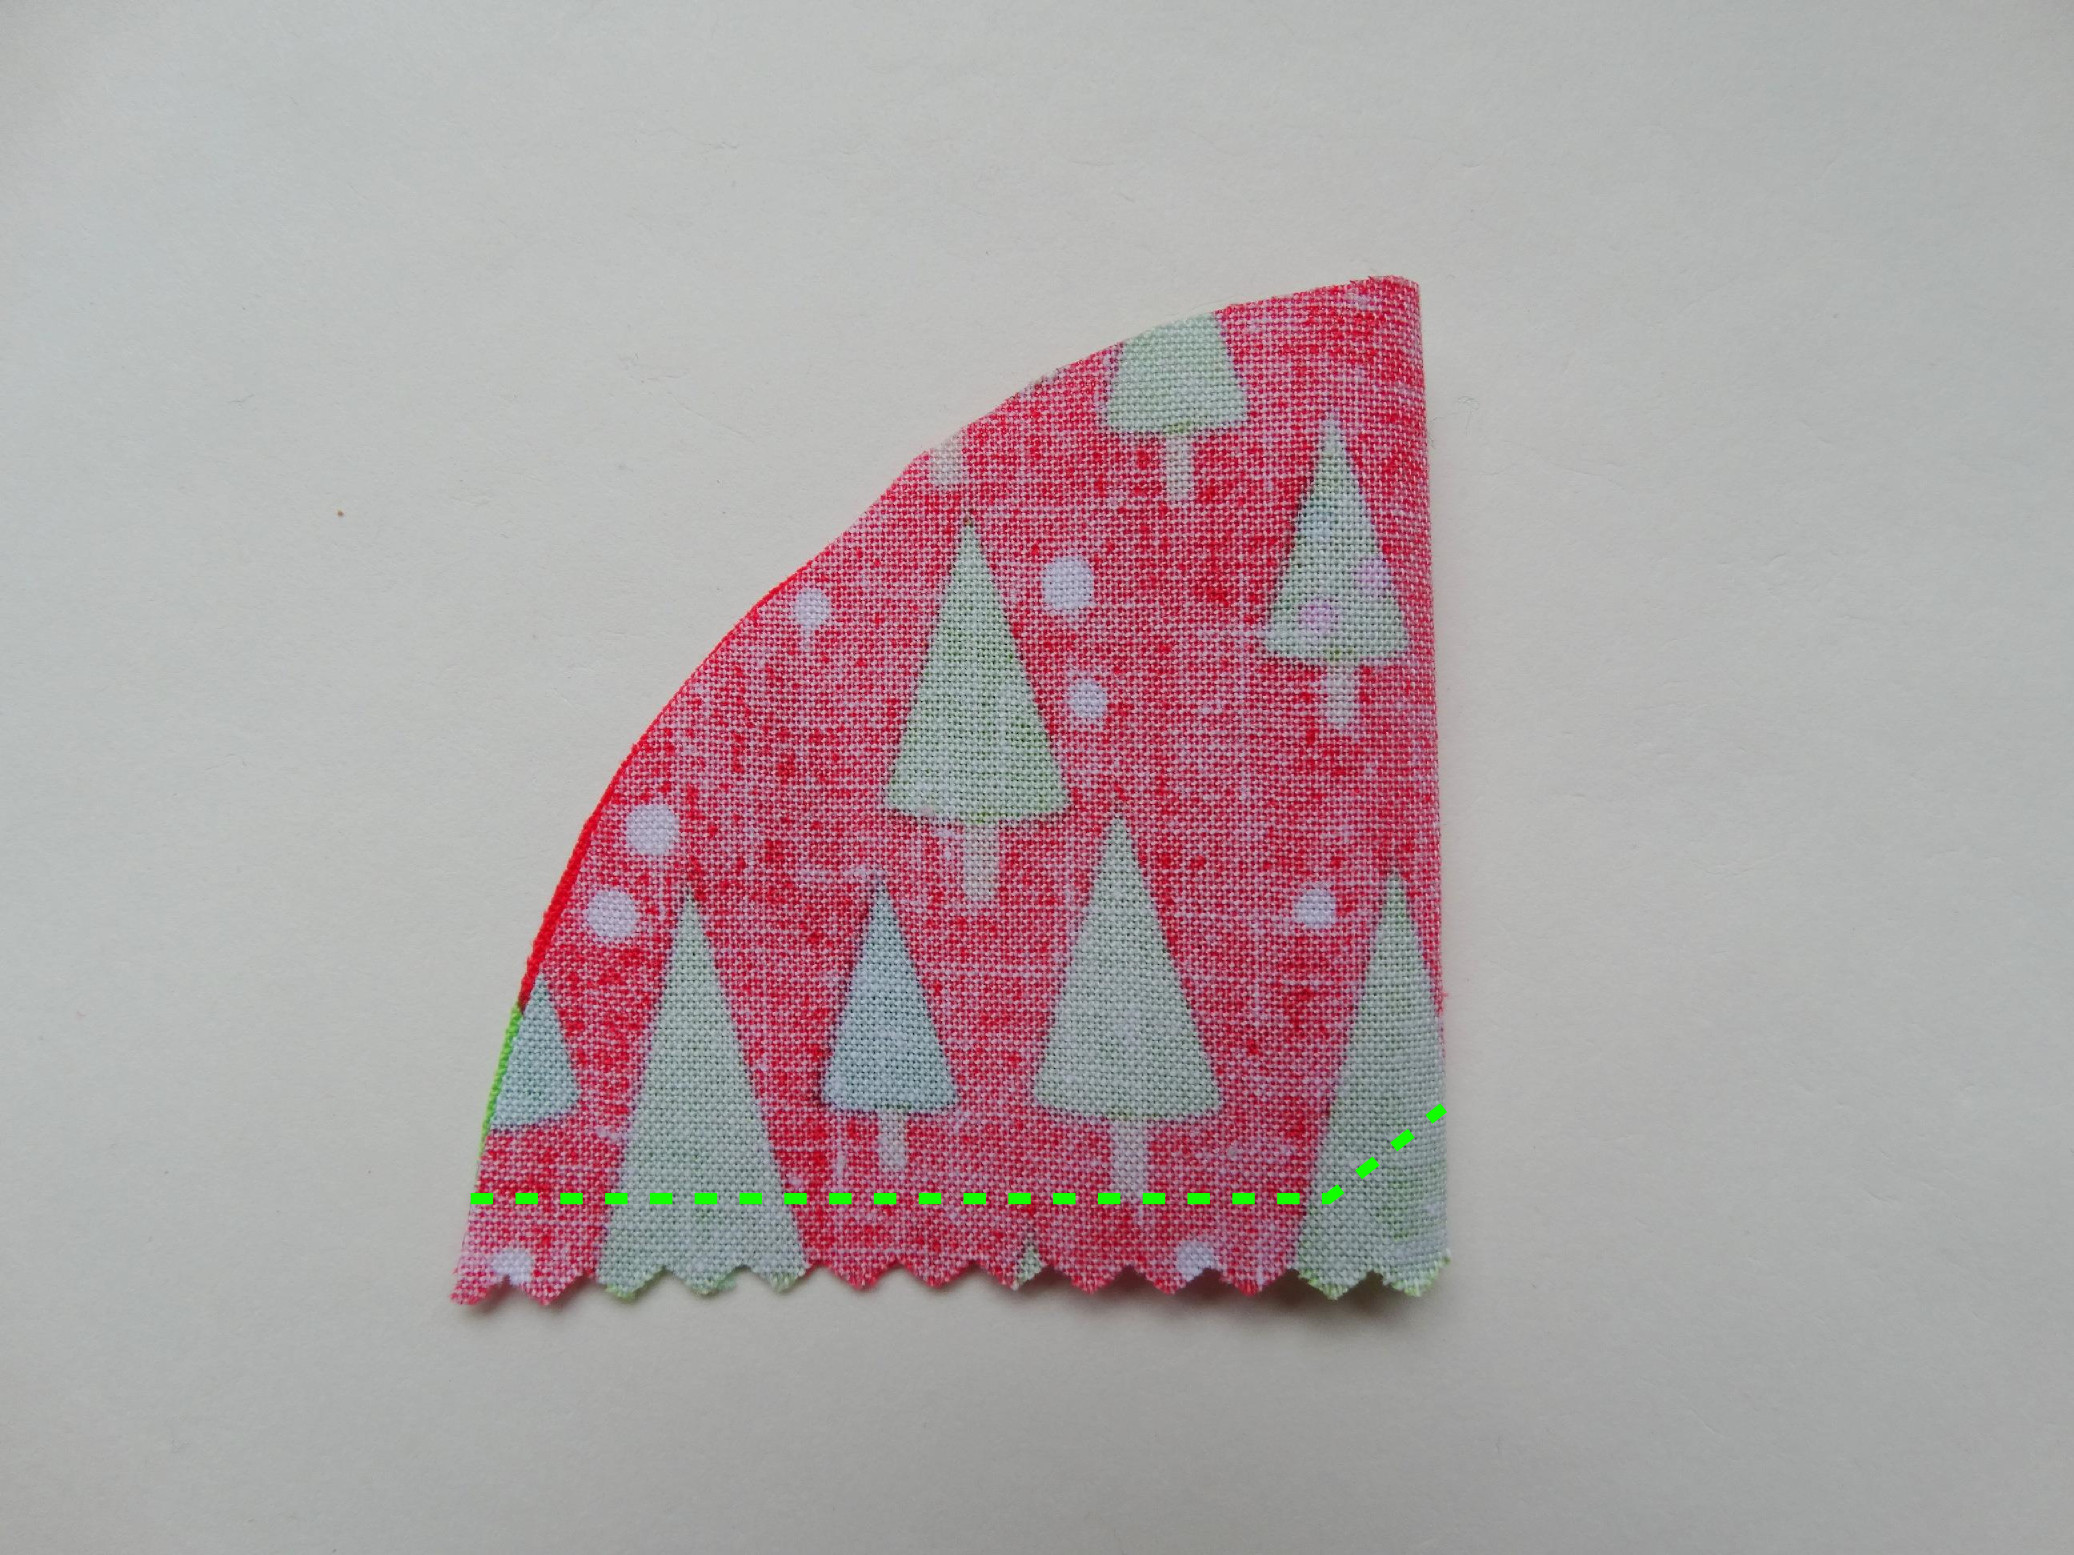
 To start you will need to create a template for cutting out your pattern. Each decoration is made from a half circle of fabric 5″ in diameter. To make a cutting template draw a circle 5″ is diameter, cut it out, fold/cut it in half and you are ready to go.
Once you have your template use it to cut out one half circle of fabric for each decoration you wish to make.
 Fold the piece of fabric in half, right sides together and sew a quarter inch seam as indicated in the photo below. I prefer a slightly rounded end to my decoration, hence the bend in the seam at the end. If you prefer a more pointed tip then just sew a straight seam to the tip.
 Turn the decoration right side out and using a double thread run a line of gathering stitched around the open top of the decoration.
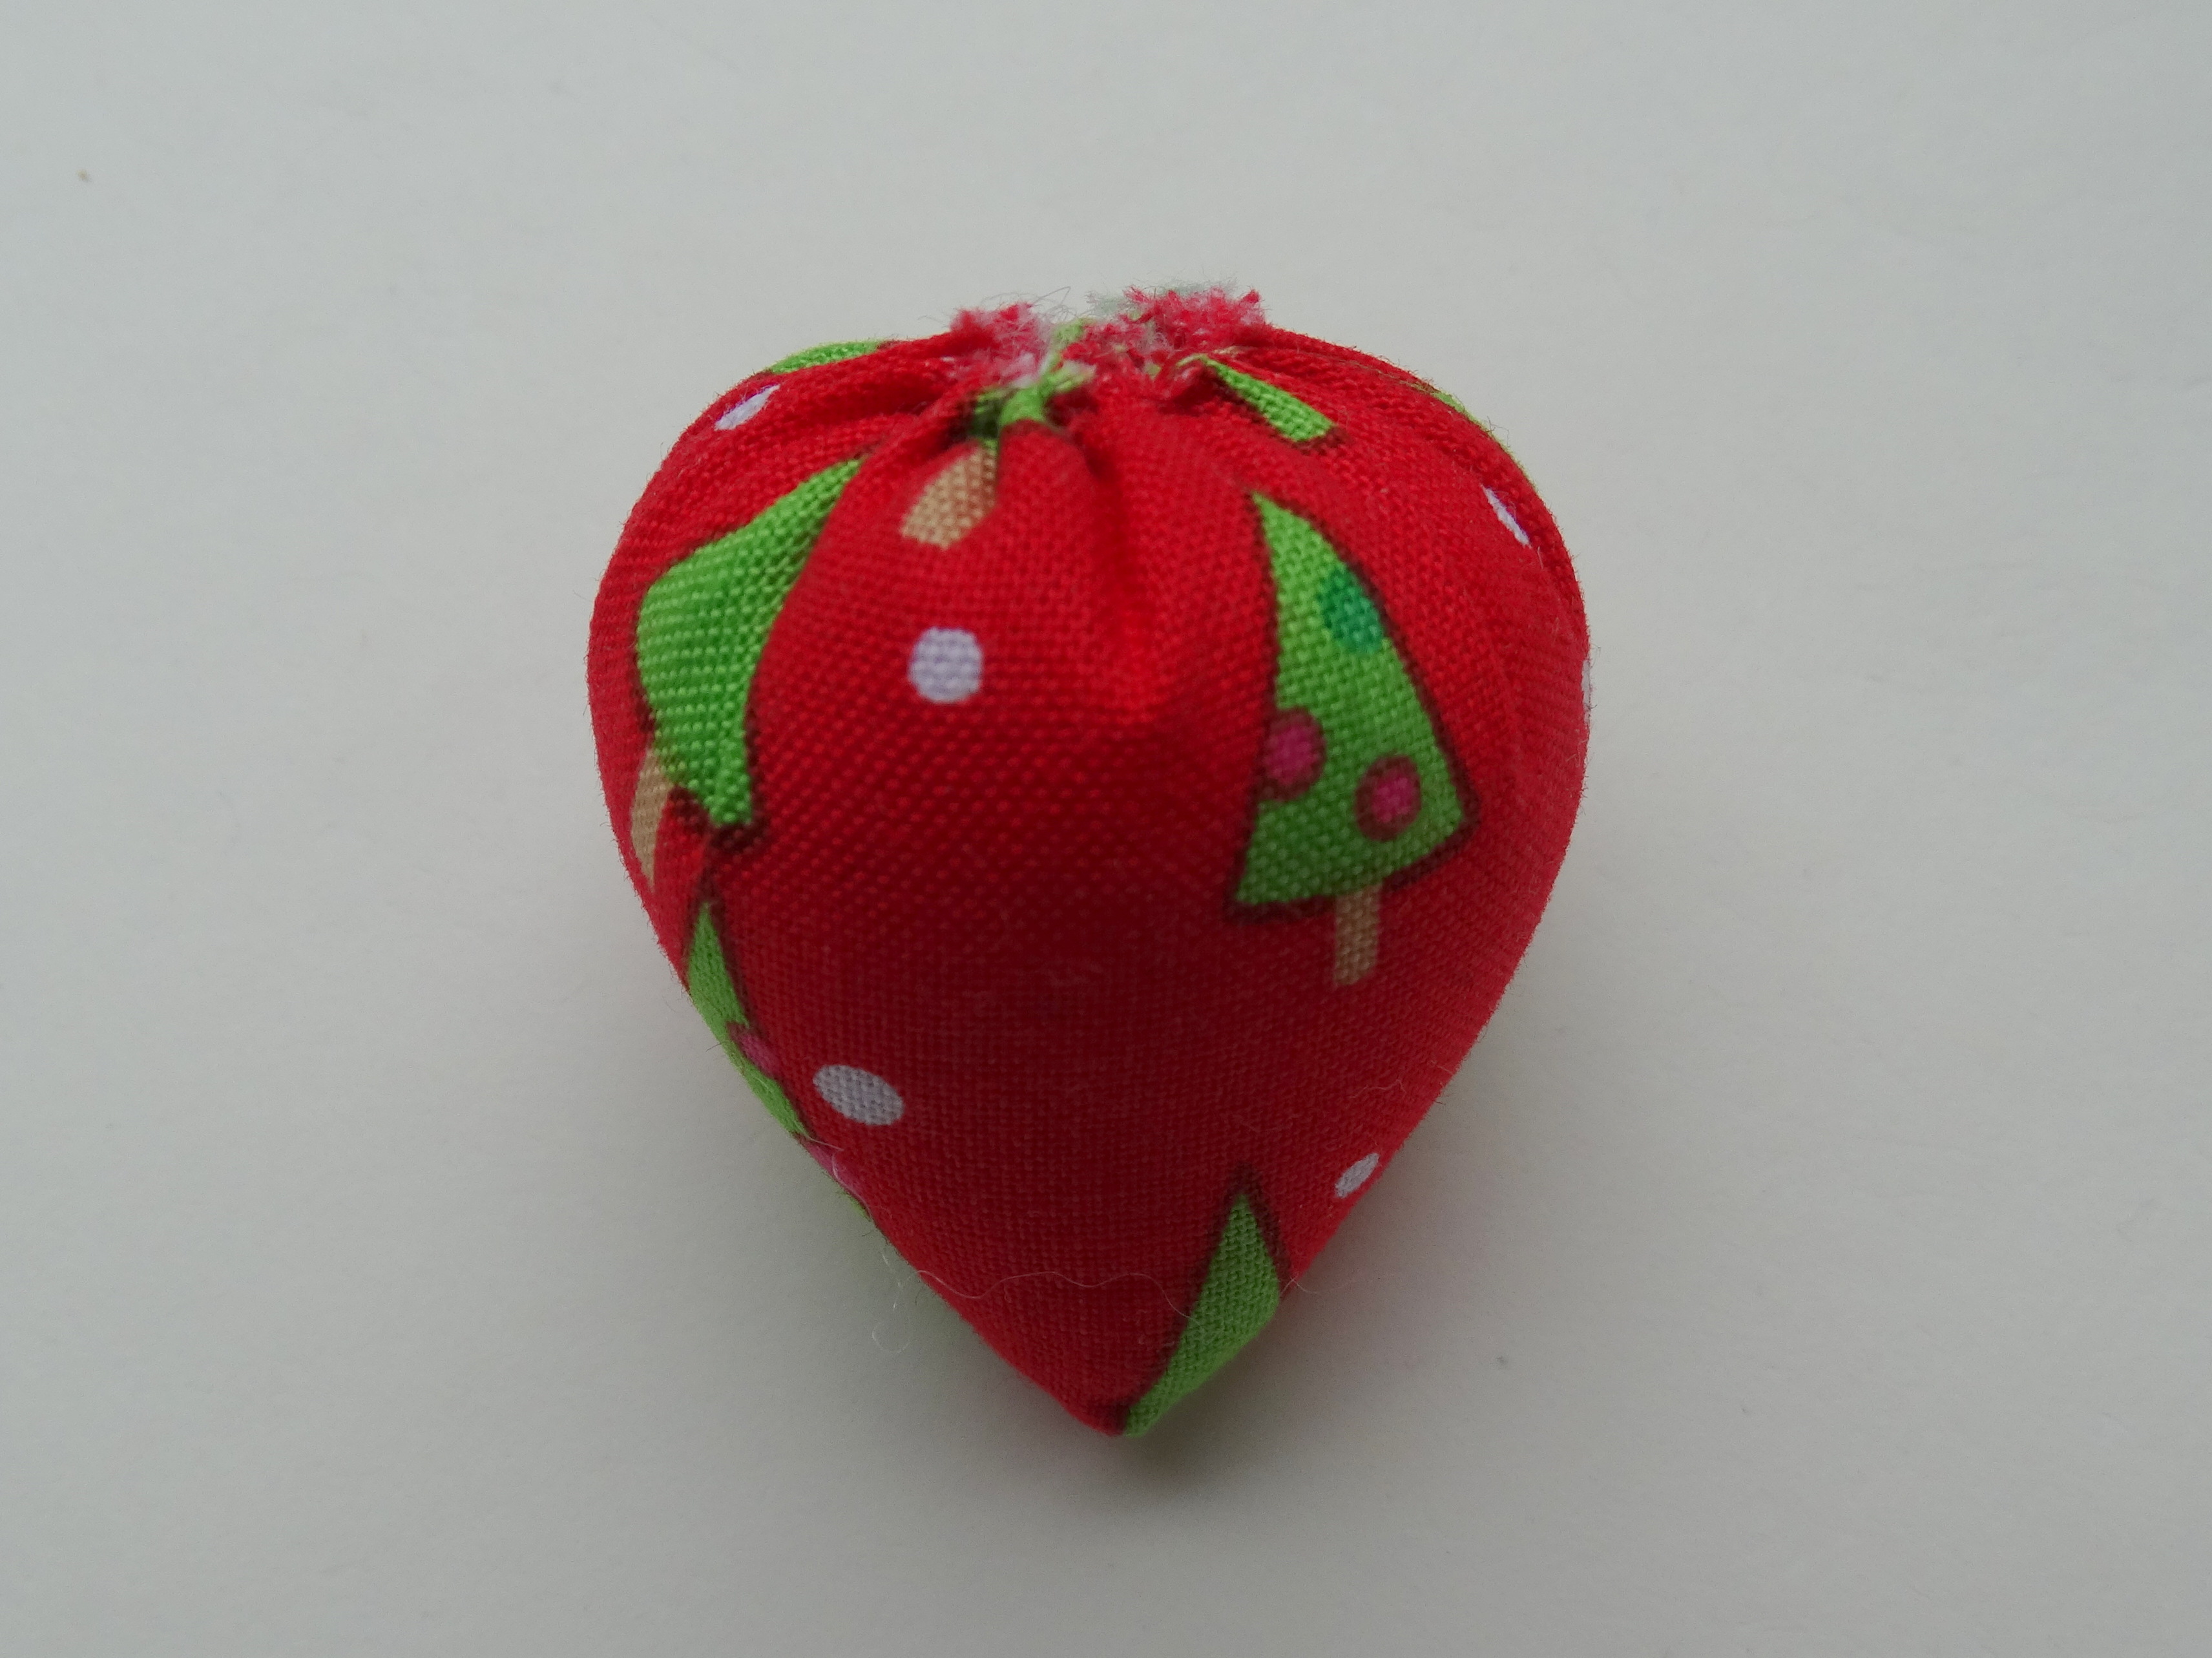
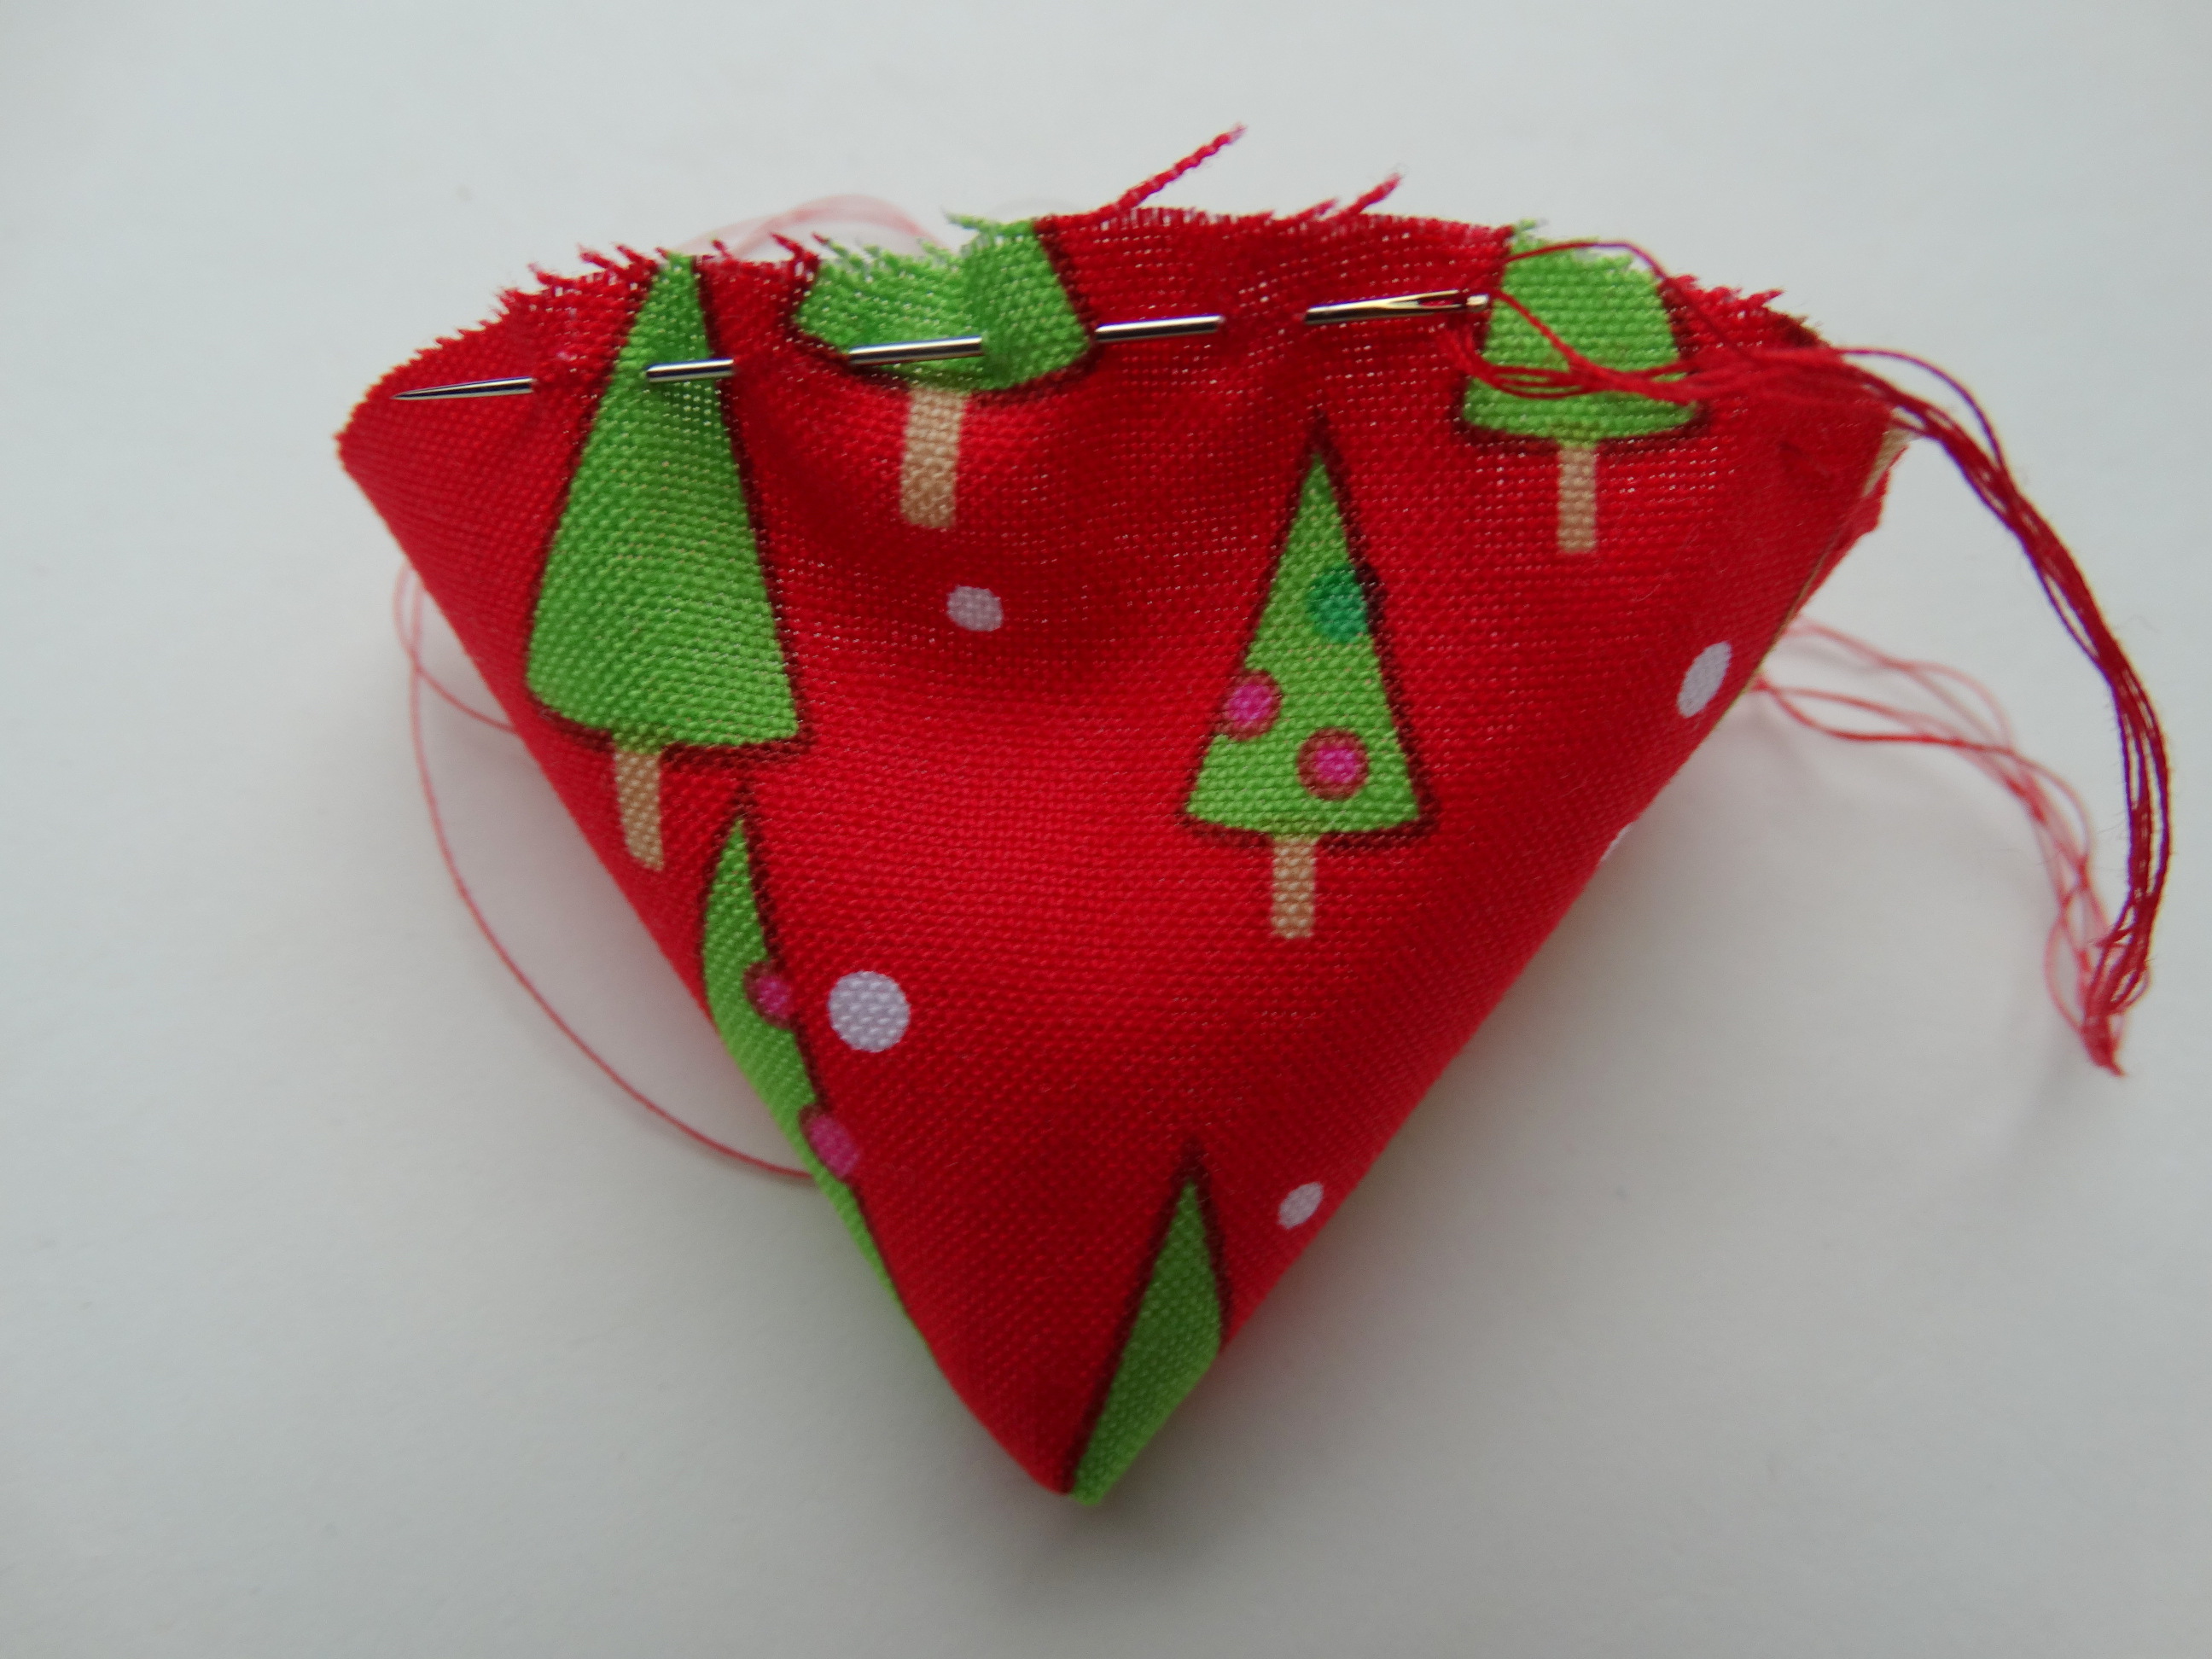 Stuff the decoration with your chosen stuffing and then draw the gathering stitches closed and fix with a few stitches.
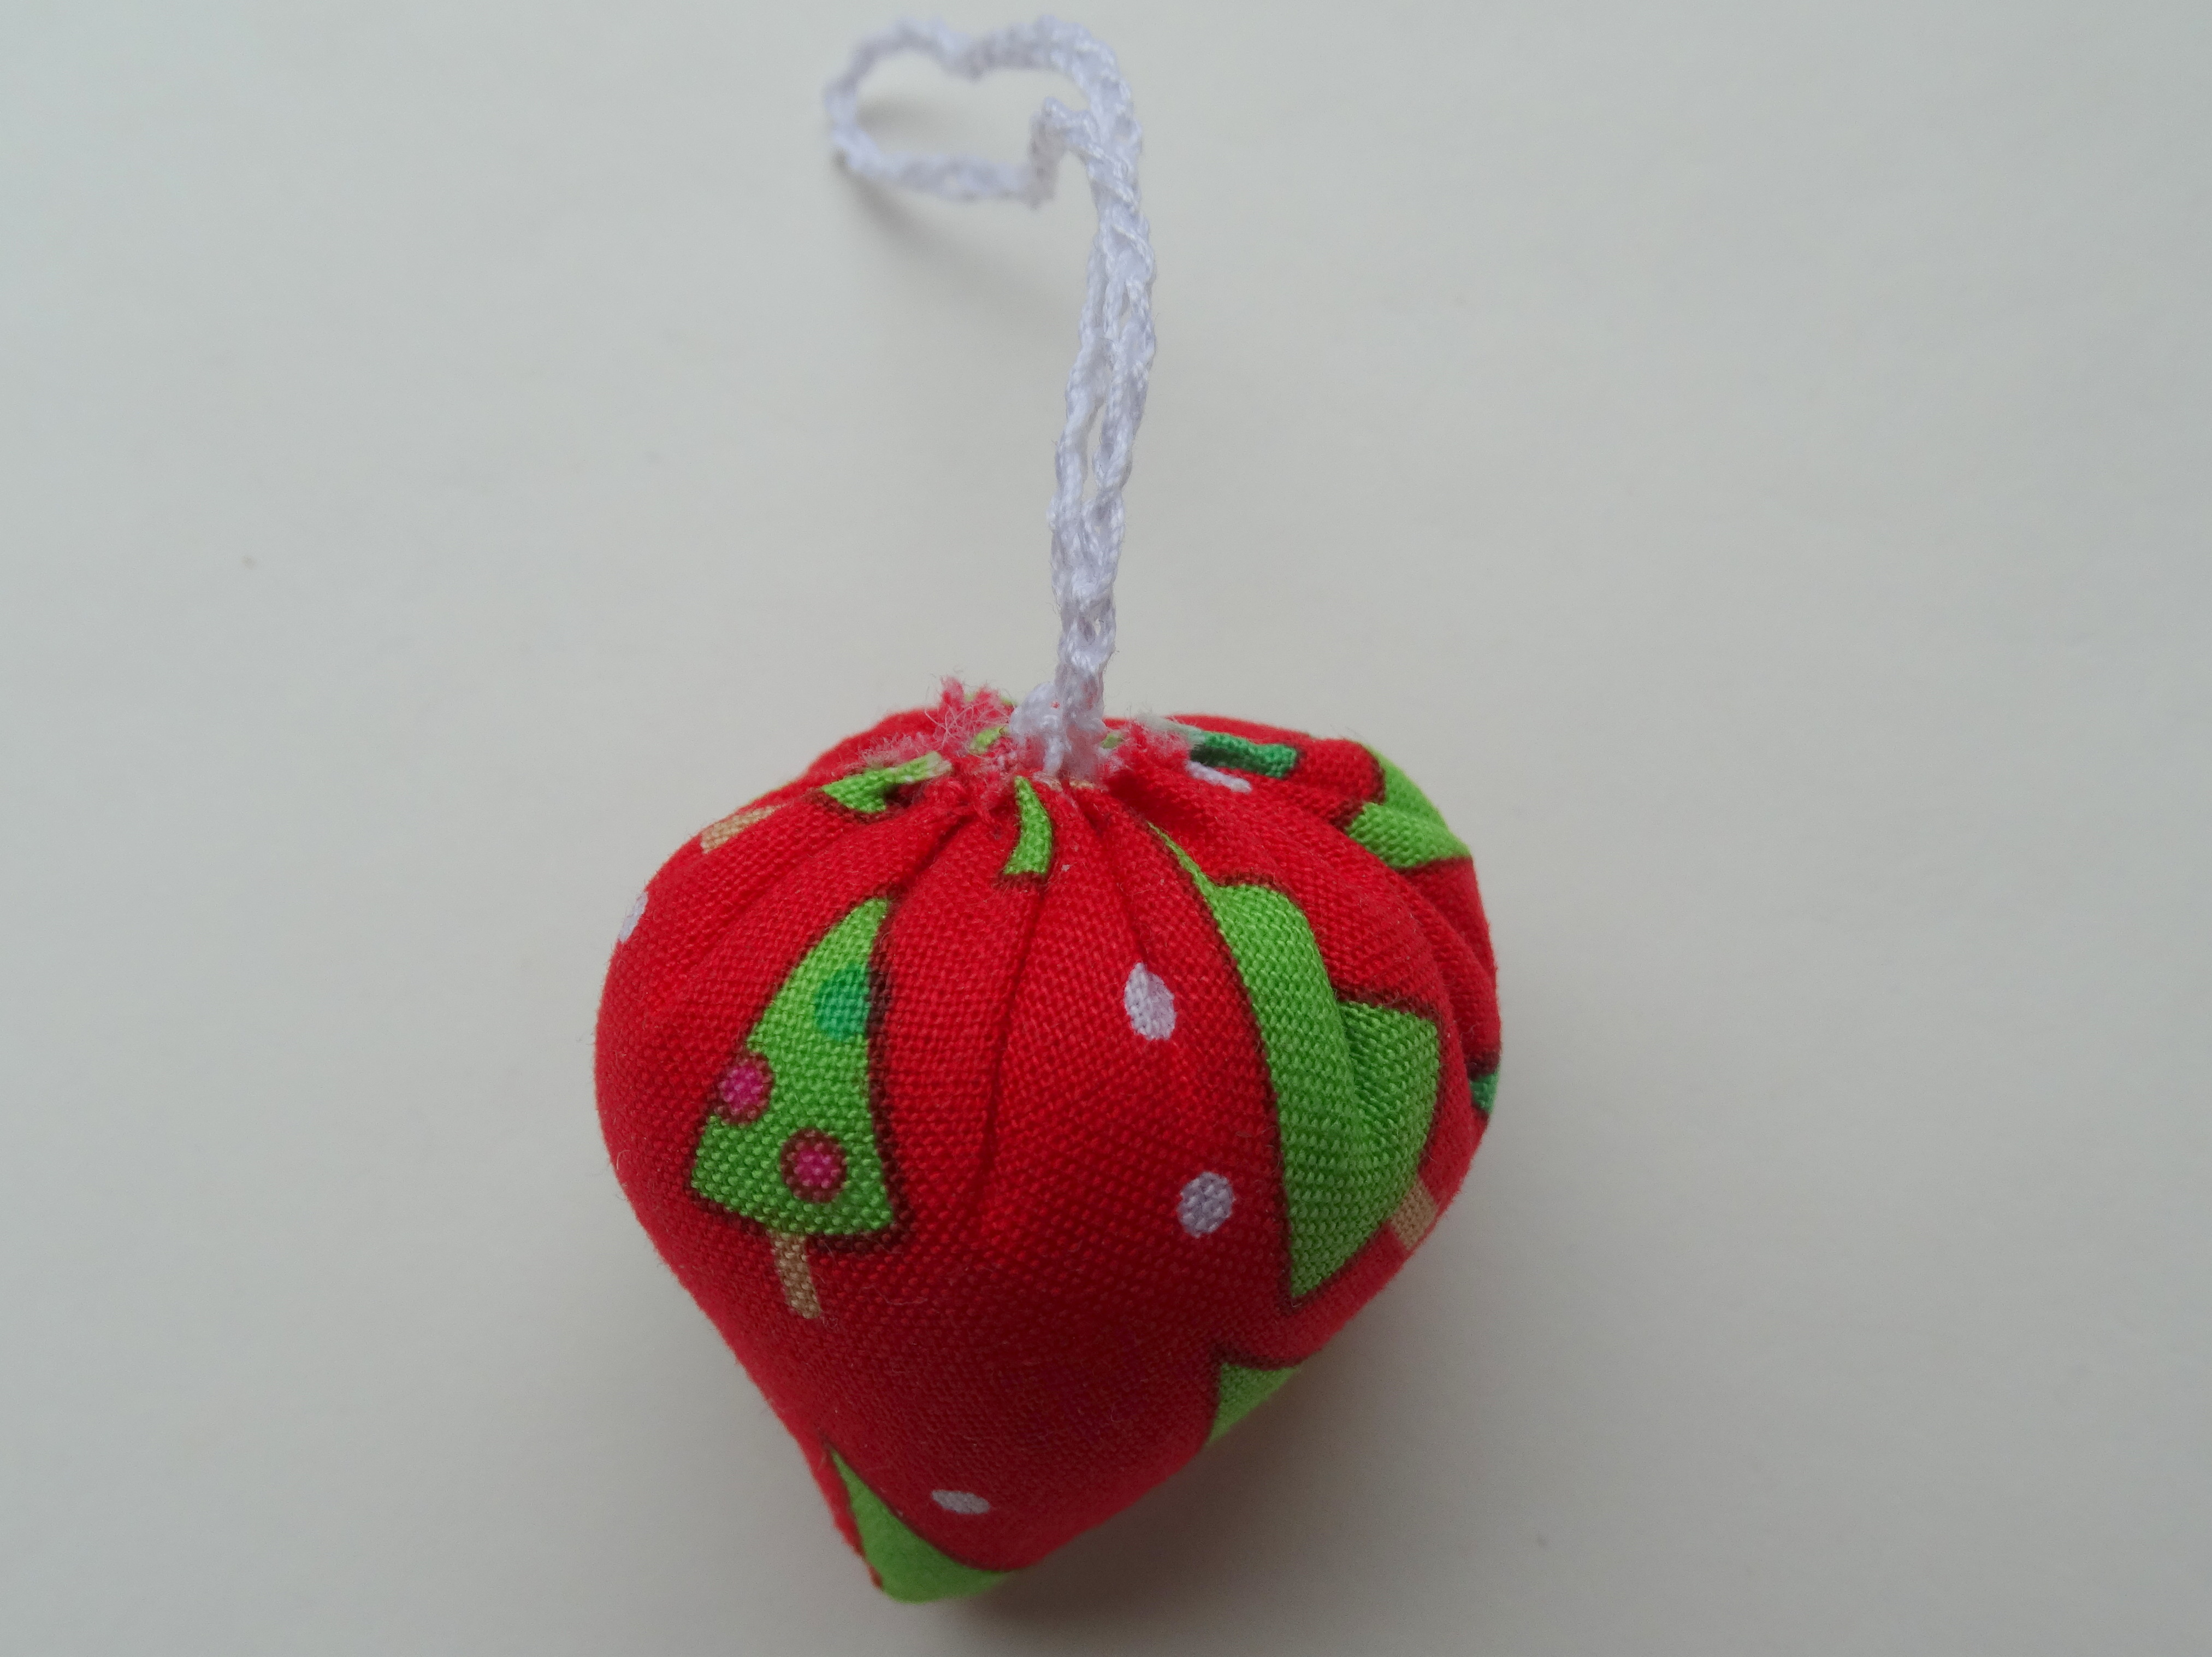
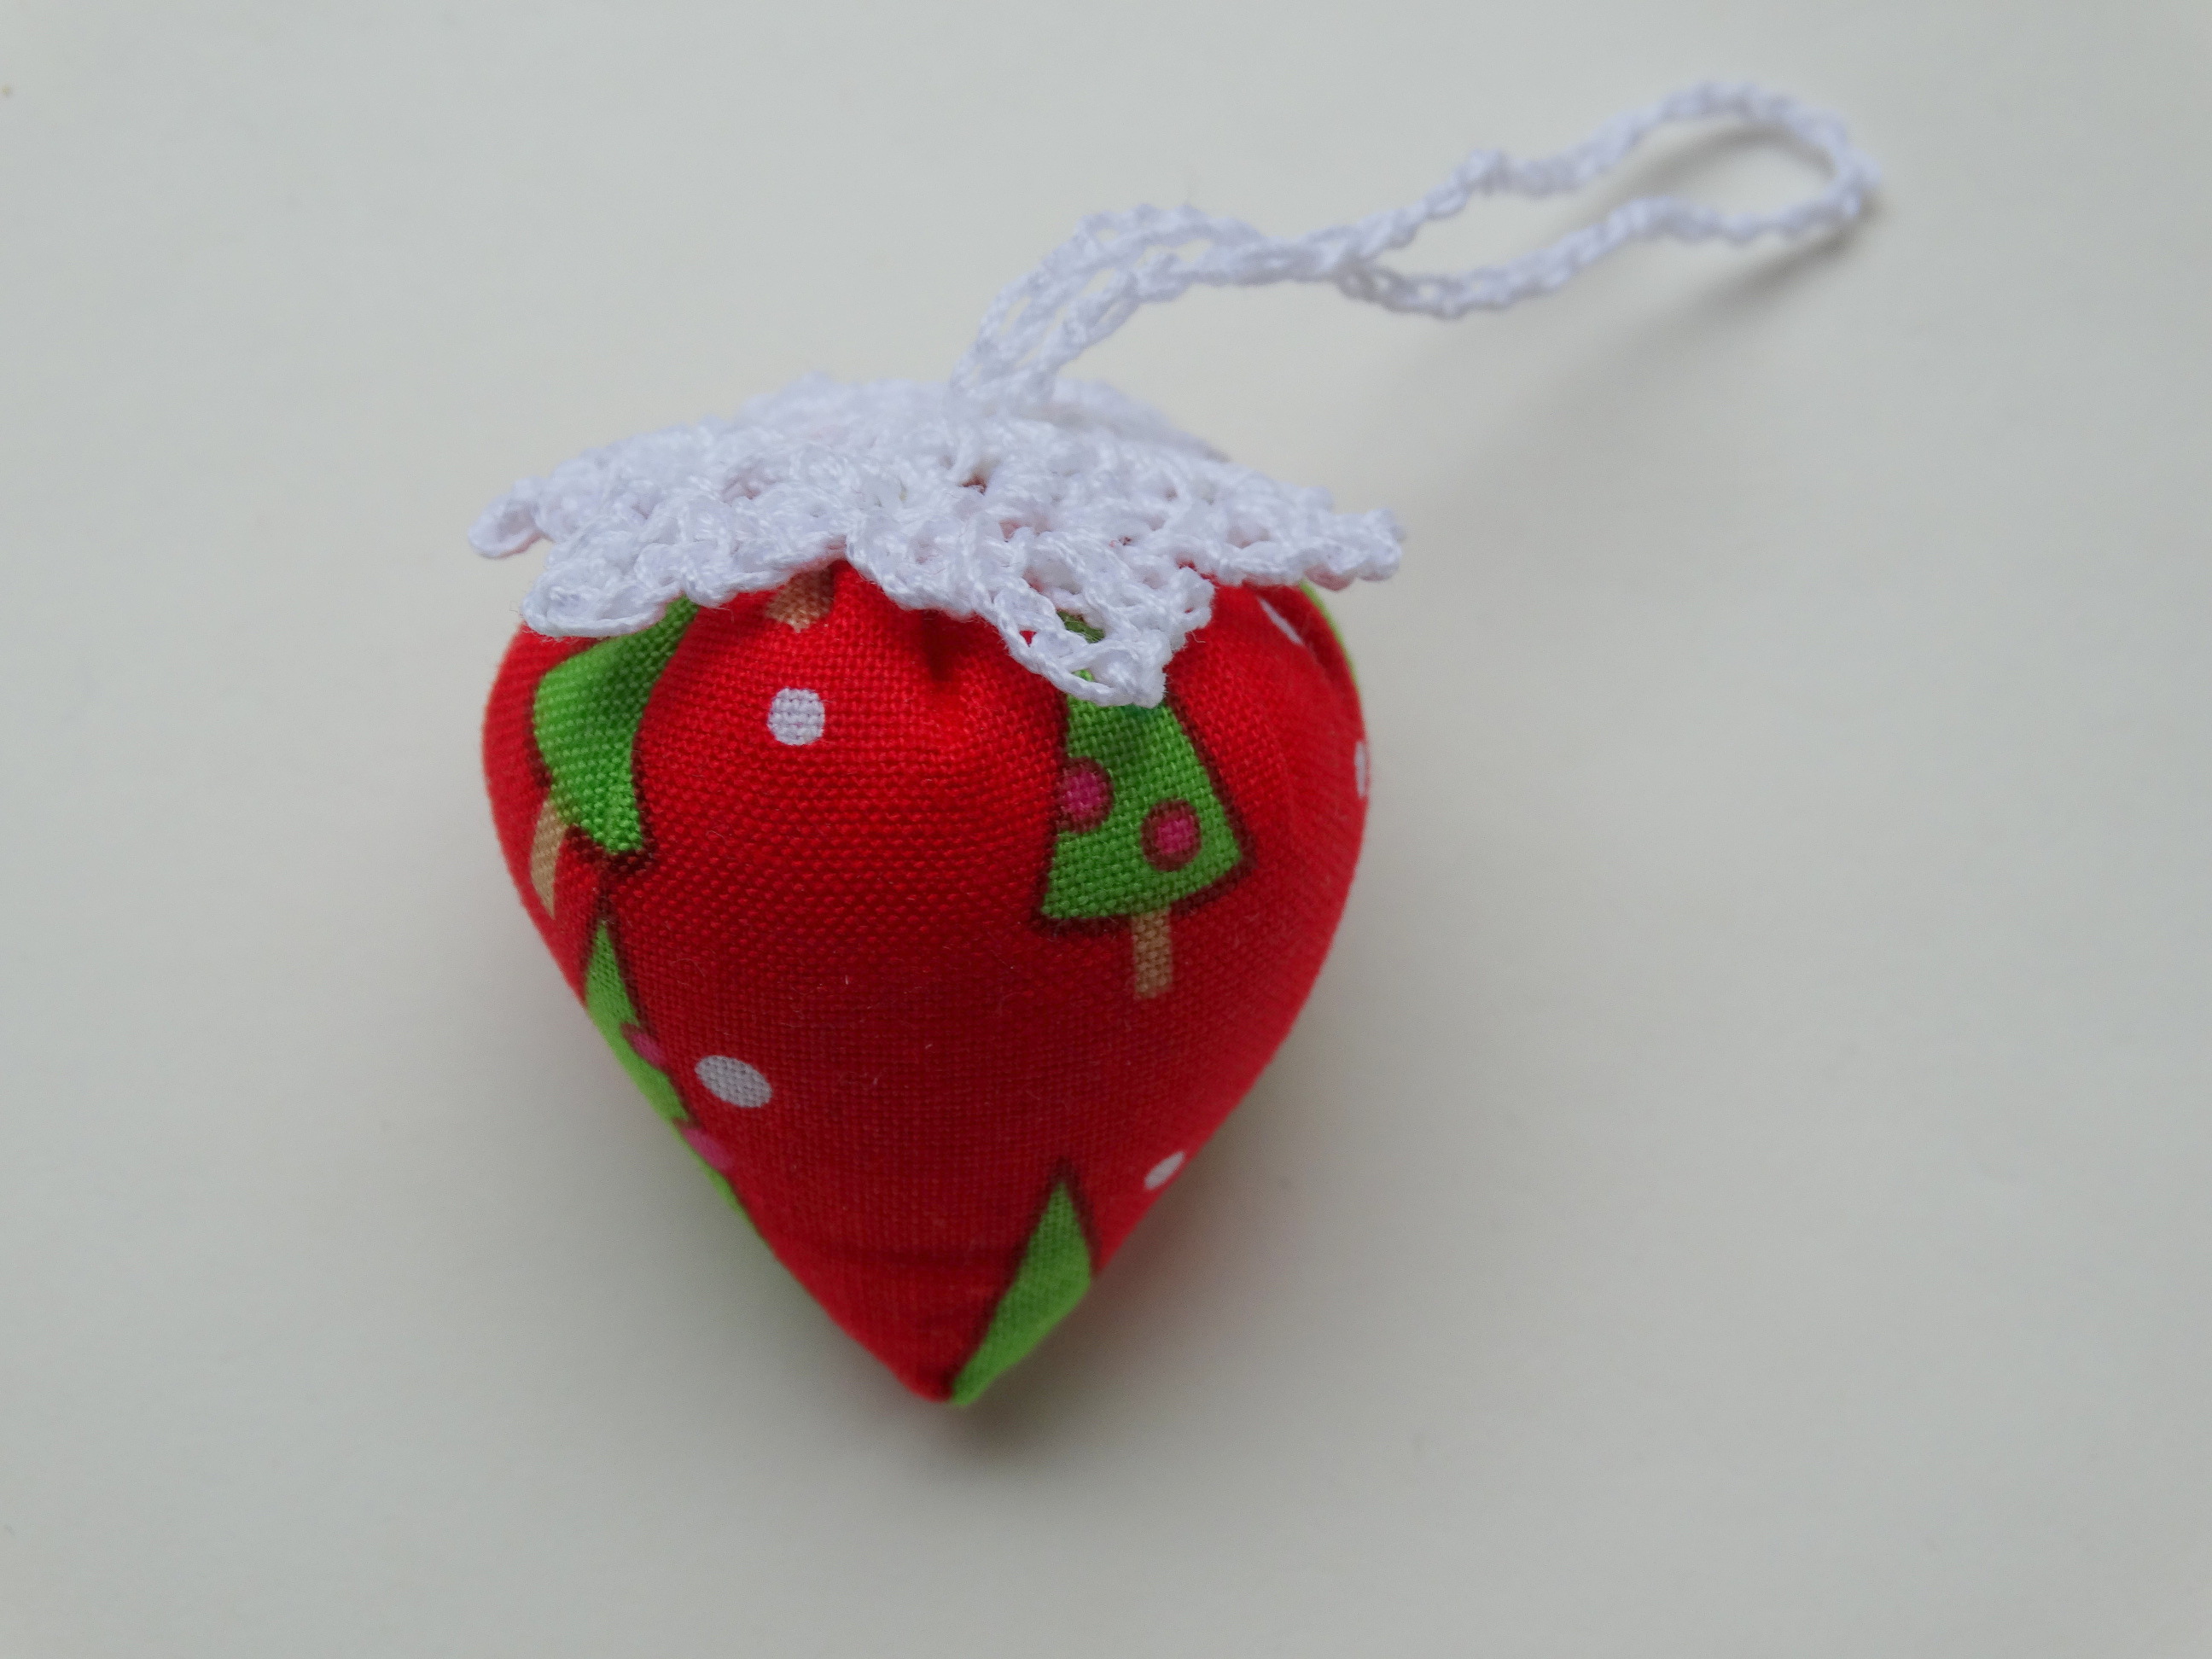
 The hanging loop for the ornament is simply created by crocheting a length of 40 chain. Once fastened off, the start and end threads of the chain length can be used to attach it to the ornament.
 The final addition to the ornament is crocheted snowflake. I use the following pattern which results in a snowflake approx 1.5″ in diameter. Please note that these instructions are in the UK format and use the following abbreviations: ch (chain), sl st (slip stitch), dc (double crochet). For those of you who follow the US format then simply replace the dc with an sc (single crochet) in the pattern.
To start: Ch 5 and sl st into the first ch to form a ring.
Round 1: Ch 1, 1 dc in ring, ch 3, (2 dc in ring, ch 3) 5 times, sl st into first ch
Round 2: Sl st into first chain loop. Into this first chain loop work ch 1, 1 dc, ch 3, 2 dc. Into each of the remaining 5 chain loops work 2dc, ch 3, 2dc. Sl st into first ch.
Round 3: Sl st into the first chain loop created in the previous round. Work 1dc, ch 3, 1dc, ch 5, 1dc, ch 3, 1dc, ch 2 in this and each of the following five loops. Sl st into first dc and fasten off
Once the snowflake is completed and the threads finished off you simply thread it in place on the hanging chain through the central starting ring and secure in place with a few stitches in matching thread. Your ornament is now finished.
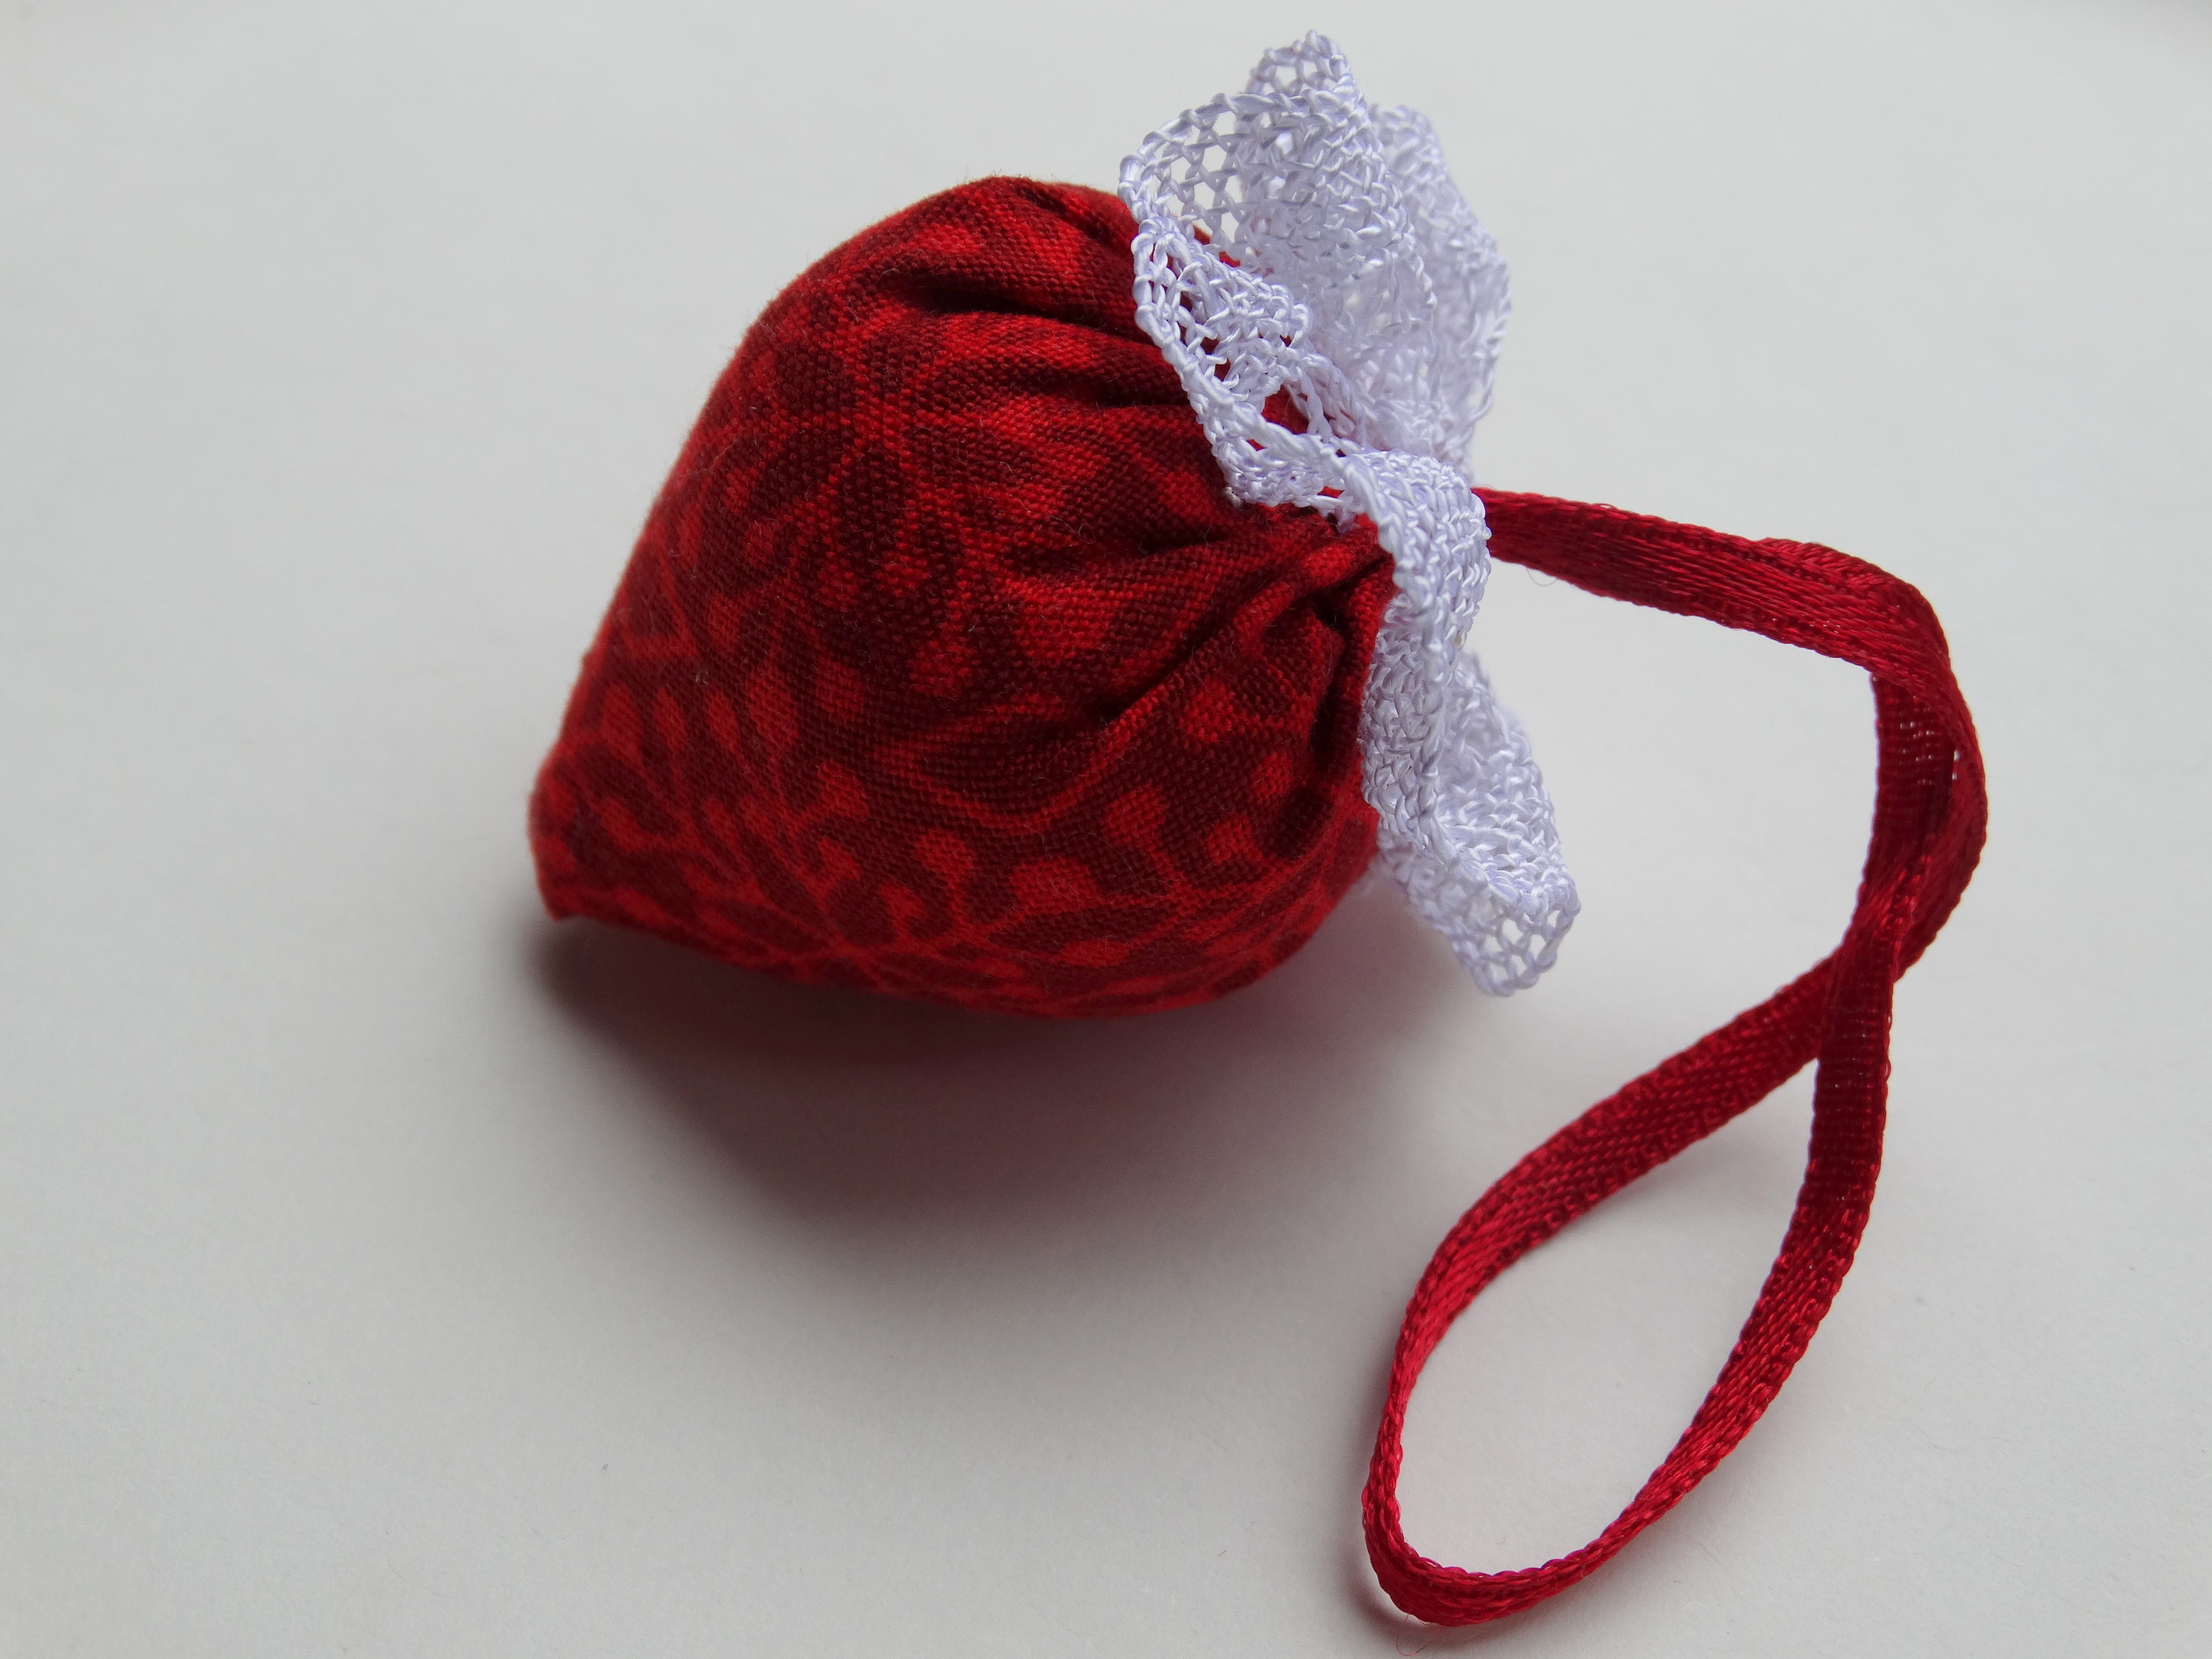
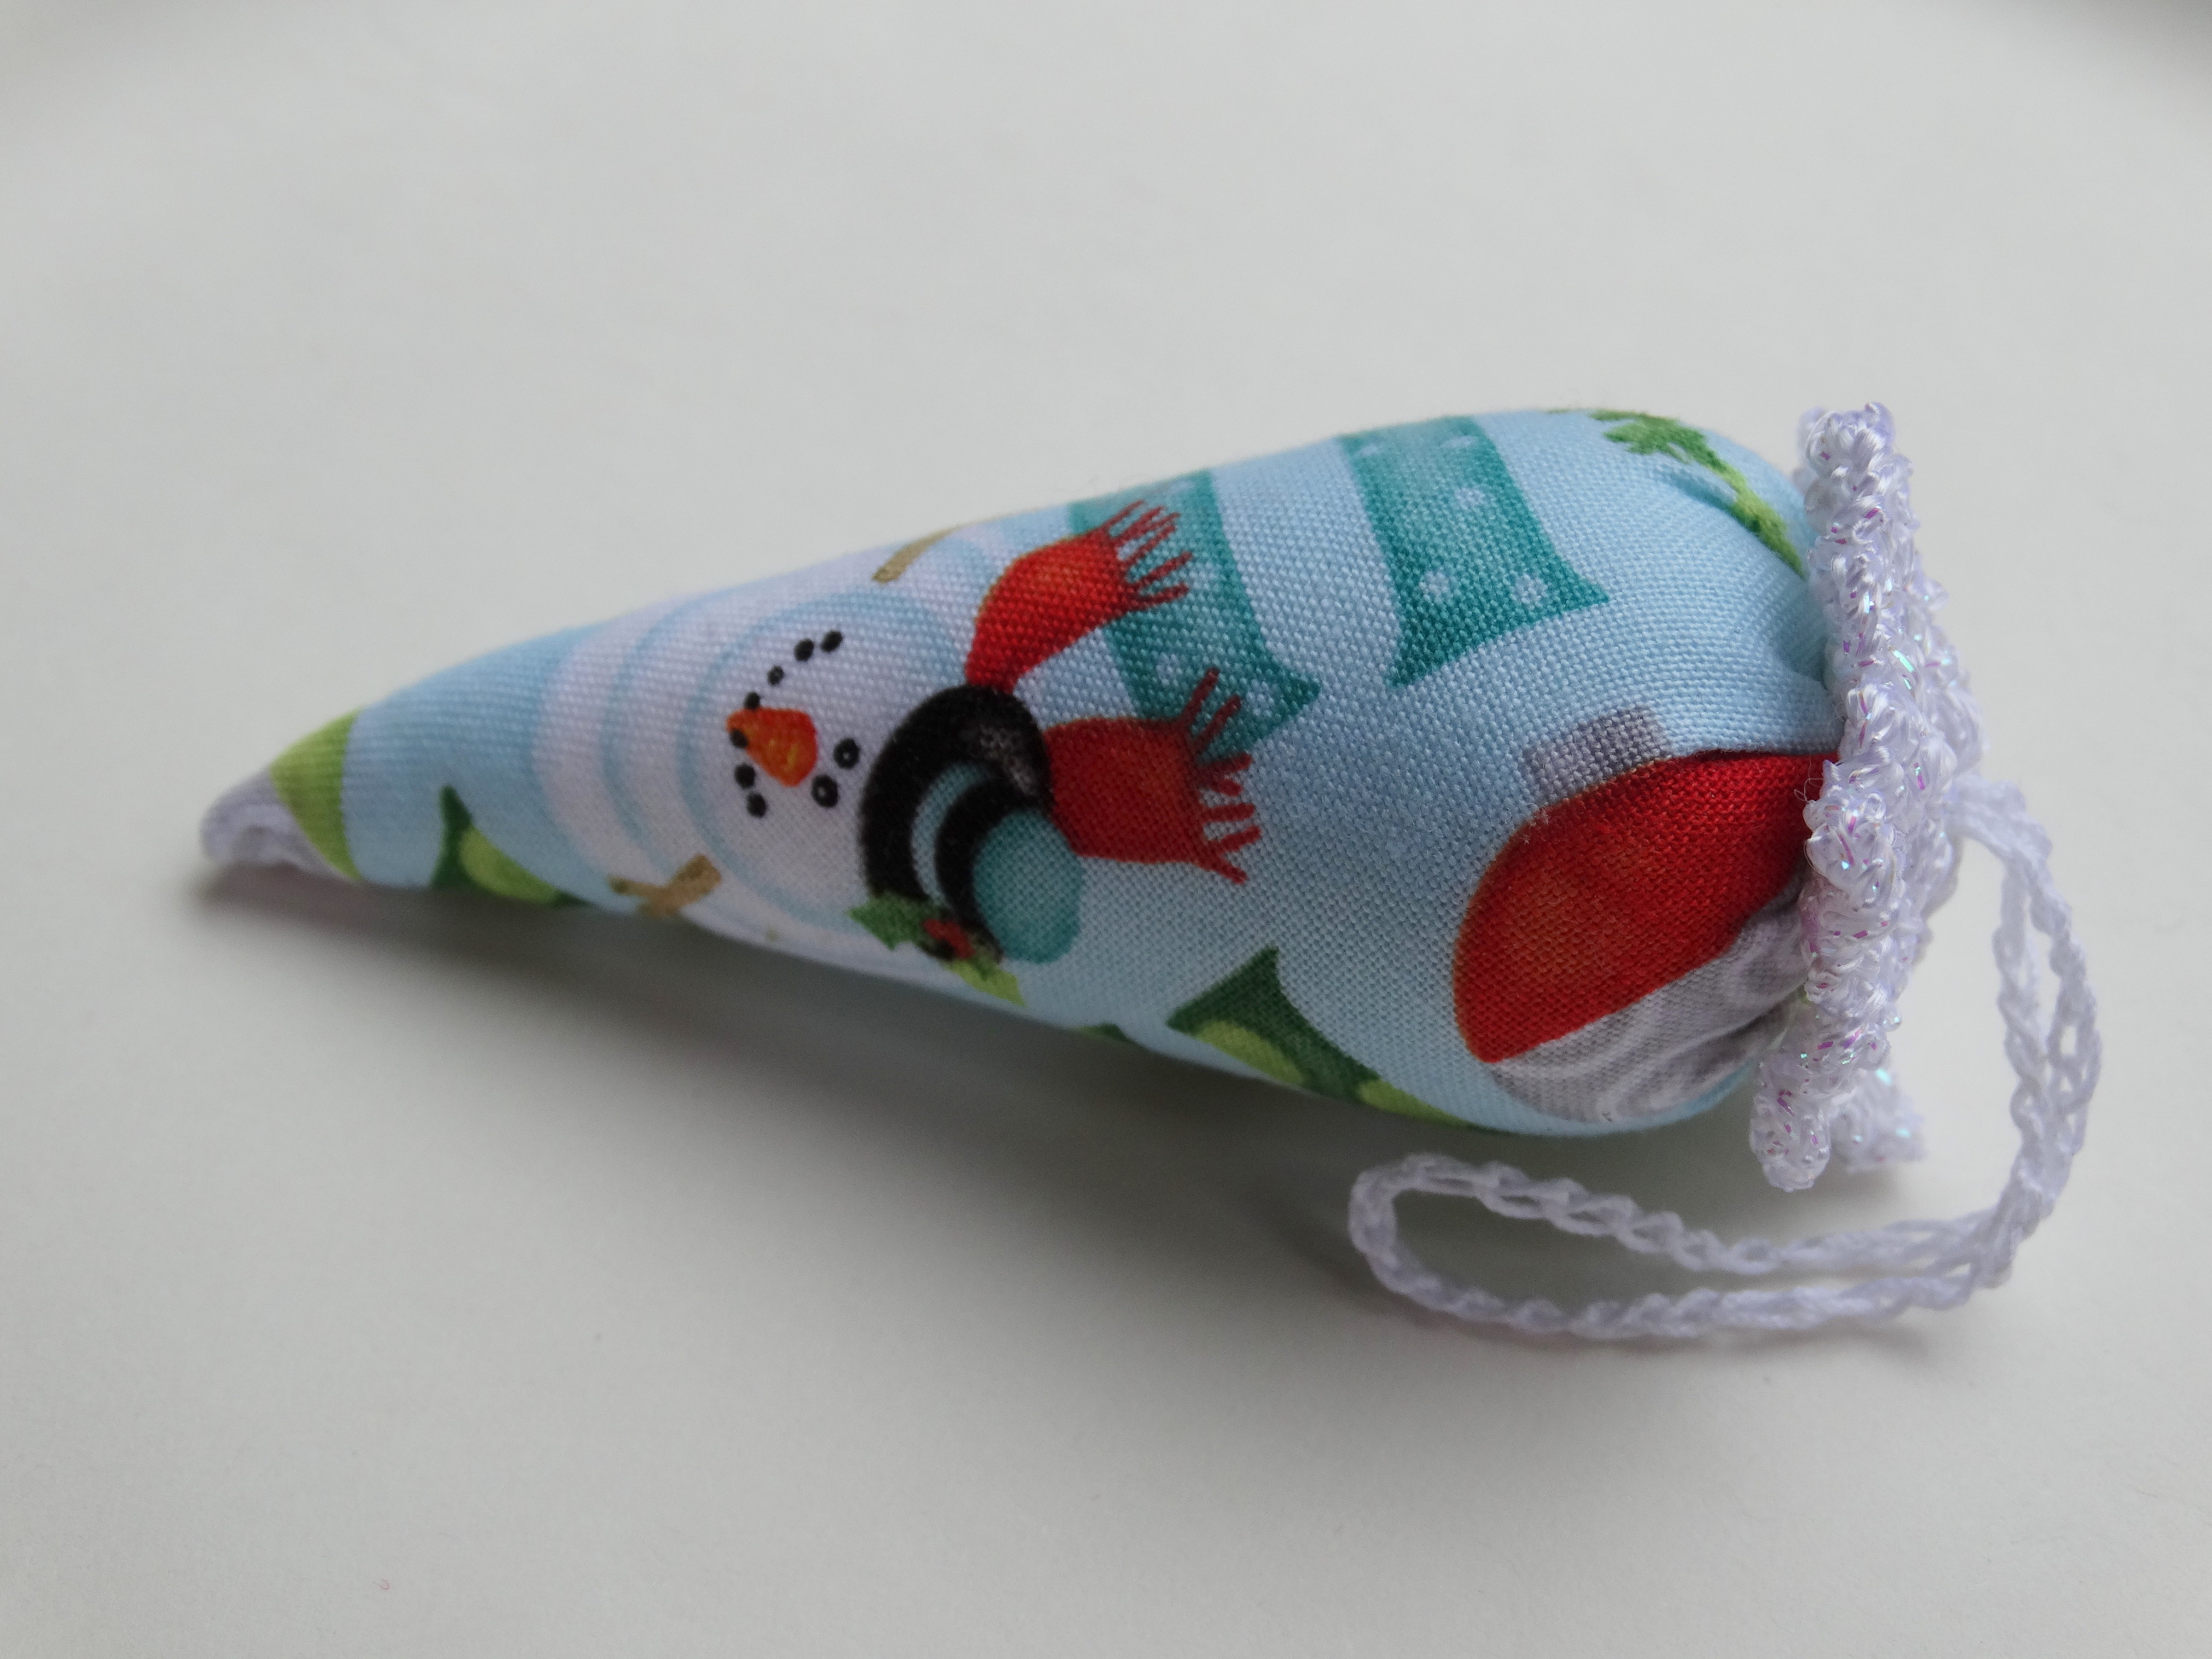
 If you can’t crochet then you can easily make the ornaments using ribbon for the hanging loop and a length of gathered lace or other ribbon in place of the crocheted snowlake. In the example below I took a 6″ piece of lace ribbon, gathered tightly along one side and then joined the ends together to form a circle before placing the ornament.
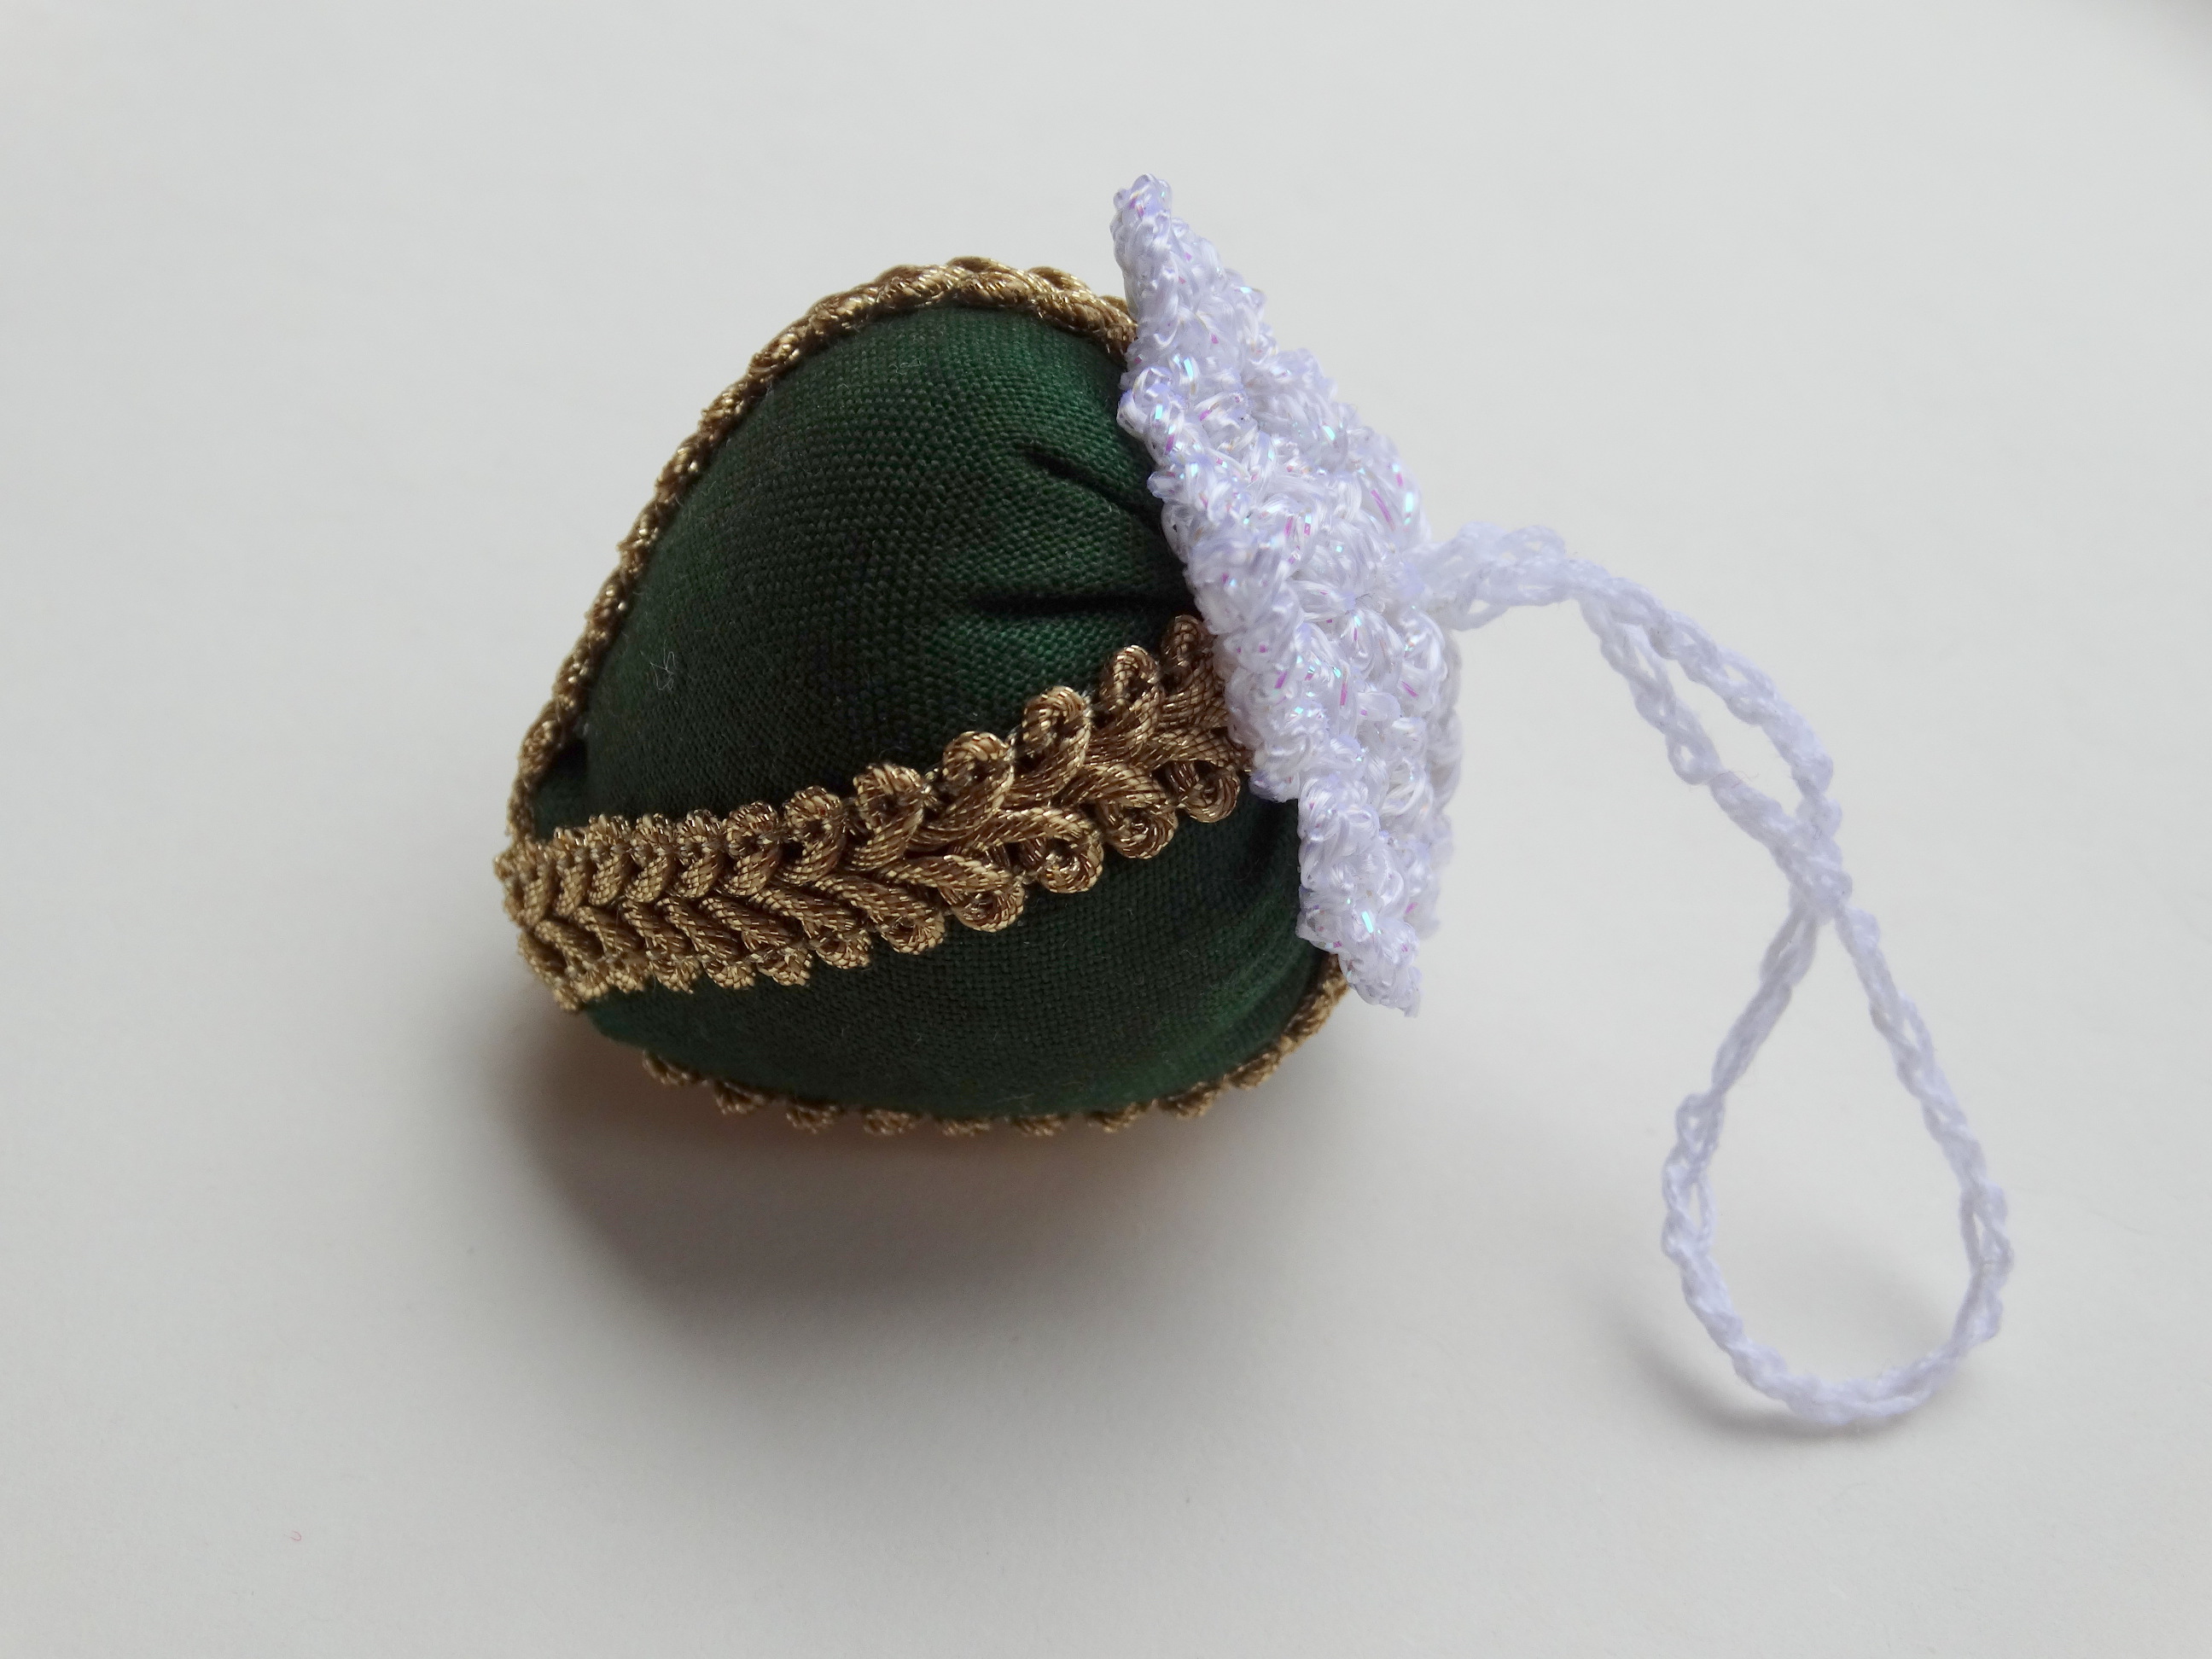
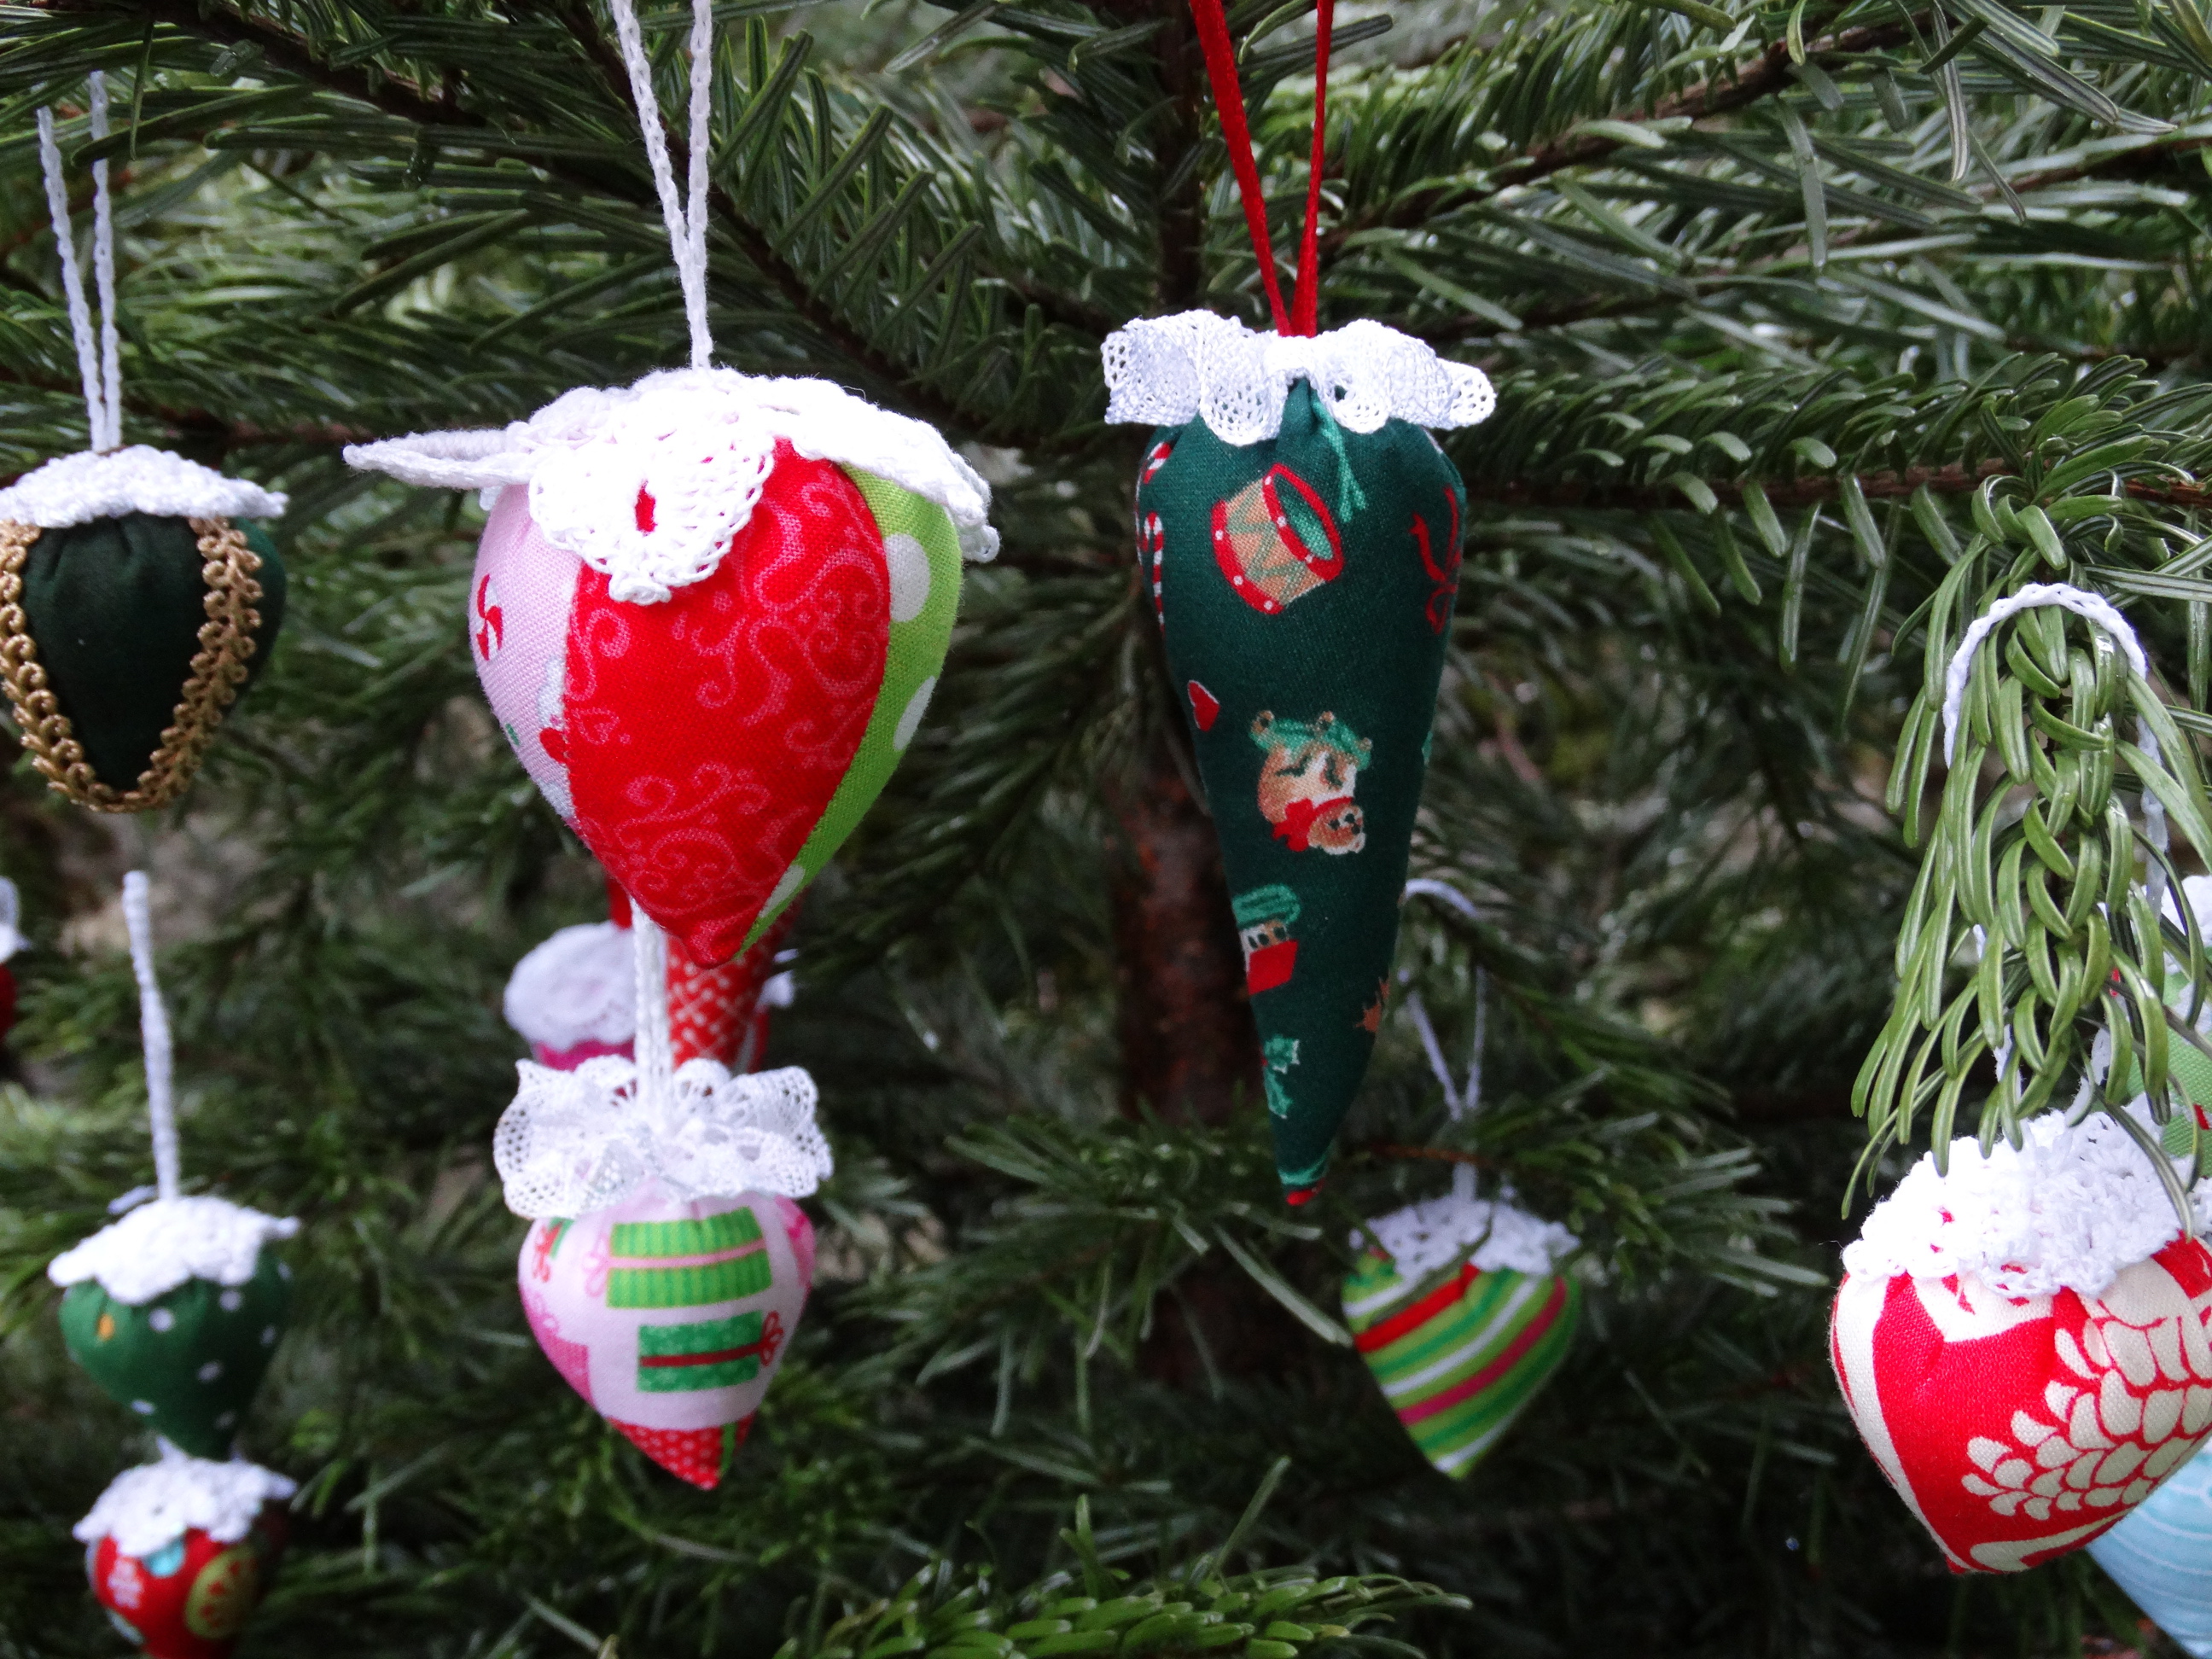
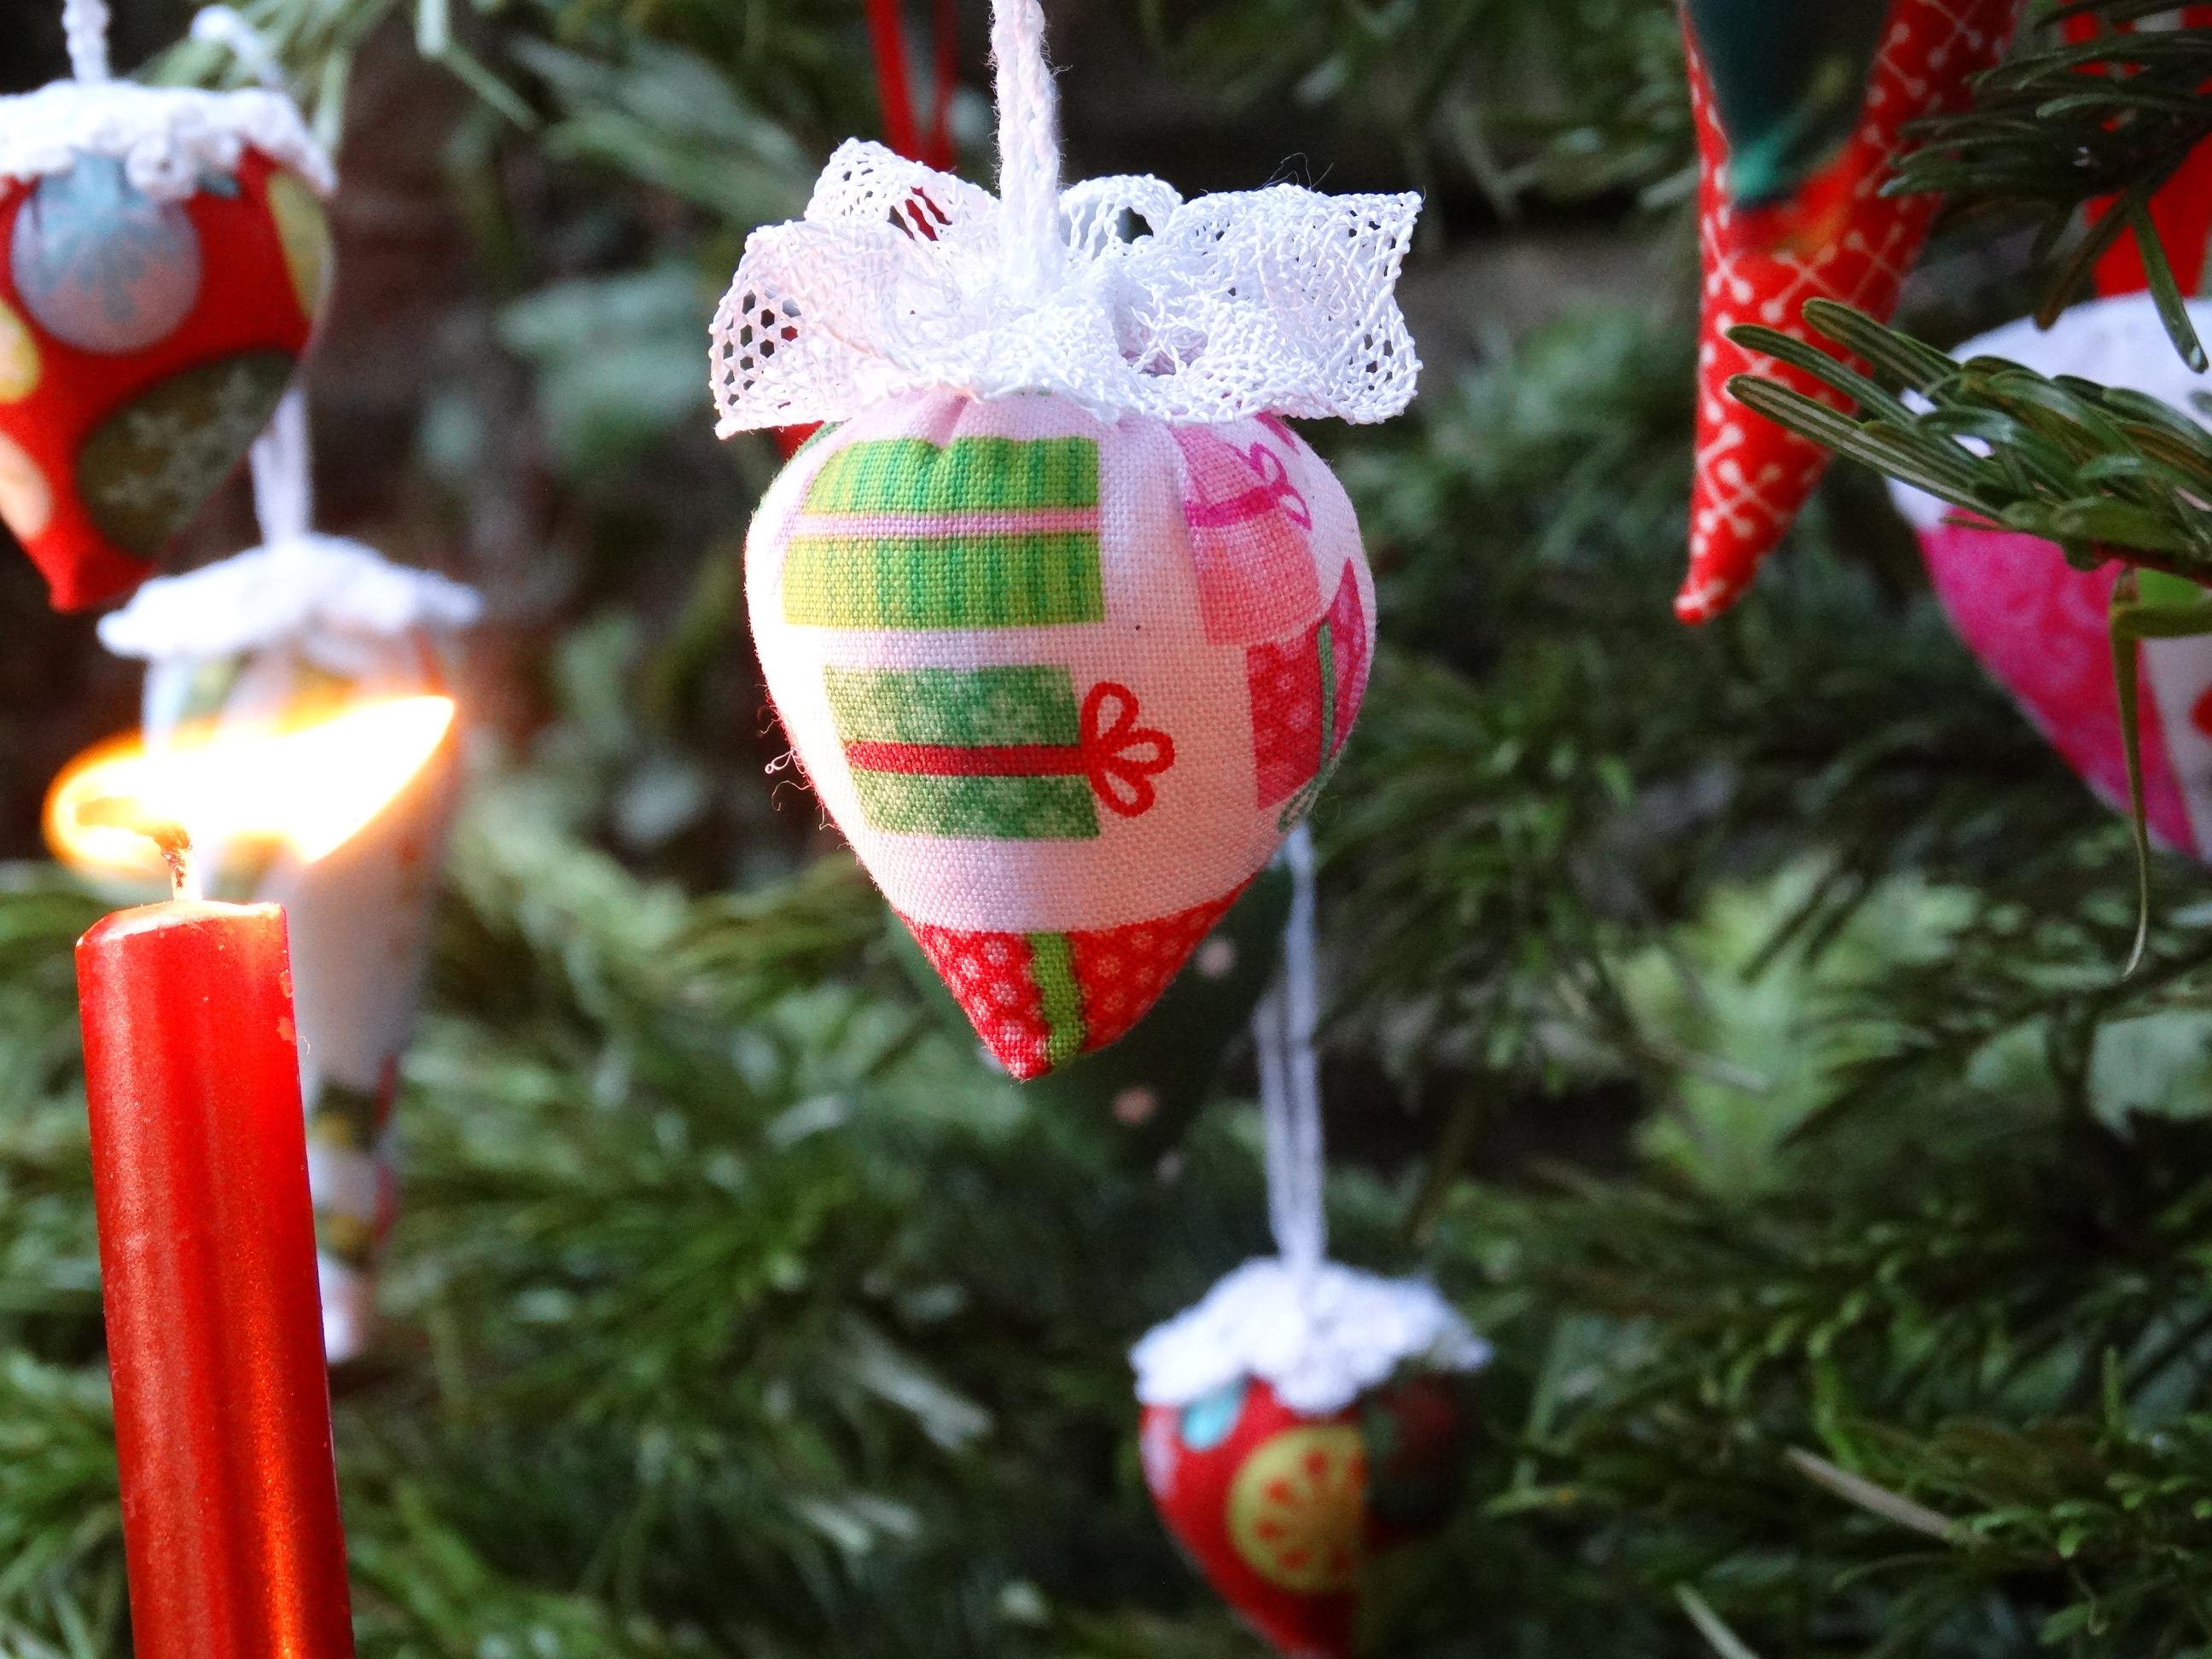
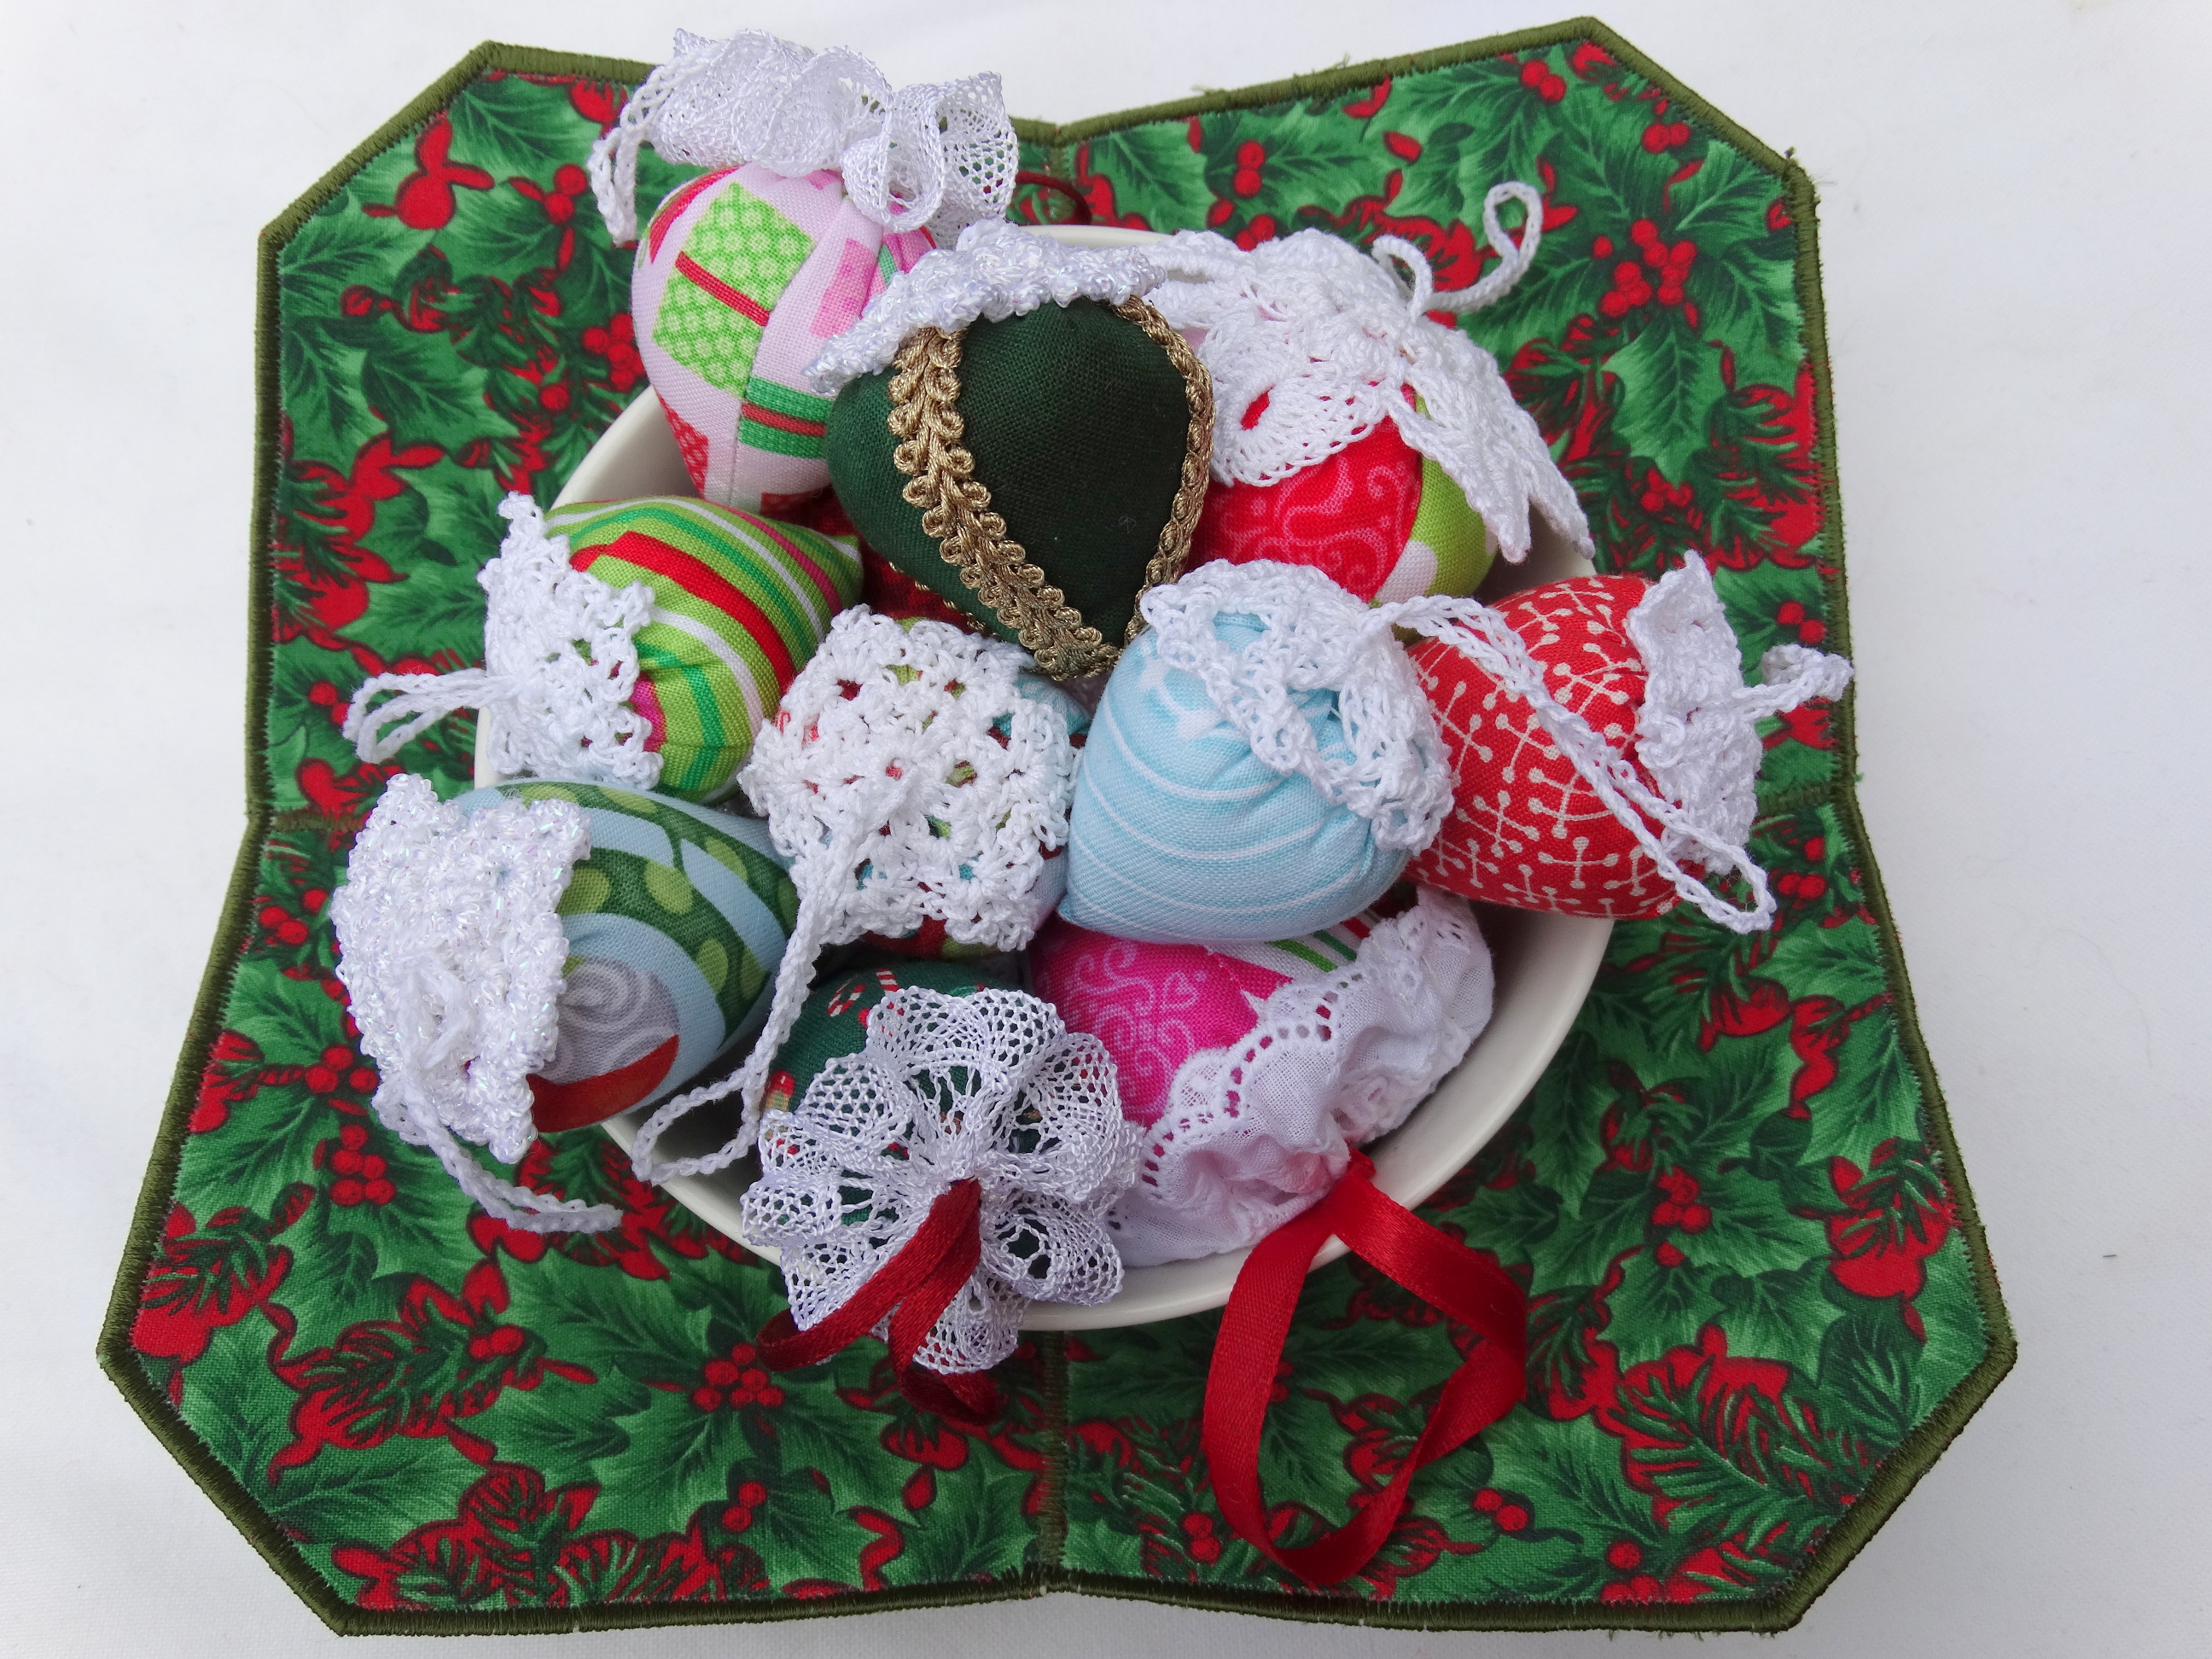
 Once you have mastered the basic ornament you can try all sorts of variations. Transform any plain fabric into a festive bauble with the addition of some fancy trim.
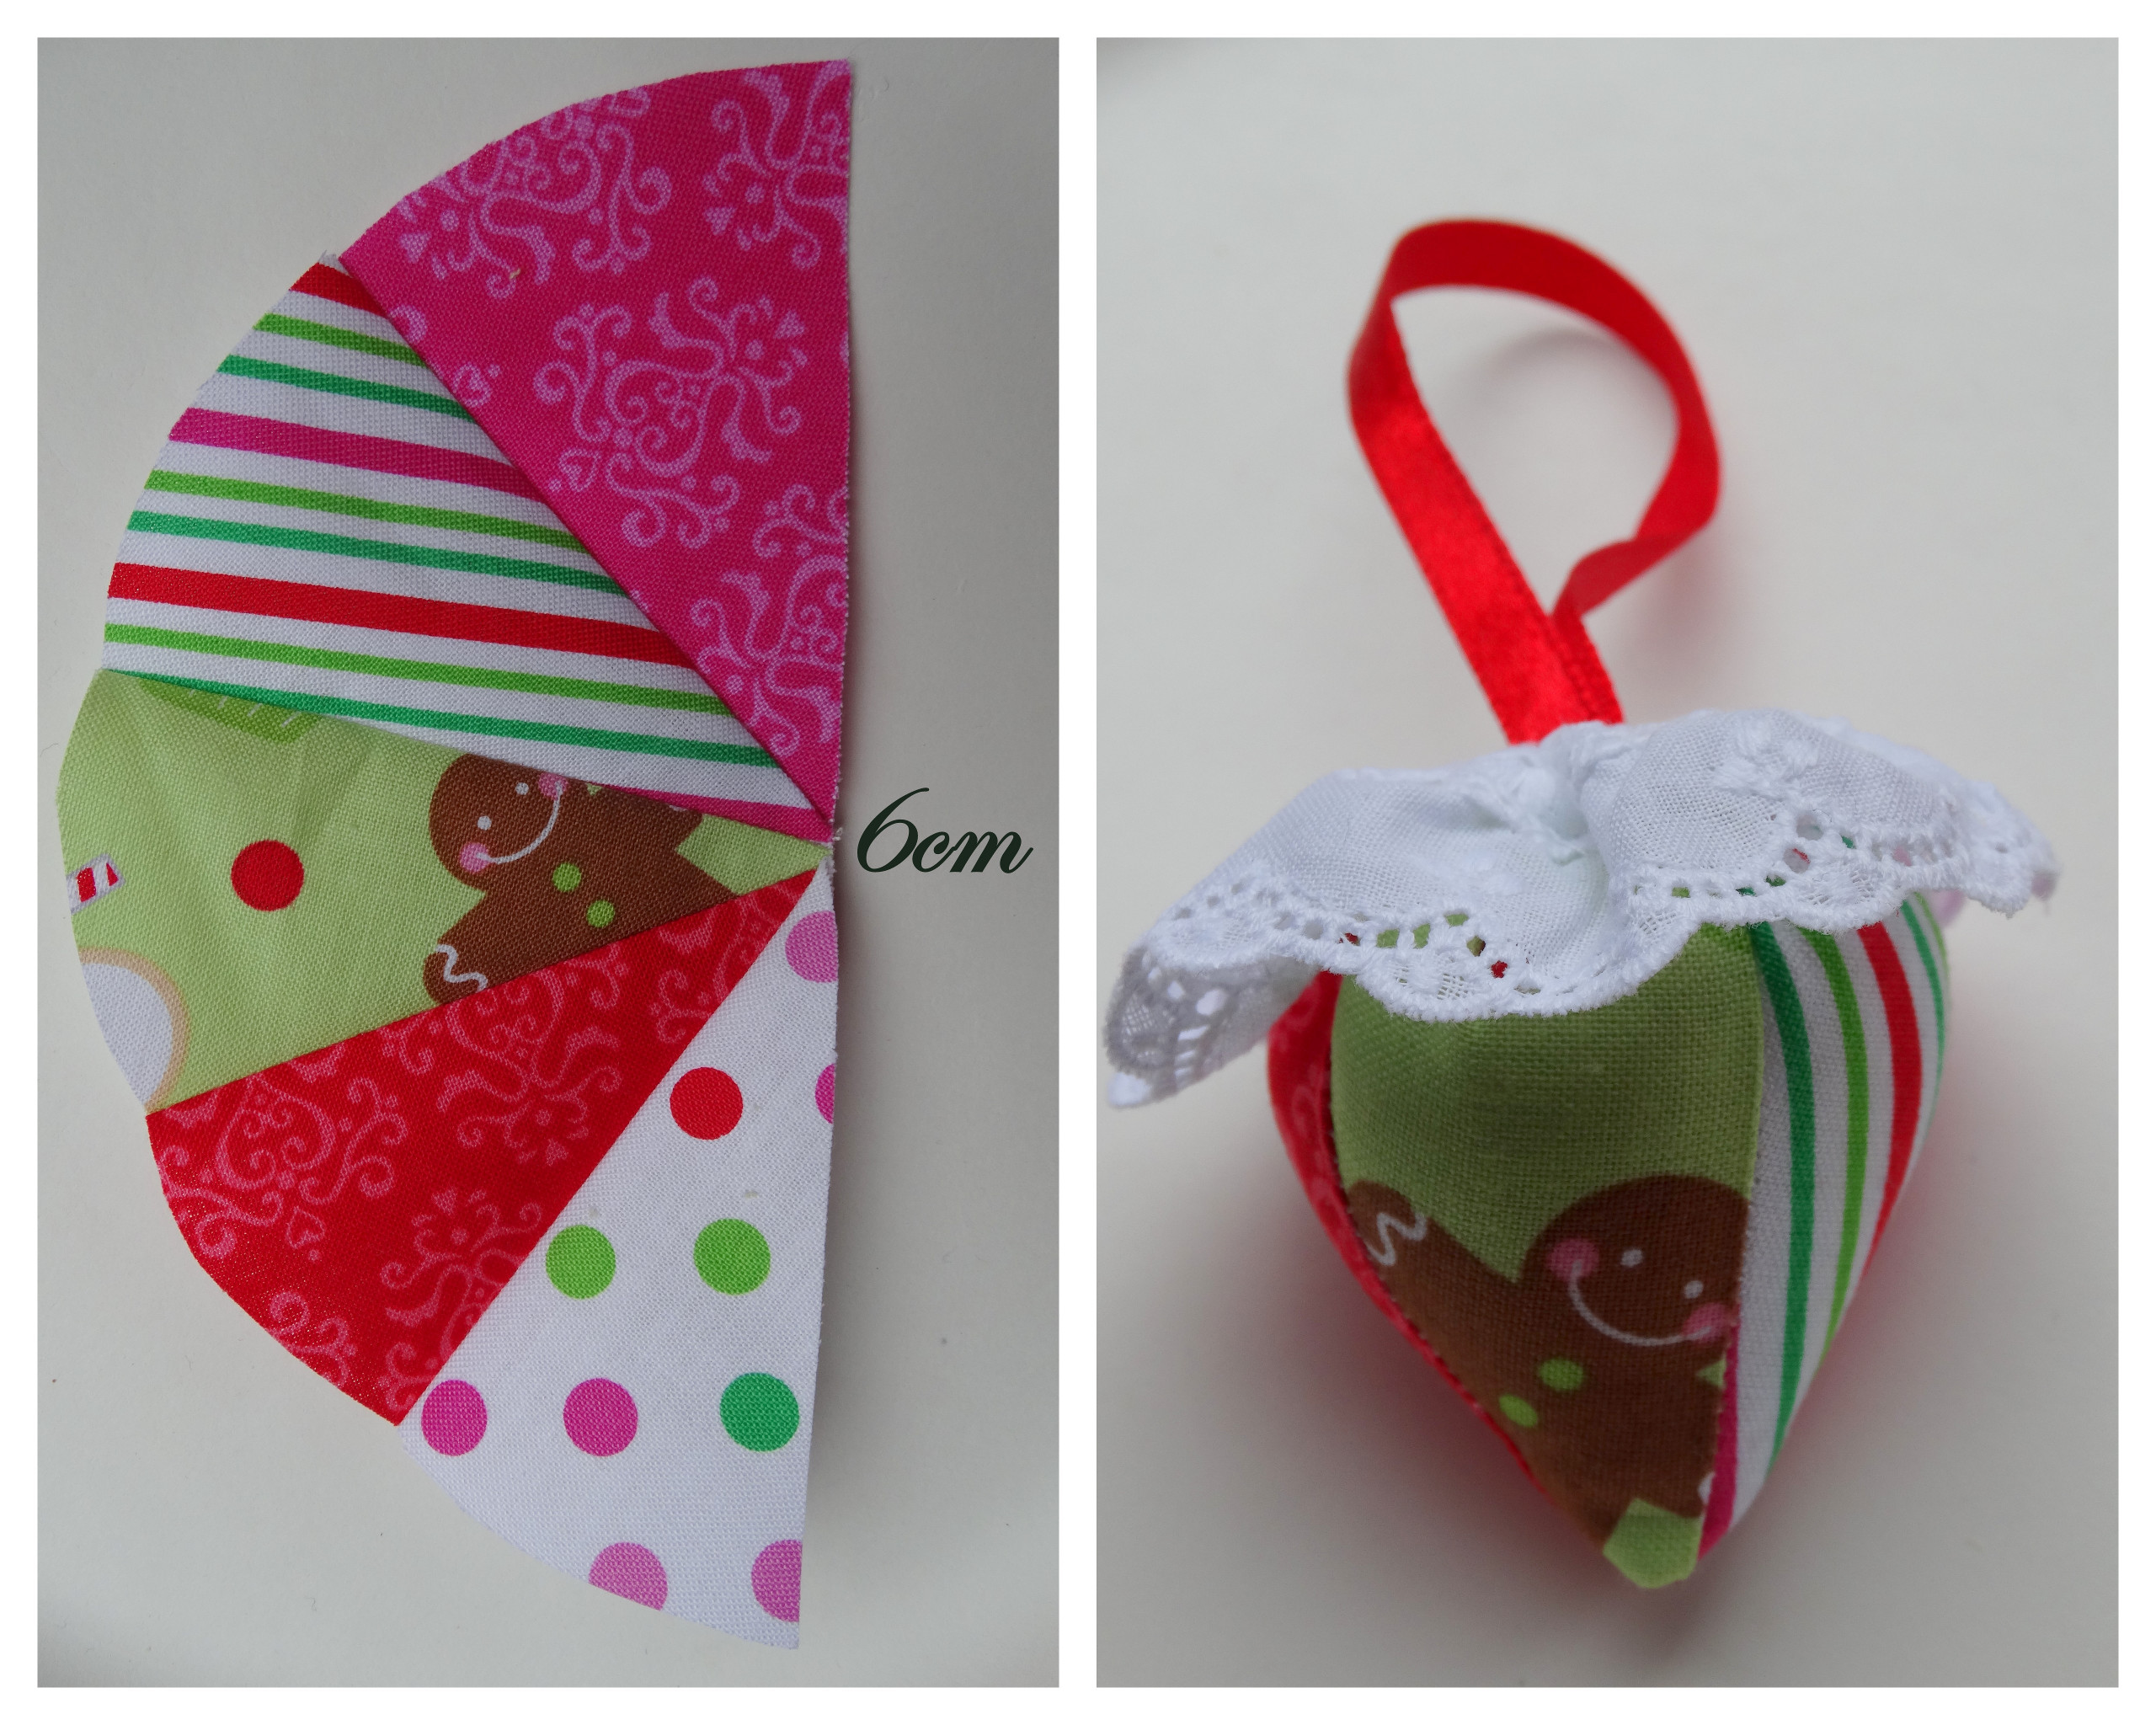
 Want to use up smaller fabric scraps? In the example below I foundation pieced various small scraps of fabric together to create a slightly larger decoration based on a half circle with a 6″ diameter.
 For a longer or more tapered ornament start with a circular template that has a diameter twice the length you wish your arnament to be, divide this circle in four, or even five and use the quarter or fifth slice as your cutting template.
 There is no end to the varition that can be achieved with this simple design and I do hope that this tutorial has inspired you to have a go at making some tree ornamets for your own home as I have done.
 If you decide to try you hand at making some ornaments of your own or have been working on any other holiday projects that you would like to share then please add them to the link up below.
The link up will remain open till the 31st of January and everyone who links up will be in with a chance to win the Ornamental and Sew Seasonal pattern bundles from Quiet Play’s Craftsy Pattern Store. The winner will be randomly drawn and announced here on February 1st.

Love the variations, think these might become addictive:)
These look great and what a fab idea to make them now to save that autumn rush 🙂
I love you’re little ornaments; they look great on the tree, but I like them in the bowl too as an accent.
Your ornaments are so cute!! Love them!!
I love those ornaments and the bowl they are in. Did you make the bowl also? If so will you share the pattern?
What a great idea! I’ll have to try them. Reading through the instructions, one thing is unclear to me: how did you attach the ribbon to the ornament? Did you sew it onto the fabric (but how did you keep it centered?) or did you somehow anchor it in the stuffing (and if so, how)?
I’m so glad you like the ornaments, and thank you for for your query. I attached the ribbon to the ornament by simply sewing it to the gathered fabric at the top of the ornament. When you gather in the top edge you end up with a tightly gathered circle of fabric, and as long as the ribbon is centered on that circle it will be centered at the top of the ornament (if that makes sense).