Well here we are at the end of the year. There’s just a week to go till the big day and it’s time for the last Ho, Ho, Ho and On We Sew link party of the year. I hope that, like myself and my co-host Fiona from Celtic Thistle Stitches, you’ve been getting organised throughout the year, but if you still have some last minute sewing to do then don’t despair because there still is time to get it done.
 In case you still need some inspiration for some last minute sewing projects then let me give you a quick reminder of all the great ideas shared by our guest hosts throughout the year.
January: Fiona kicked off the year with her Christmas Cushion
February: Pam at Threading My Way showed us how to make a great Drawstring Gift Bag
March: Sally at Wonky Patchwork made some beautiful Clara and Nutcracker Dolls
April: Benta at SLIK stitches shared her Advent Calendar
May: Karen at Practically Pippy had some adorable Christmas Mice to share
June: Ruth at Charly & Ben’s Crafty Corner introduced us to her So Frosty Quilt Pattern
July: Chelsea at Patch the Giraffe made a beautiful Christmas Tree pillow cover and
Martha at Weekend Doings shared a very practical iPad cover
August: Deborah at Sunshine through the Rain showed us how to make Envelope Christmas Stockings
September: Karen at Practically Pippy returned with a Gift Card Holder and Mug Rugs
October : Sandra at Sandra Sews 🙂 shared a great Novelty Pouch zip and Nesta at Ella & Nesta’s Little Room were full of inspiration with Fabric Furin Wind Chime Gift Tags and Fabric covered drawing pins
November: Joanne at Rose and Dahlia made a fun Christmas Stocking Grippy holder
To round off the year I’m going to share my tutorial for a clutch pouch. It’s a design I use for so many different purposes, it can even be easily transformed into a doll’s sleeping bag and best of all it’s a really quick make.
 Before I get to that though let me take the time to tell you about this month’s link party (which you’ll find at the bottom of this post) and the wonderful giveaway prize we have to share with one lucky person who links up their finishes for this month. This month our prize has been sponsored by Rebecca at Sew Hot who will be giving one lucky winner the kit and pattern for this stunning Mini Norway quilt.
Isn’t it just beautiful! If you’re not familiar with Sew Hot then I urge you to pop on over and have a browse through their store as they not only carry quilting supplies but they also have a wonderful range of kits and patterns for soft toys, bags and lots more.
I have to give a big thank you to Sew Hot for sponsoring us this month and to all of the wonderful sponsors who have been so generous in sponsoring our giveaways throughout the year.


![]()

![]()
![]()
![]()


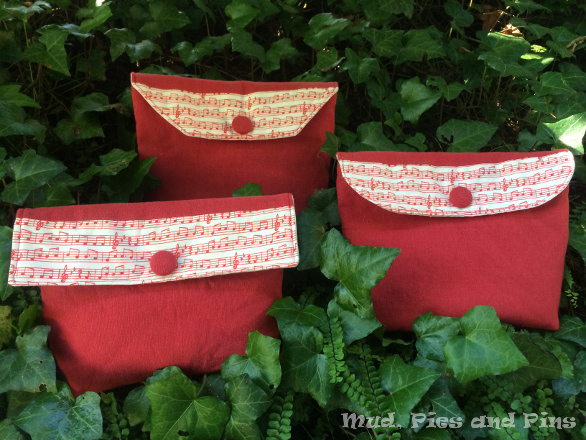
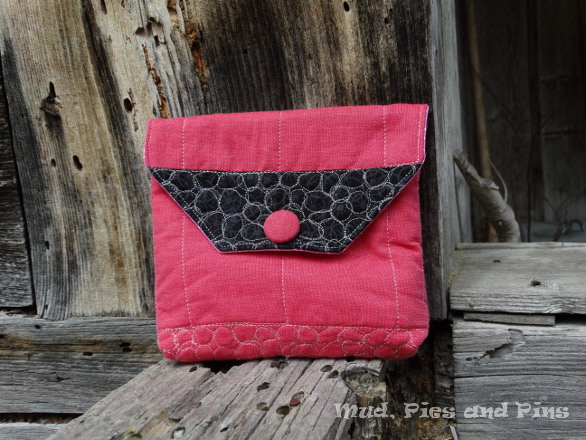
As I’ve already mentioned this month I’m sharing the tutorial for the clutch pouch I find myself making time and time again.
 For this pouch you will need two equal sized pieces of matching or contrasting fabric – one for the outer shell of the pouch, the other for the lining. You will also need a piece of fusible fleece to line the outer fabric.
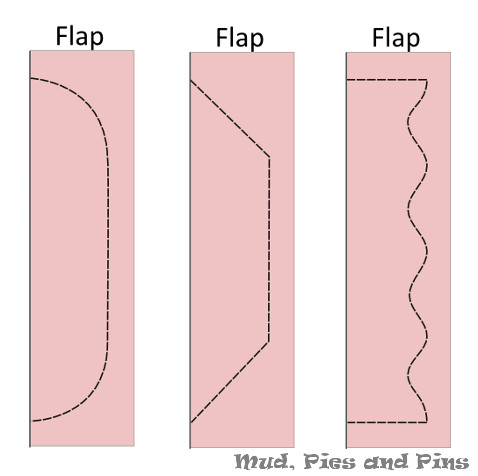
The amount of fabric you will need will be dependent on the size of pouch you want to make. First decide on the width and depth of pouch you would like, and the depth of flap you pouch will have. To figure out what size your fabric pieces will need to be use the following simple formula:
Width of fabric = width of finished pouch + 0.5”
Length of fabric = 2 times the depth of the finished pouch + the depth of the fished flap + 0.5”
The fusible fleece (1 piece) should be cut 0.5” narrower and shorter than your fabric pieces.
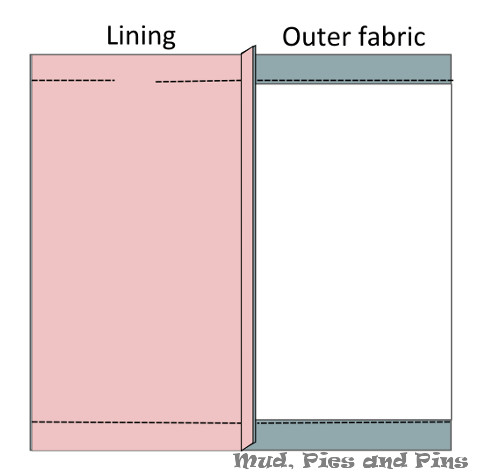
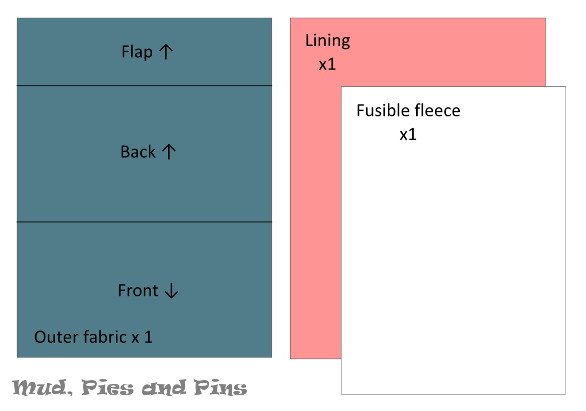 Please note that, because the outer shell of the pouch is cut from one single piece of fabric, directional fabrics are not ideal for this project as the print on the back of the pouch will appear upside-down on the finished pouch. You can of course piece the outer shell from several pieces of fabric if you wish to avoid this problem, or if you simply want to add some contrast and added interest to the flap as I like to do. In the diagram above I have indicated the direction the print should lie in a pieced outer fabric.
Once you have your outer and lining fabric pieces cut start by attaching the fusible fleece to the wrong side of the outer fabric according to the manufacturer’s instructions. If you don’t have fusible fleece you can of course use normal quilt batting and simply quilt the outer fabric and batting together.
 Place your lined/quilted outer fabric and lining right sides together. On the non-flap end stitch the two pieces together with a standard 0.25” seam. Using pins or a marking tool mark the start of the flap on each of the long sides of the lining. Using the first mark as a starting point stitch up the side seam of the flap, across the bottom and down the second side seam till you reach you second marker.
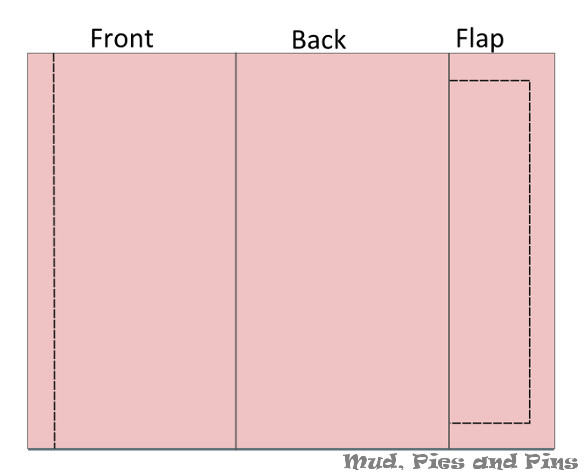 When sewing the flap you can easily change the design depending on how you sew it. Maybe curve the corners, taper them in or add some waves to the bottom of the flap.
 Once the flap and bottom seams are sewn the next step is to pull the lining fabric to one side so that it lies folded in half, right sides together, with the outer fabric on the other side, also folded in half right sides together. Sew the side seams of both these pieces, taking care not to catch the flap in the seams, and making sure to leave an opening in one of the side seams to allow you to turn the pouch inside out.
 Clip all your corners and trim seams as necessary before turning the pouch inside out and finishing off the seam in the lining with a whip stitch. Tuck the lining inside the pouch and press well to finish. For a more finished look you can add a row of top stitching around the edges of the flap and the top front of the pouch.
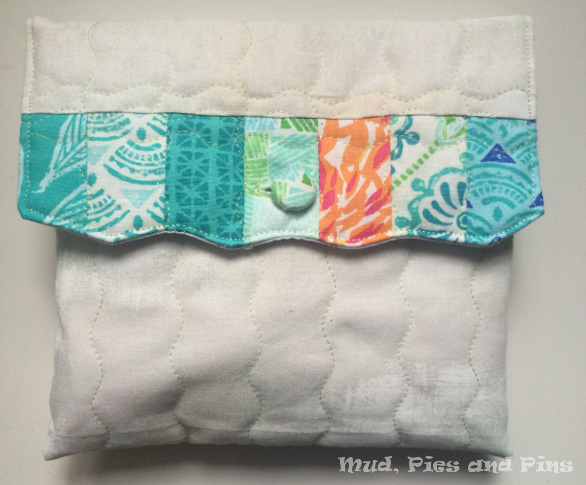 To keep the pouch closed I like to use sew-on magnetic clasps, buttons (with a buttonhole or two added to the flap), velcro or snap poppers. All of these can be added at the end, and if using magnetic clasps, velcro or poppers I usually also stitch a covered button onto the front of the pouch to cover the stitching.
If you want a pocket you can easily stitch one in place on the lining fabric before piecing the pouch together. I have even added pockets the full width and depth of the pouch on occasion so that the finished pouch is essentially divided in two.
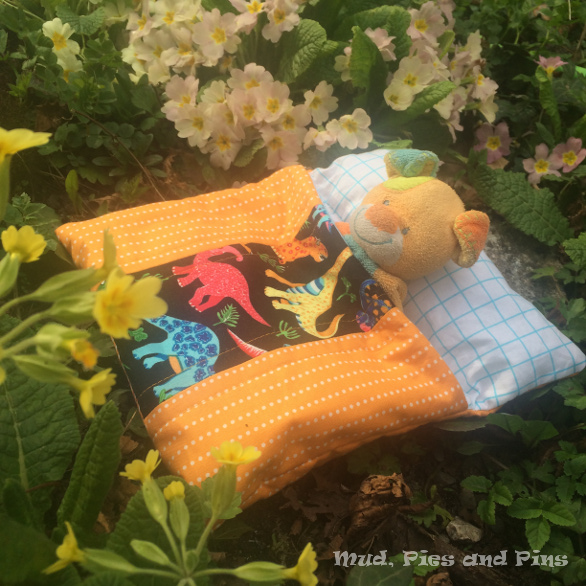
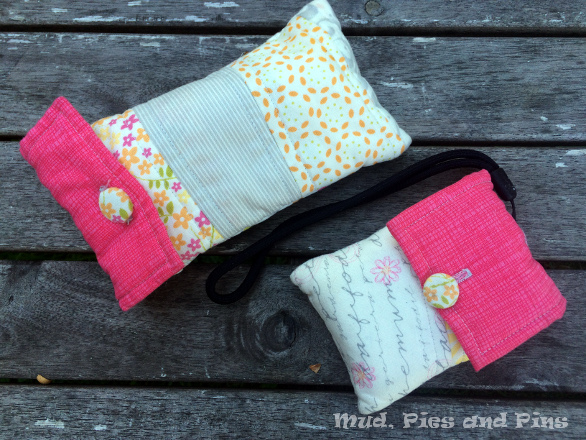
 To use this pouch as a dolls sleeping bag I simply stuffed some wadding into the flap of the pouch after I had turned the pouch right side out and then added a line of sewing across the flap/bag at the point where the flap met the back of the bag so that it became a pillow instead of a flap.
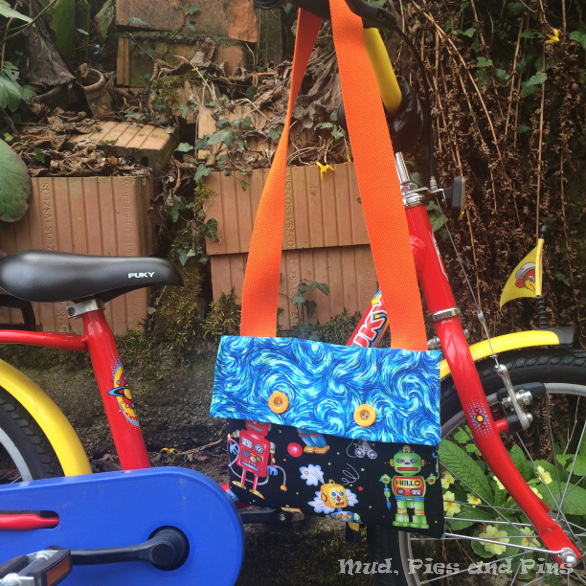
 I do hope you will have a go at making this pouch. The possibilities for it are really quite endless. You can make it as large (ipad sized perhaps) or small as you like, add pockets, box out the bottom corners, maybe add a wriststrap sewn into the side seam. I’ve used it to make a sunglasses case, a camera pouch, countless sewing pouches and my son has even added a webbing strap to one to make himself a bag.
 If you do decide to make a pouch this month I’d love to see it, and of course I am looking forward to seeing all of those festive finishes that you have to share. You can link them up below and as ever the link party will remain open till the end of the month.
Happy sewing and happy holidays!
 Loading InLinkz ...

Very versatile – love the idea of the sleeping bag for teddy or dolly!!
I love all of your pouches Paula, but the wavy line quilted pouch is definitely my favourite. Another great project to add to the Ho, Ho, Ho and on We Sew Archive 🙂
It’s great how one design can make so many different items.
Those are such adorable little pouches – each one is different, and each pouch can be personalized for the contents and recipient – very practical 😀 The robot fabric for the last pouch is a hoot!
Very versatile idea, thank you for the inspiration and tutorial! And for hosting!
Merry Christmas!
Very versatile! Thank you for the inspiration and tutorial!
And for hosting!
Merry Christmas!
So many great variations! My favourite is the pink and black. Merry Christmas.
Wow! Your pouches are extremely versatile! Thank you for helping me decide what I am to make next – a Reader pouch for my hubby. : ) Hugs, Karen