It’s hard to believe we’re already six months, halfway, into our Ho, Ho, Ho and On We Sew journey of getting prepared for Christmas. I’ve been sewing home décor items again this month and as each month passes and the little pile of Christmas gifts and décor grows I am ever so delighted and thankful that myself and Fiona from Celtic Thistle Stitches decided we were going to get ahead with our sewing this year. Ho, Ho, Ho and On We Sew has definitely been a big success for me so far.
 This month’s Ho, Ho, Ho and On We Sew link party is being hosted by Martha over at Weekend Doings. Martha is sharing a tutorial for a lovely drawstring bag that would not only make a great gift but is also the perfect reusable gift wrapping.
 As usual there is a giveaway prize up for those who link up and this month’s prize is thanks to the lovely people over at the Fat Quarter Shop who have given us a mini charm pack of Moda’s Be Jolly. So do be sure to pop on over to Weekend Doings and remember you have until the end of the month to link up your finished projects.
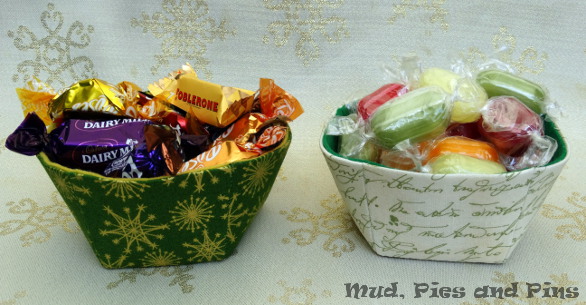
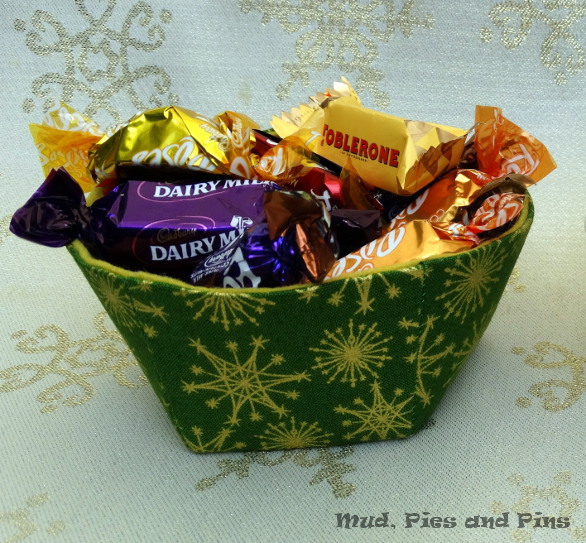
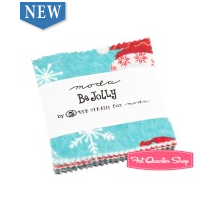 This month I made a couple of fabric candy dishes and I’ve also written up a short tutorial for you on how you can make you own so I do hope you will give them a try. They are quick and easy to make and if you feel like giving them a go there is still plenty of time to make your own to add to this month’s link party.
 To make each candy bowl you will need the following materials in addition to your usual sewing notions:
- fabric for the outside of the bowl
- stiff iron-on interfacing (I used Decovil I Light)
- felt to line the bowl
- fabric glue
 The amount of fabric that you require will depend on the size of bowl that you wish to make so we will start by drawing the template/pattern for the bowl.
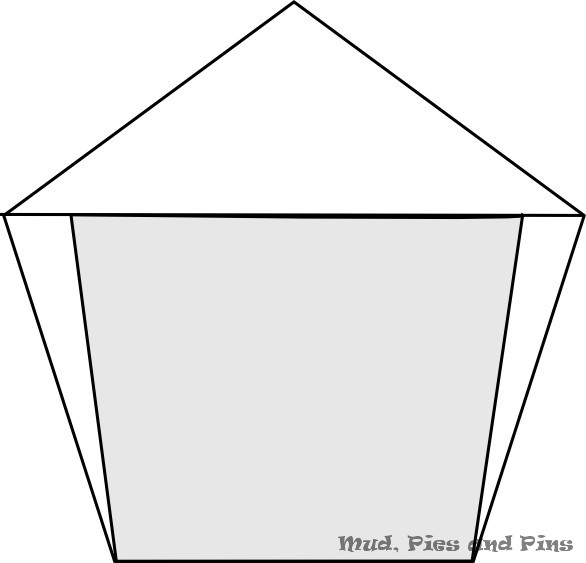
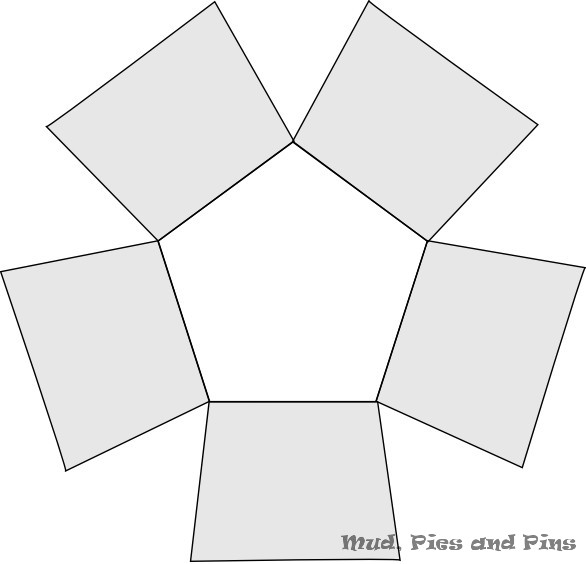
The base of the bowl is a basic pentagon. For these bowls I used a 2″ pentagon, you can of course use any size you wish.
 The pattern for the side pieces can be simply drawn by taking the pentagon and cutting off the non-shaded areas indicated below. The less tapered you make the pieces the steeper the sides of the bowl will sit.
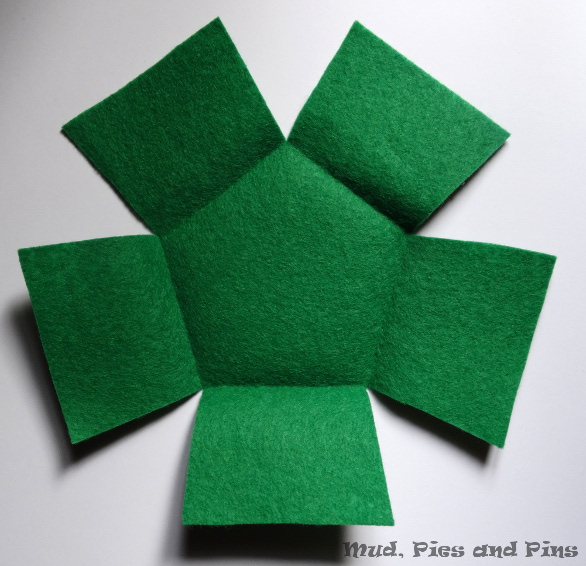
 The final pattern you will need to draw is for the felt lining and it is a combination of the base pentagon with five side pieces, as drawn below.
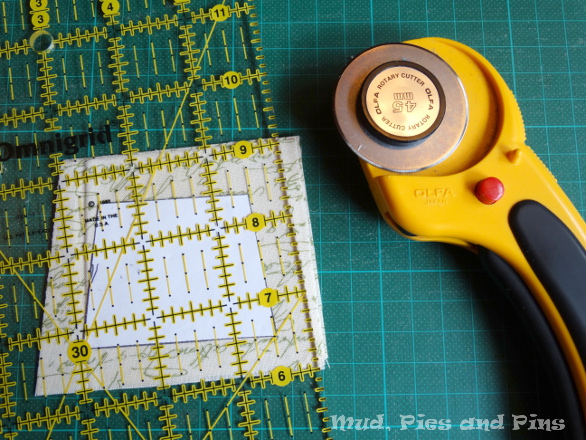
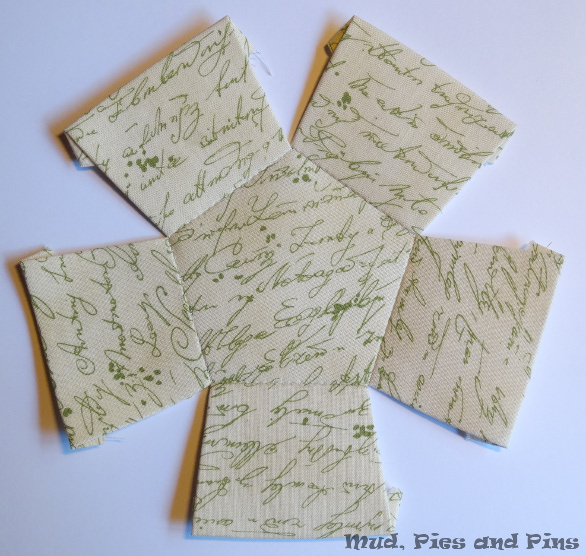
 Once you have your templates you will need to cut 1 base and 5 side pieces from fusible interfacing. The fabric shell of the bowl is made using English Paper Piecing (EPP) techniques, but instead of covering papers with fabric we will be covering the interfacing papers. For this reason we will then continue by cutting 1 base and 5 side pieces from fabric allowing a half inch seam allowance all around. I generally cut these with my rotary cutter, using a paper or card pattern piece as a template.
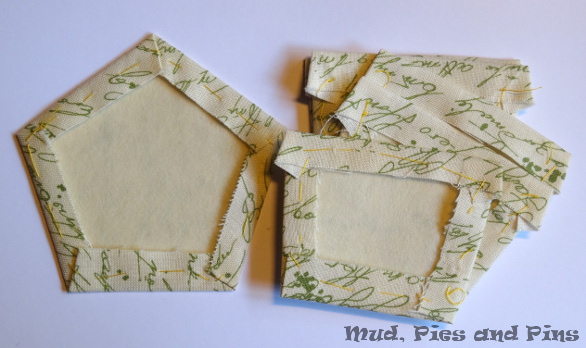
 Once all the pieces have been cut fuse the interfacing to the wrong side of the fabric pieces following the manufacturers instructions. Fold the seam allowance of each piece to the back over the interfacing, lightly baste in place and press well. With the side bowl pieces be sure to fold the side seams in first followed by the top and bottom seams.
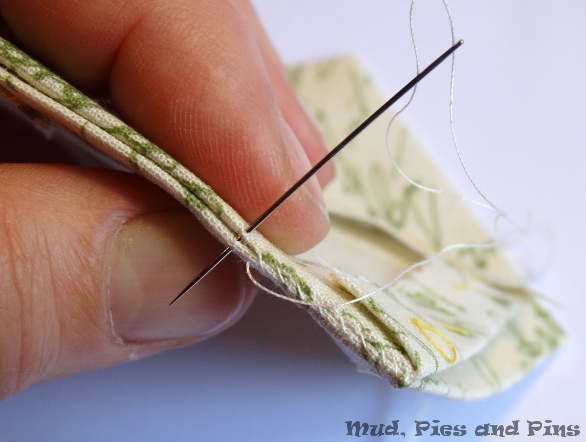
 Take the first side piece and right sides together whip stitch the base of the side piece to one side of the pentagonal base.
 Attach all of the remaining sides in this manner.
 Sew each of the side seams of the bowl in the same way, always stitching them right sides together. The finished bowl will be inside out so pop it rightside out and give all of the side seams a final press before removing the basting stitching and proceeding to the lining.
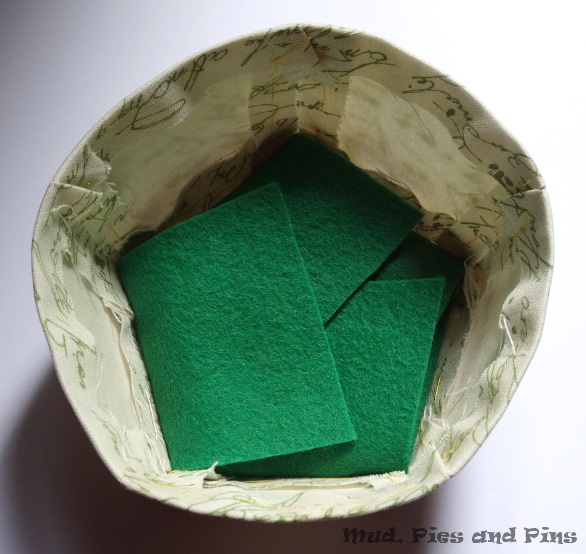
Cut a single piece of lining felt using the template you prepared earlier. Press each of the side pieces of the felt lining toward the center to form the base shape.
 Lighlty glue the base of the inside of the bowl and then drop in the folded felt lining. Press firmly in place.
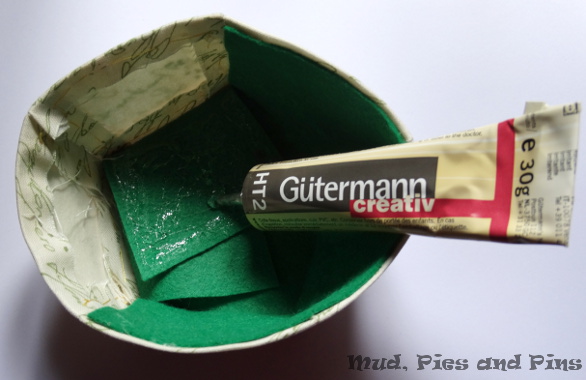
 Working one side at a time glue each of the five felt sides in place. Make sure that each side seam lines up with the side seam of the bowl.
 Once dried your bowl is finished and ready for use.
 Once you have mastered the basic pattern for this bowl then there is really no end to the possible variations you could make.
- You could leave the sides pentagonal in shape to give the top edge a more scalloped look.
- Make it wider and flatter by leaving the sides the same width as the base pentagon.
- The bowl could be made larger, smaller, shallower or deeper by altering the overall size or just the depth of the side pieces.
- For a more colourful bowl you could use different fabrics for each side of the bowl.
I actually made a multi-coloured and larger version of this bowl last year as part of a Halloween swap. On that ocassion I made a second fabric bowl that was not interfaced and used that to line the bowl in place of the felt. I also added a layer of binding around the top of the bowl to give the top edge a more finished appearance.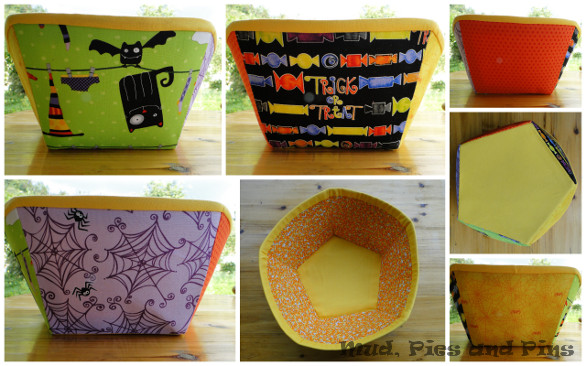 I do hope that this might inspire you to have a go at making your own fabric bowls and I look forward to seeing the variations that you can come up with.

Brilliant idea Paula. Endless possibilities for using them. Little dried flower arrangements etc
what great little bowls, so useful! Thanks for sharing the tutorial
Nice tutorial! Can’t wait to try making one soon!
Oh, I forgot about your linky. I better make something fast 🙂 your bowls are looking good! Thanks for inspiration.